For a motor-driven wheel only
 Disassemble the ribbed drive
belt. See Replacing the ribbed
drive belt and tension rollers.
Disassemble the ribbed drive
belt. See Replacing the ribbed
drive belt and tension rollers.
Disassemble the drive. See Disassembling the
drive.
 Disassemble the bracket. See Disassembling
the bracket.
Disassemble the bracket. See Disassembling
the bracket.
For repairs or replacement, it may be necessary to remove the wheel carrier.
In order to be able to disassemble the non-driven wheels, the complete wheel carrier must first be disassembled.
The motor-driven and the belt-driven wheel cannot be replaced individually. These wheels must be replaced together with the installed wheel carrier.
Only the non-driven wheels can be replaced individually. See Replacing the wheels.
The pictures show the procedure on a GM 1000 modular wire rope hoist. The procedure on GM 800 does not differ significantly from this.
Disassemble the ribbed drive
belt. See Replacing the ribbed
drive belt and tension rollers.
Disassemble the drive. See Disassembling the
drive.
Disassemble the bracket. See Disassembling
the bracket.
 Disassemble the ribbed drive belt. See Replacing the ribbed
drive belt and tension rollers.
Disassemble the ribbed drive belt. See Replacing the ribbed
drive belt and tension rollers.
Disassemble the bracket. See Disassembling
the bracket.
The figures show disassembly of the wheel carrier on the non-driven wheel. Disassembly of the motor-driven wheel and the belt-driven wheel does not differ considerably.
|
|
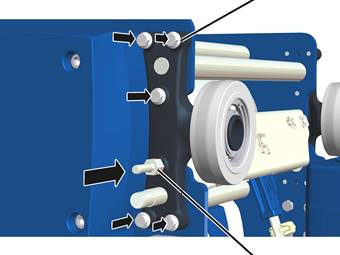
Rib screw M10x40 |
|
| |
|
|
Studs |
Unscrew the rib screws (M10x40 (5x).
Unscrew the stud.
To unscrew the stud, a tubular socket wrench or a flat wrench is required.
|
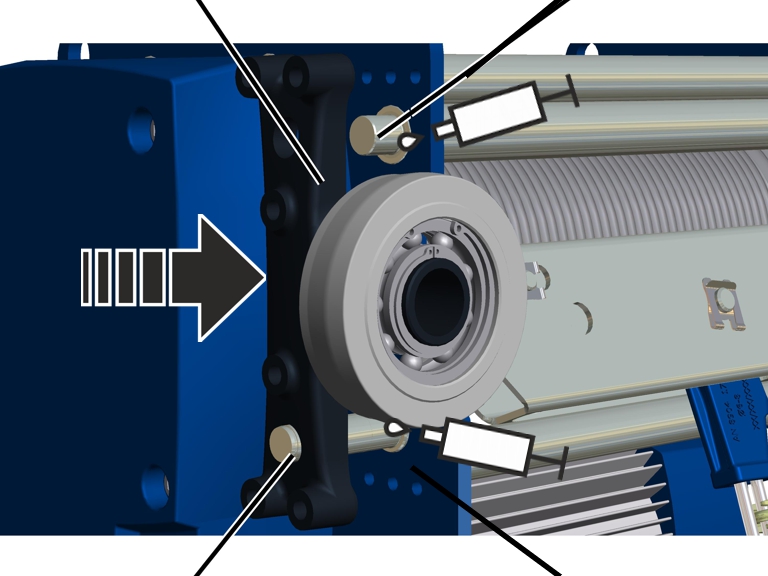
Flanged bolt |
|
|
| |
|
Wheel carrier |
Rib screw M10x40 |
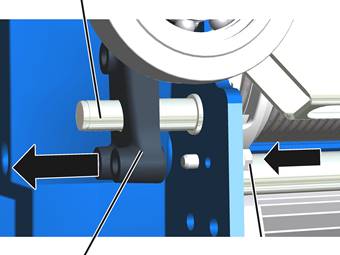
Screw the rib screw M10x40 from the inside into the middle
thread.
The middle thread is used to make wheel carrier disassembly easier. It is not required for fastening the wheel carrier and ends on a level surface on the wheel carrier.
Screw the rib screw against the wheel carrier.
● The wheel carrier is pressed outwards by the rib screw onto the flanged bolt, until the wheel carrier is loosely seated on the flanged bolt.
Pull the wheel carrier from the flanged bolt.
|
Wheel carrier |
Bolt |
|
| |
|
Flanged bolt |
Side panel |
 Grease the bolt and flanged bolt.
Lubricant: “High temperature paste PBC 1574”. For details, see Lubricants.
Push the wheel carrier on completely.
|
|
Rib screw M10x40 |
|
| |
|
|
Studs |
Screw in the rib screws M10x40 (5x). Tighten to 75 Nm.
Screw in the stud. 30 Nm.
To screw in the stud, a tubular socket wrench or a flat wrench in required.
Install the bracket. See Installing
the bracket and a new rubber spring element.
If necessary: Install the ribbed drive belt. See Replacing the ribbed
drive belt and tension rollers.
If necessary: Install the drive. See Installing the
drive.