|

|
The figures show the installation of a steel HB
profile rail of size HB150S. The installation of larger or smaller HB
profile rails or aluminium HB profile rails does not differ significantly
from this. |
|
|
The figures show a short tension nut (short
suspension XS and S). The installation with a long tension nut (short
suspension M and L, normal suspension) is the same. |
|

|
This product manual describes the installation of
the HB crane runway on an M16 suspension. To install the HB crane runway
on an M20 suspension, see product manual "Installing the ceiling-mounted
bracket 4LP/M20 and craneway suspension M20". |
On all craneway suspensions:
|
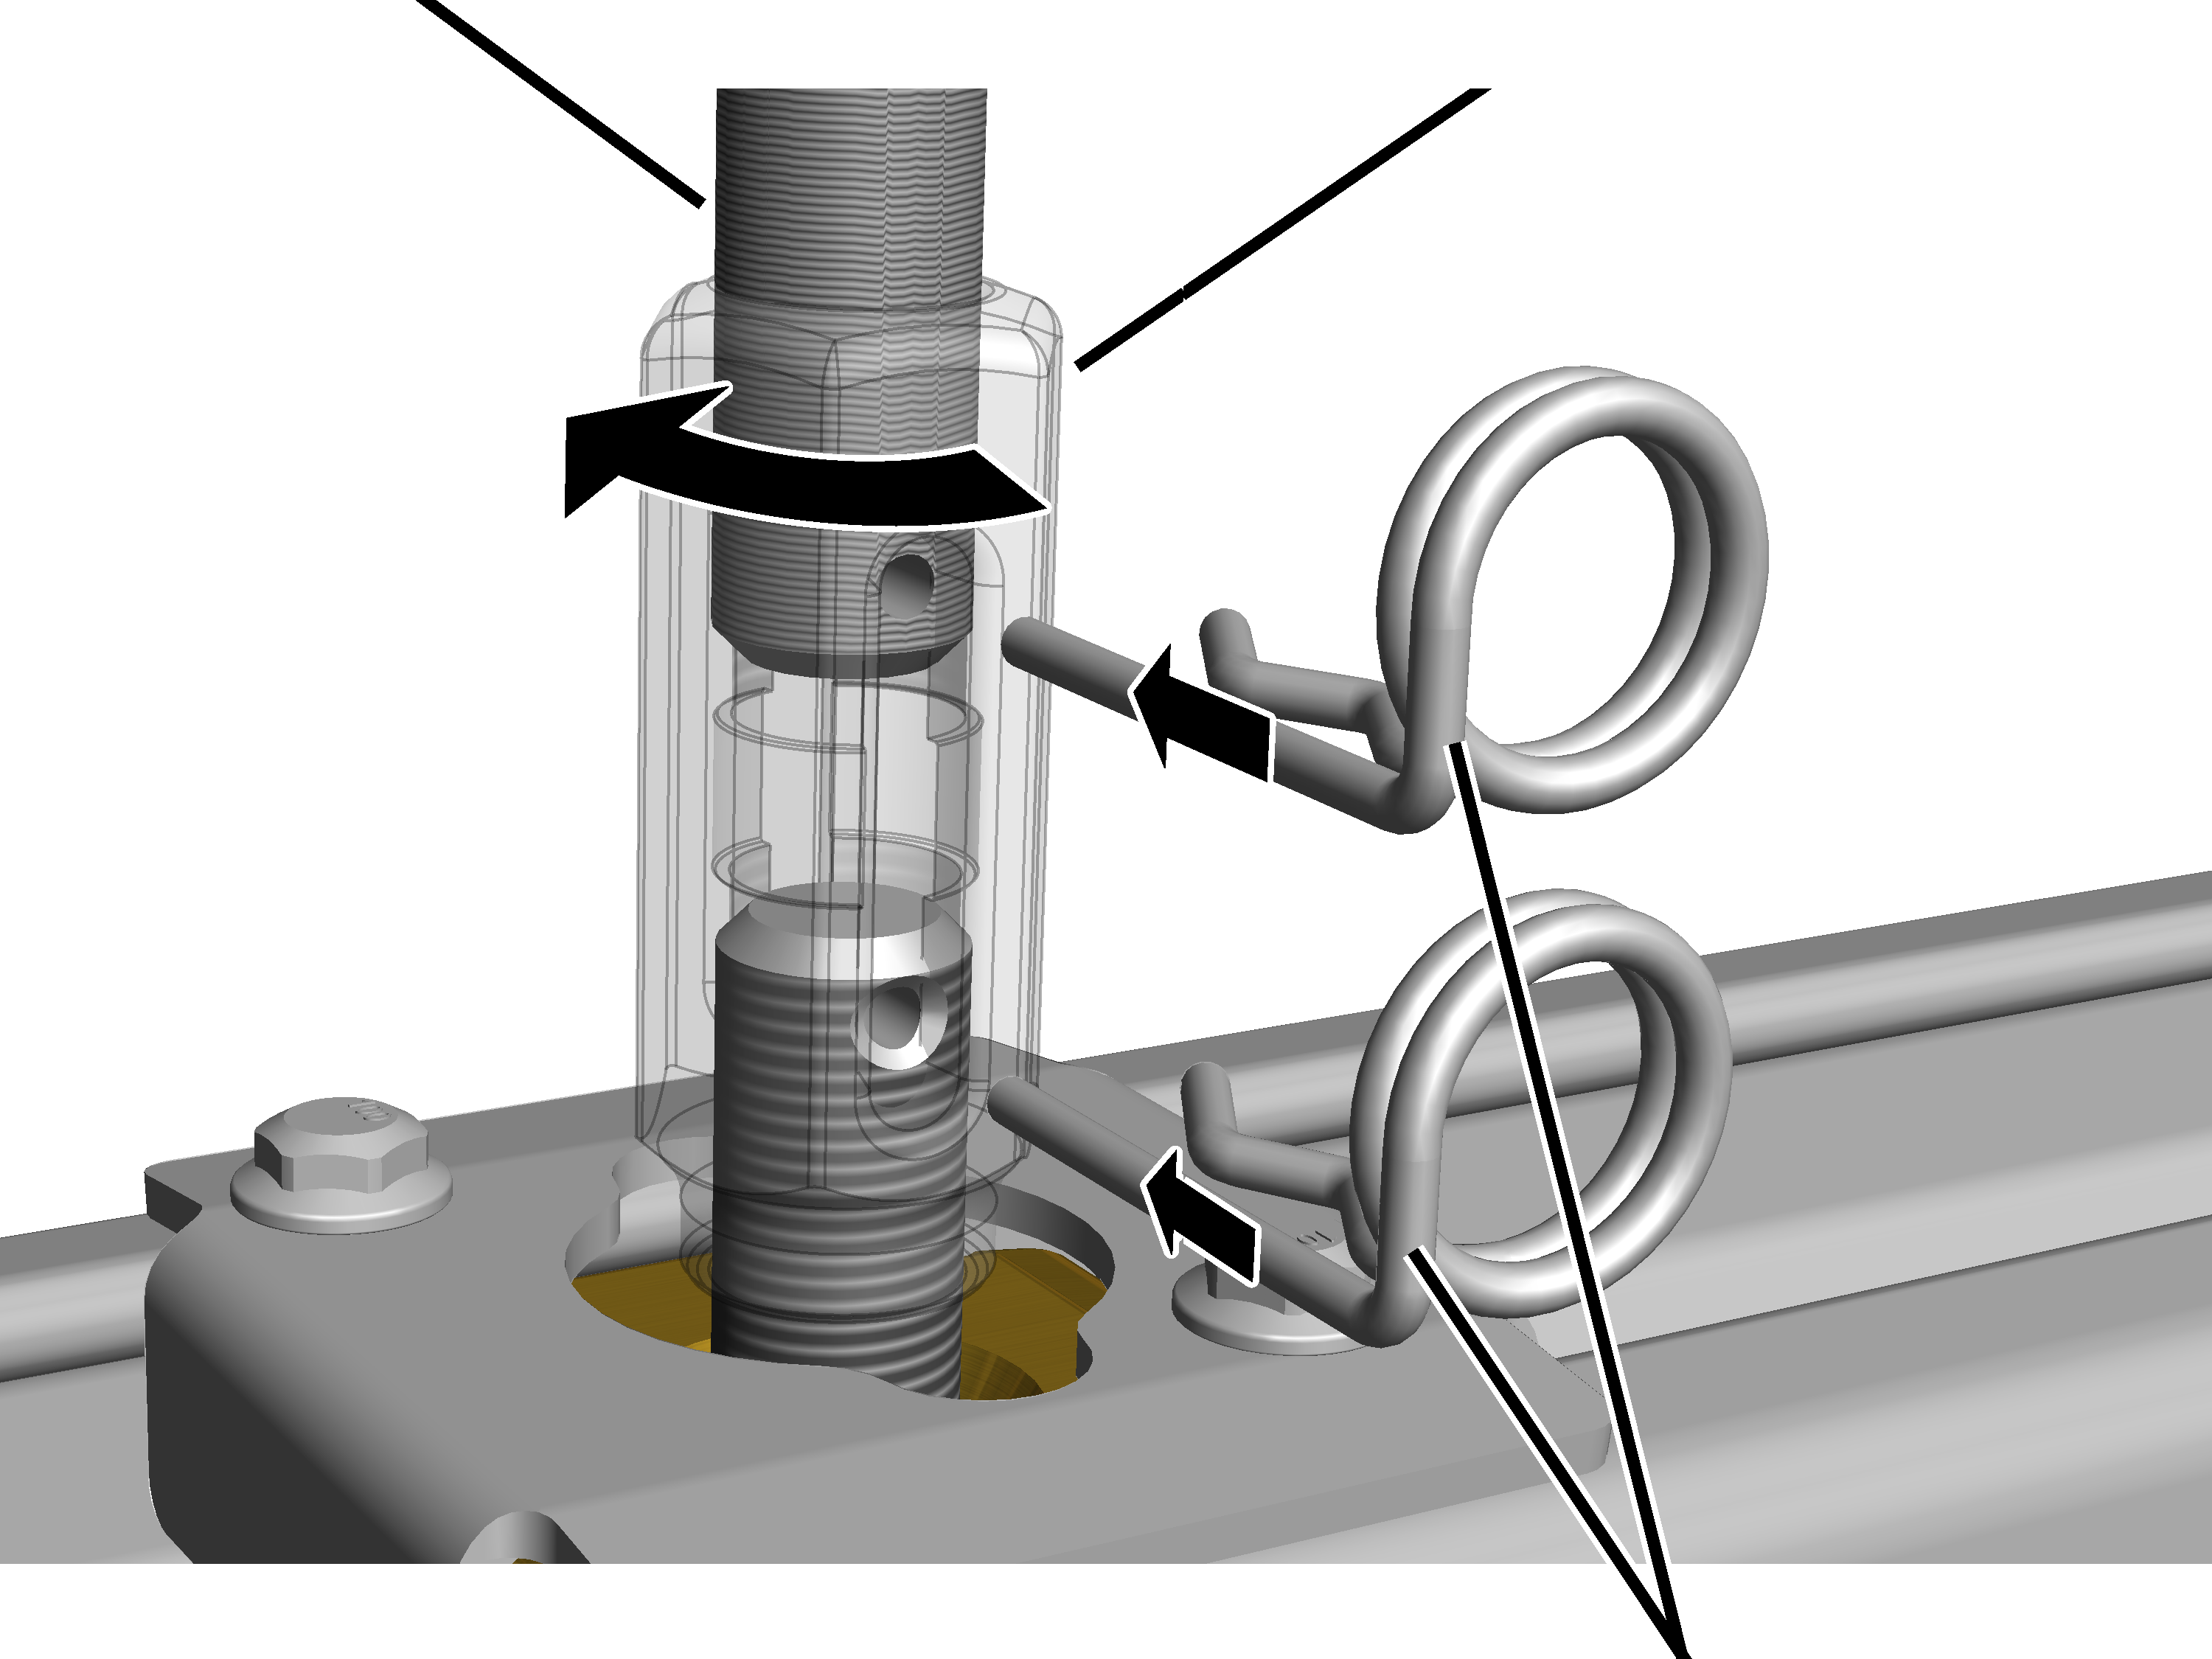
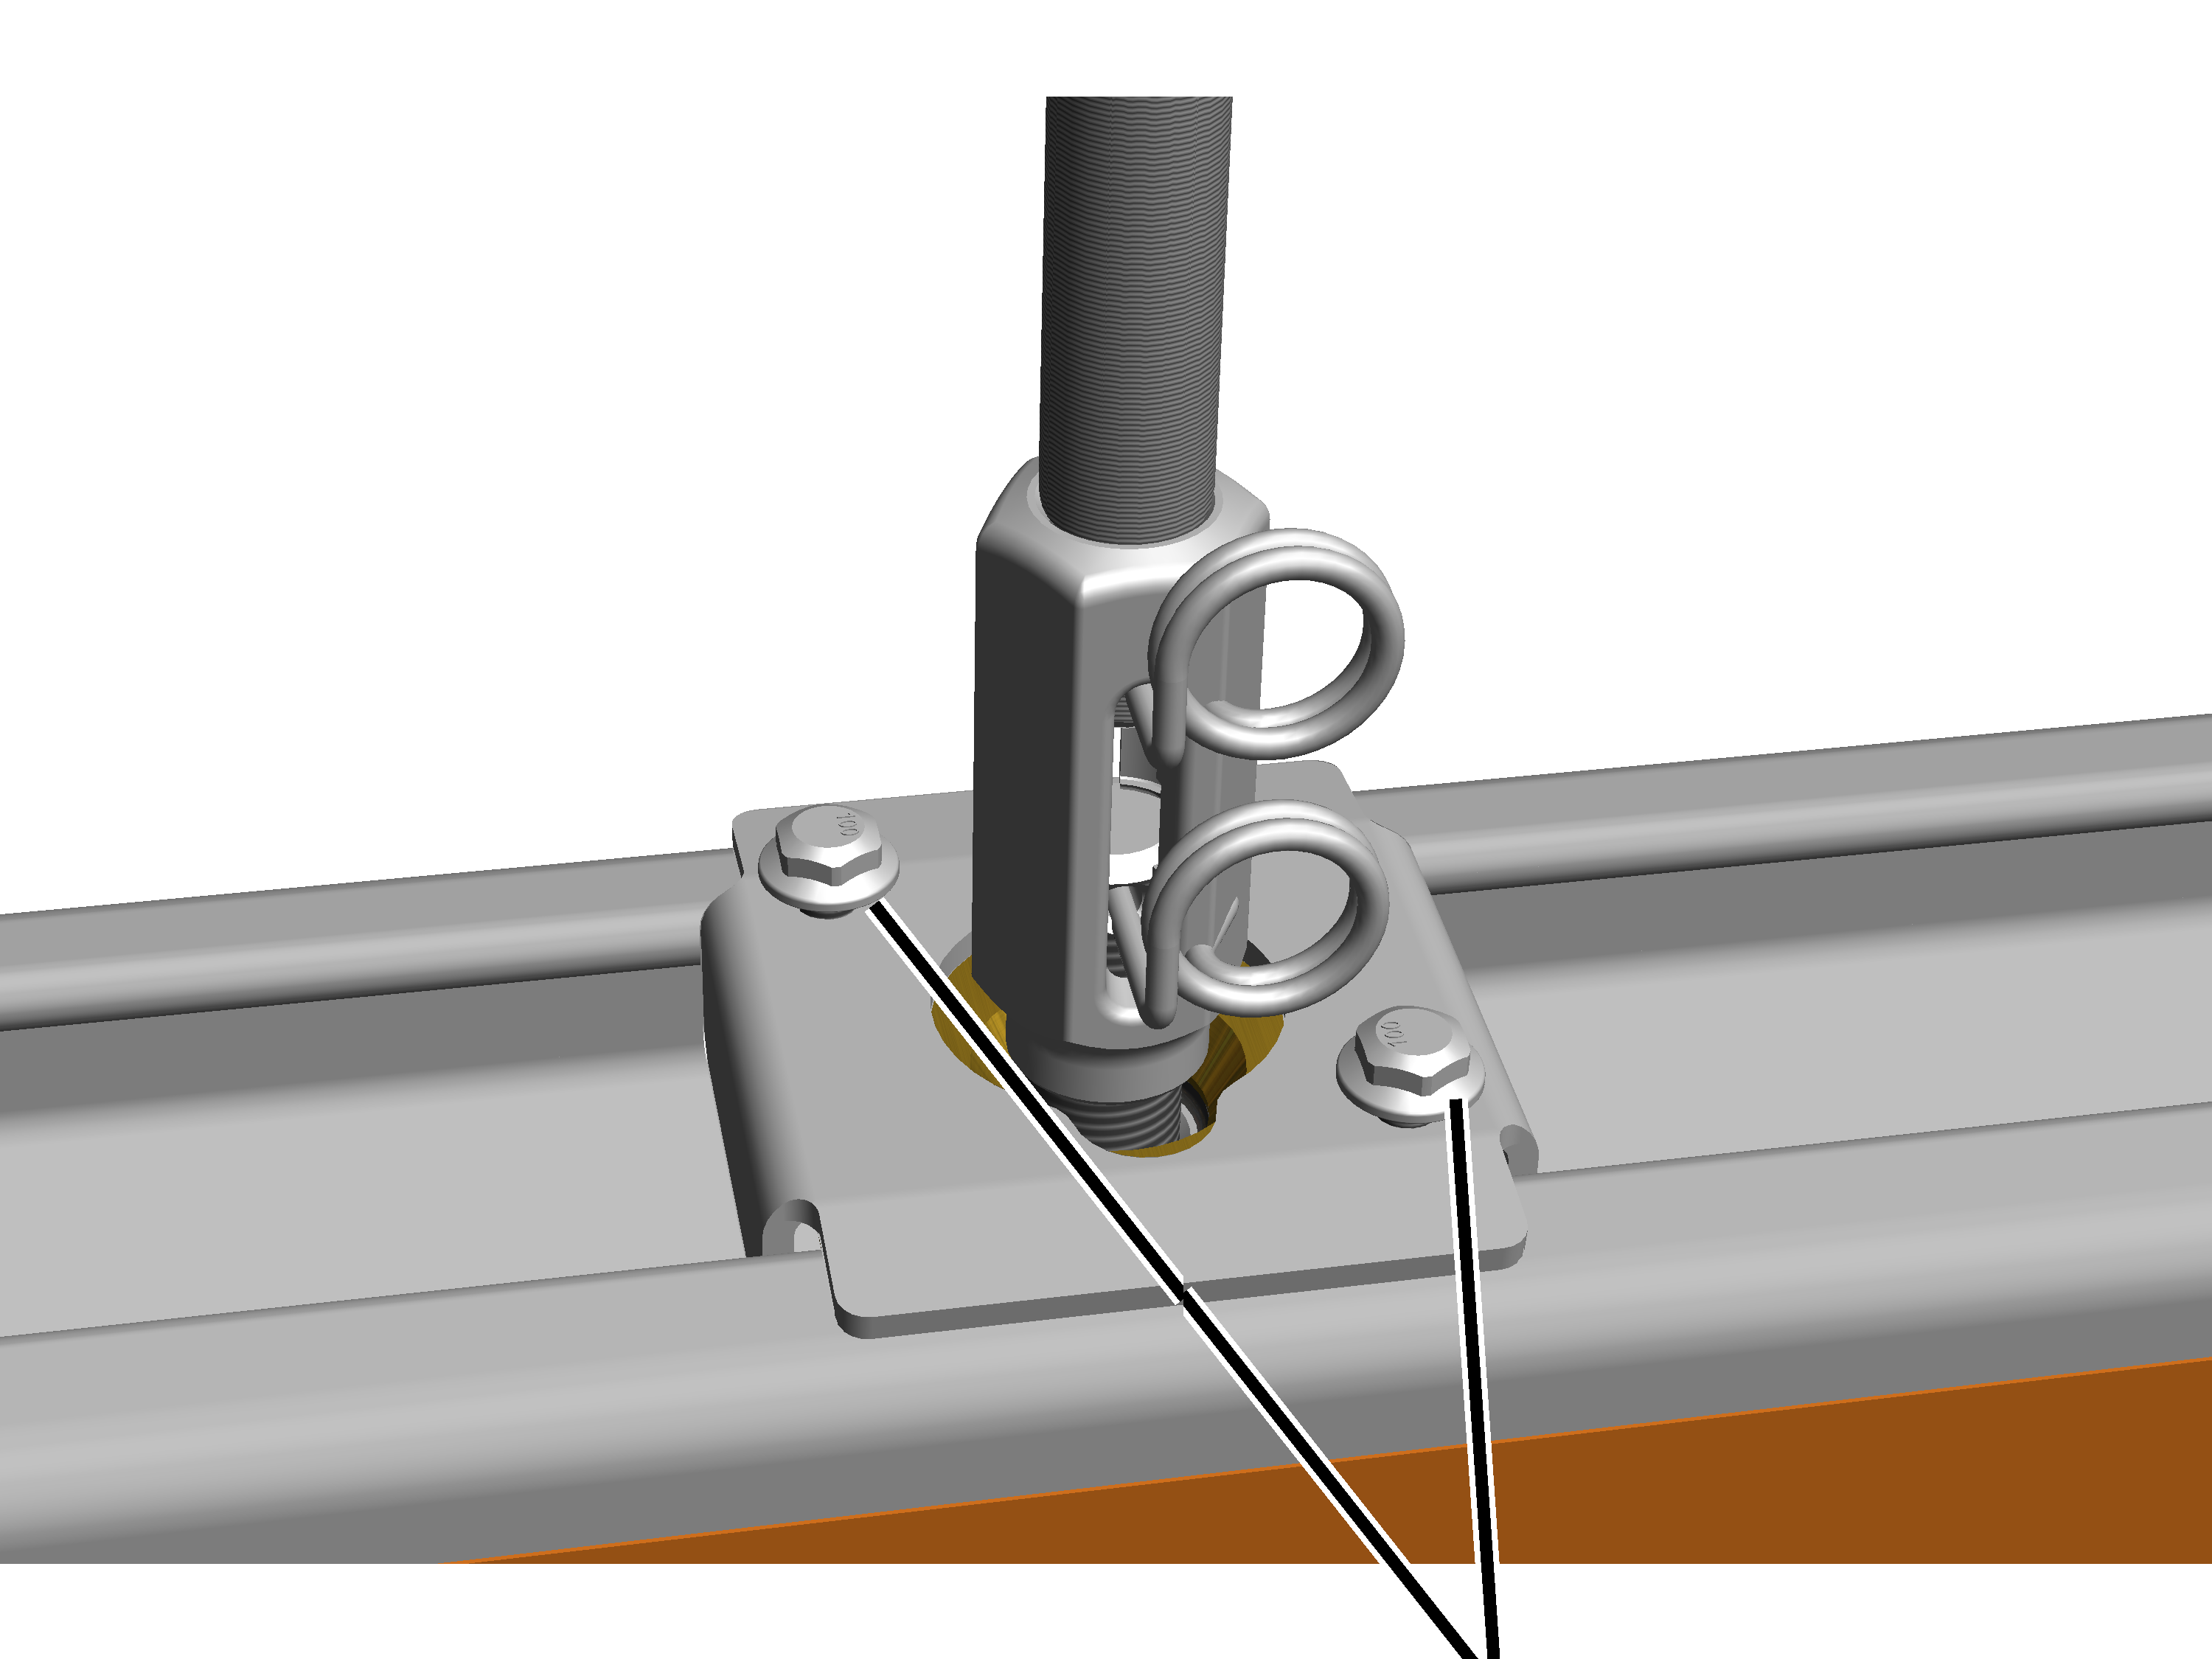
Threaded
rod |
Tension
nut |
|
|
|
|
Spring
cotter |
 Turn the tension nut and the threaded rod so far that the rectangular
hole of the tension nut and the bore in the threaded rod are facing the same way
(aligned with the HB crane runway).
Turn the tension nut and the threaded rod so far that the rectangular
hole of the tension nut and the bore in the threaded rod are facing the same way
(aligned with the HB crane runway).
If the two holes are not to be visible at the same time, the
wrong hole of the cross-drilled hole on the ceiling-mounted bracket 2LP/M16 or
M20 may have been used (see Craneway suspension
M16: Installing a normal suspension), or the hole in the threaded rod was
not drilled in alignment with the existing hole after shortening (see Shortening or
lengthening threaded rods).
If necessary, e.g. to compensate for inaccuracies, the hole in
the threaded rod can be enlarged to a diameter of 5 mm.
 Insert the spring cotter at
the bottom through the tension nut into the hole of the profile
connection.
Insert the spring cotter at
the bottom through the tension nut into the hole of the profile
connection.
Insert the spring cotter at the top through the tension nut into hole
in the threaded rod.
Final tightening
of the ceiling-mounted bracket 2LP/M16 or M20
On all ceiling-mounted brackets 2LP/M16 or M20:
|
|
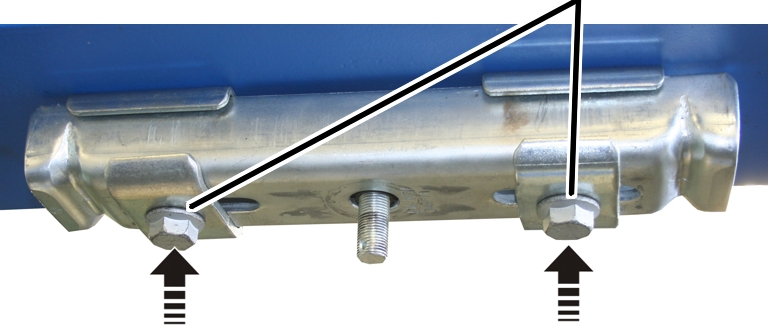
Rib
screws (2x) or rib nuts (2x) |
|
|
Tighten the rib screws (2x) or rib nuts (2x) on the ceiling-mounted
bracket 2LP/M16 or M20.
|
Suspension |
Tightening torque |
|
Flange clamp |
200 Nm |
|
Weld-on block |
200 Nm |
|
Anchor rod |
200 Nm |
|
Anchor connection |
90 Nm |
|
Anchor bar |
200 Nm |
|
Wooden beams |
90 Nm |
|
Rib nut |
e.g. 200 Nm (*) |
|
Rib screw |
e.g. 200 Nm (*) |
(*) The correct tightening torque depends on the
bolt quality and the friction coefficient from the standards table.
Example: 200 Nm for M16, bolt quality grade 8.8
and friction coefficient 0.12.
Final tightening
of the profile connections
On all profile connections:
|
|
|
|
Rib
screws |
Tighten the rib screws (2x) on the profile connection.
|
Size |
Rib screw |
Tightening torque |
|
HB110 |
M5x30 |
11 Nm |
|
HB150 |
M6x40 |
20 Nm |
|
HB190 |
M6x40 |
20 Nm |
|
HB240 |
M6x40 |
20 Nm |
Tip:
For the profile connections on the HB110, M5x30
fillister-head screws are used. The screws lie quite close to the tension nuts.
To screw them easily, use a bit with a spherical head.
Only with normal stiffener,
inclined stiffener and V-suspension
Final tightening
of the articulated girder
|
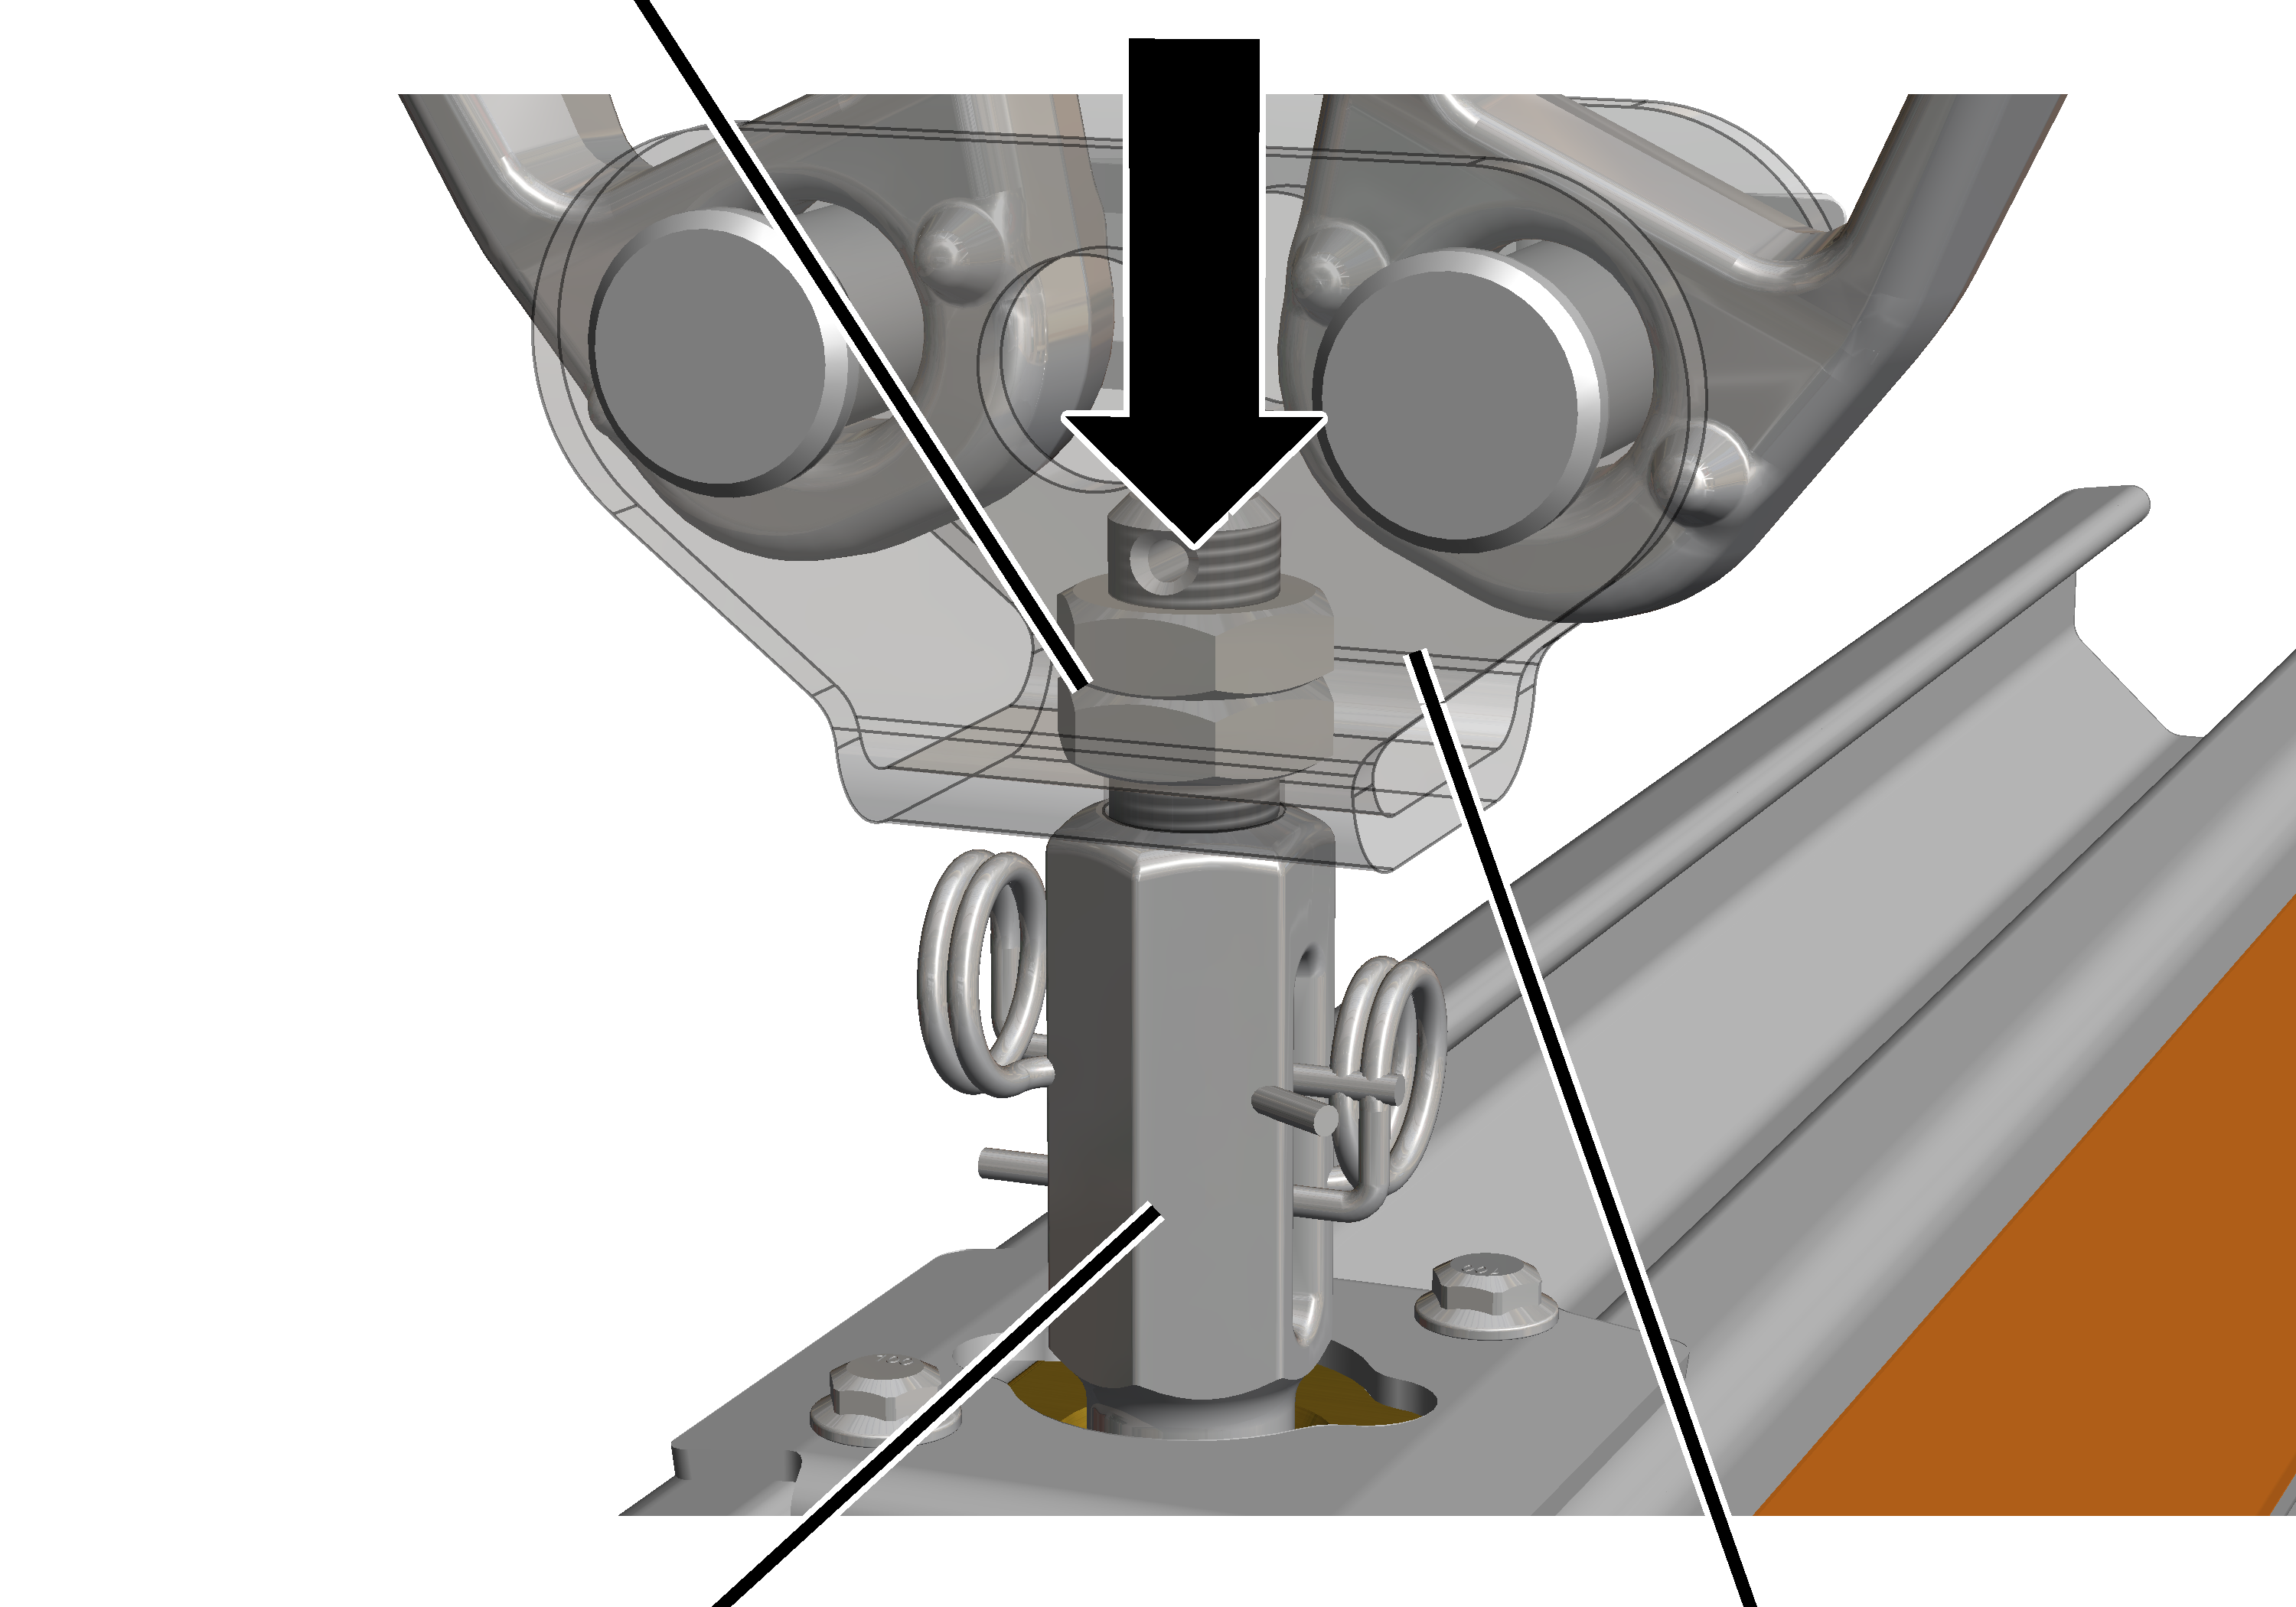
Hexagonal nuts |
|
|
|
|
Tension
nut |
Articulated girder |
Press the articulated girder against the tension nut.
Screw on hexagonal nut. 90 Nm.
Lock with a second hexagonal nut.