Danger to persons with heart pacemakers!
The charging cradle contains several strong permanent magnets. These can affect implants located nearby. Determine the position for the charging cradle accordingly and take the on-site risks into account.
The charging cradle is a safe and designated storage location for the transmitter when not working with the crane.
|
|
Danger to persons with heart pacemakers! The charging cradle contains several strong permanent magnets. These can affect implants located nearby. Determine the position for the charging cradle accordingly and take the on-site risks into account. |
 Compare the specifications on the type plate with the local mains
supply.
Compare the specifications on the type plate with the local mains
supply.
Press the button on the rear of the power pack.
Push the connector upwards and remove it.
Push on the connector required so it audibly clicks into place.
|
|
Micro-USB connection |
|
| |
|
Charge state gauge |
|
 Insert the power pack on the micro-USB connection on the charging
cradle.
Insert the power pack on the micro-USB connection on the charging
cradle.
Plug the power pack into the socket.
● The charging cradle is switched on.
● The charge state gauge of the charging cradle lights up white.
|
|
Danger due to charging of disposable batteries! If a transmitter with disposable batteries is placed in the charging cradle, the batteries heat up and could burst and leak. Toxic substances could thereby be released and damage the transmitter. Check carefully that no disposable batteries are inserted before placing the transmitter in the charging cradle. |
|
Magnet mountings |
Transmitter |
|
| |
|
Holding bracket |
Charge state gauge |
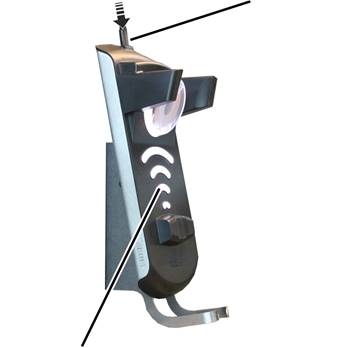
Place the transmitter on the holding bracket and tip it into the
charging cradle.
The transmitter does not need to be taken out of the protective case. It can be laid in the charging cradle with the protective case and charged.
Do not place any electrically conductive objects between the transmitter and the charging cradle!
● The transmitter is magnetically locked on the charging cradle.
● The batteries are charged.
The batteries are charged each time the transmitter is laid in the charging cradle for 10 hours. The charging current is very low, which prevents damage to batteries which are already fully or partially charged.
● The charge state gauge lights up red.
During the entire charging process, the charge state gauge lights up red. Information on the already charged capacity is not given.
● The transmitter switches to “Standby” operating mode.
● An animated charge state gauge is shown on the display.
When the charge state gauge lights up green:
● The transmitter is fully charged.
● The charging cradle switches over to trickle charging.
This ensures the batteries in the transmitter are continuously charged and remain fully charged. This does not damage the batteries or diminish their capacity.
If necessary: Remove the transmitter from the charging cradle.
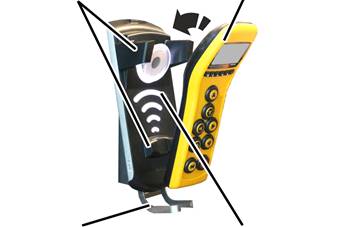
If the charge state gauge remains white when the transmitter is inserted:
|
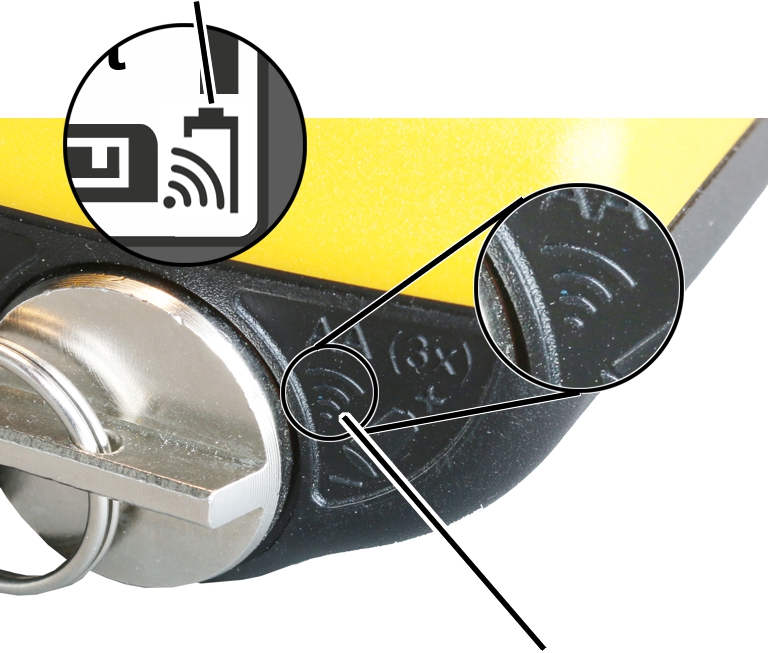
Symbol on the display for compatibility with the charging cradle |
|
|
| |
|
|
Symbol on the transmitter for compatibility with the charging cradle |
Check whether the transmitter is compatible with the charging cradle.
This is indicated by a symbol next to the battery compartment.
Check whether another error is present. See Fault indicators of
charging cradle.
If the charge state gauge flashes red:
● A fault has occurred during the charging process.
See Fault indicators of charging cradle.