Only with trolley frames
with normal overall height and track gauge 700
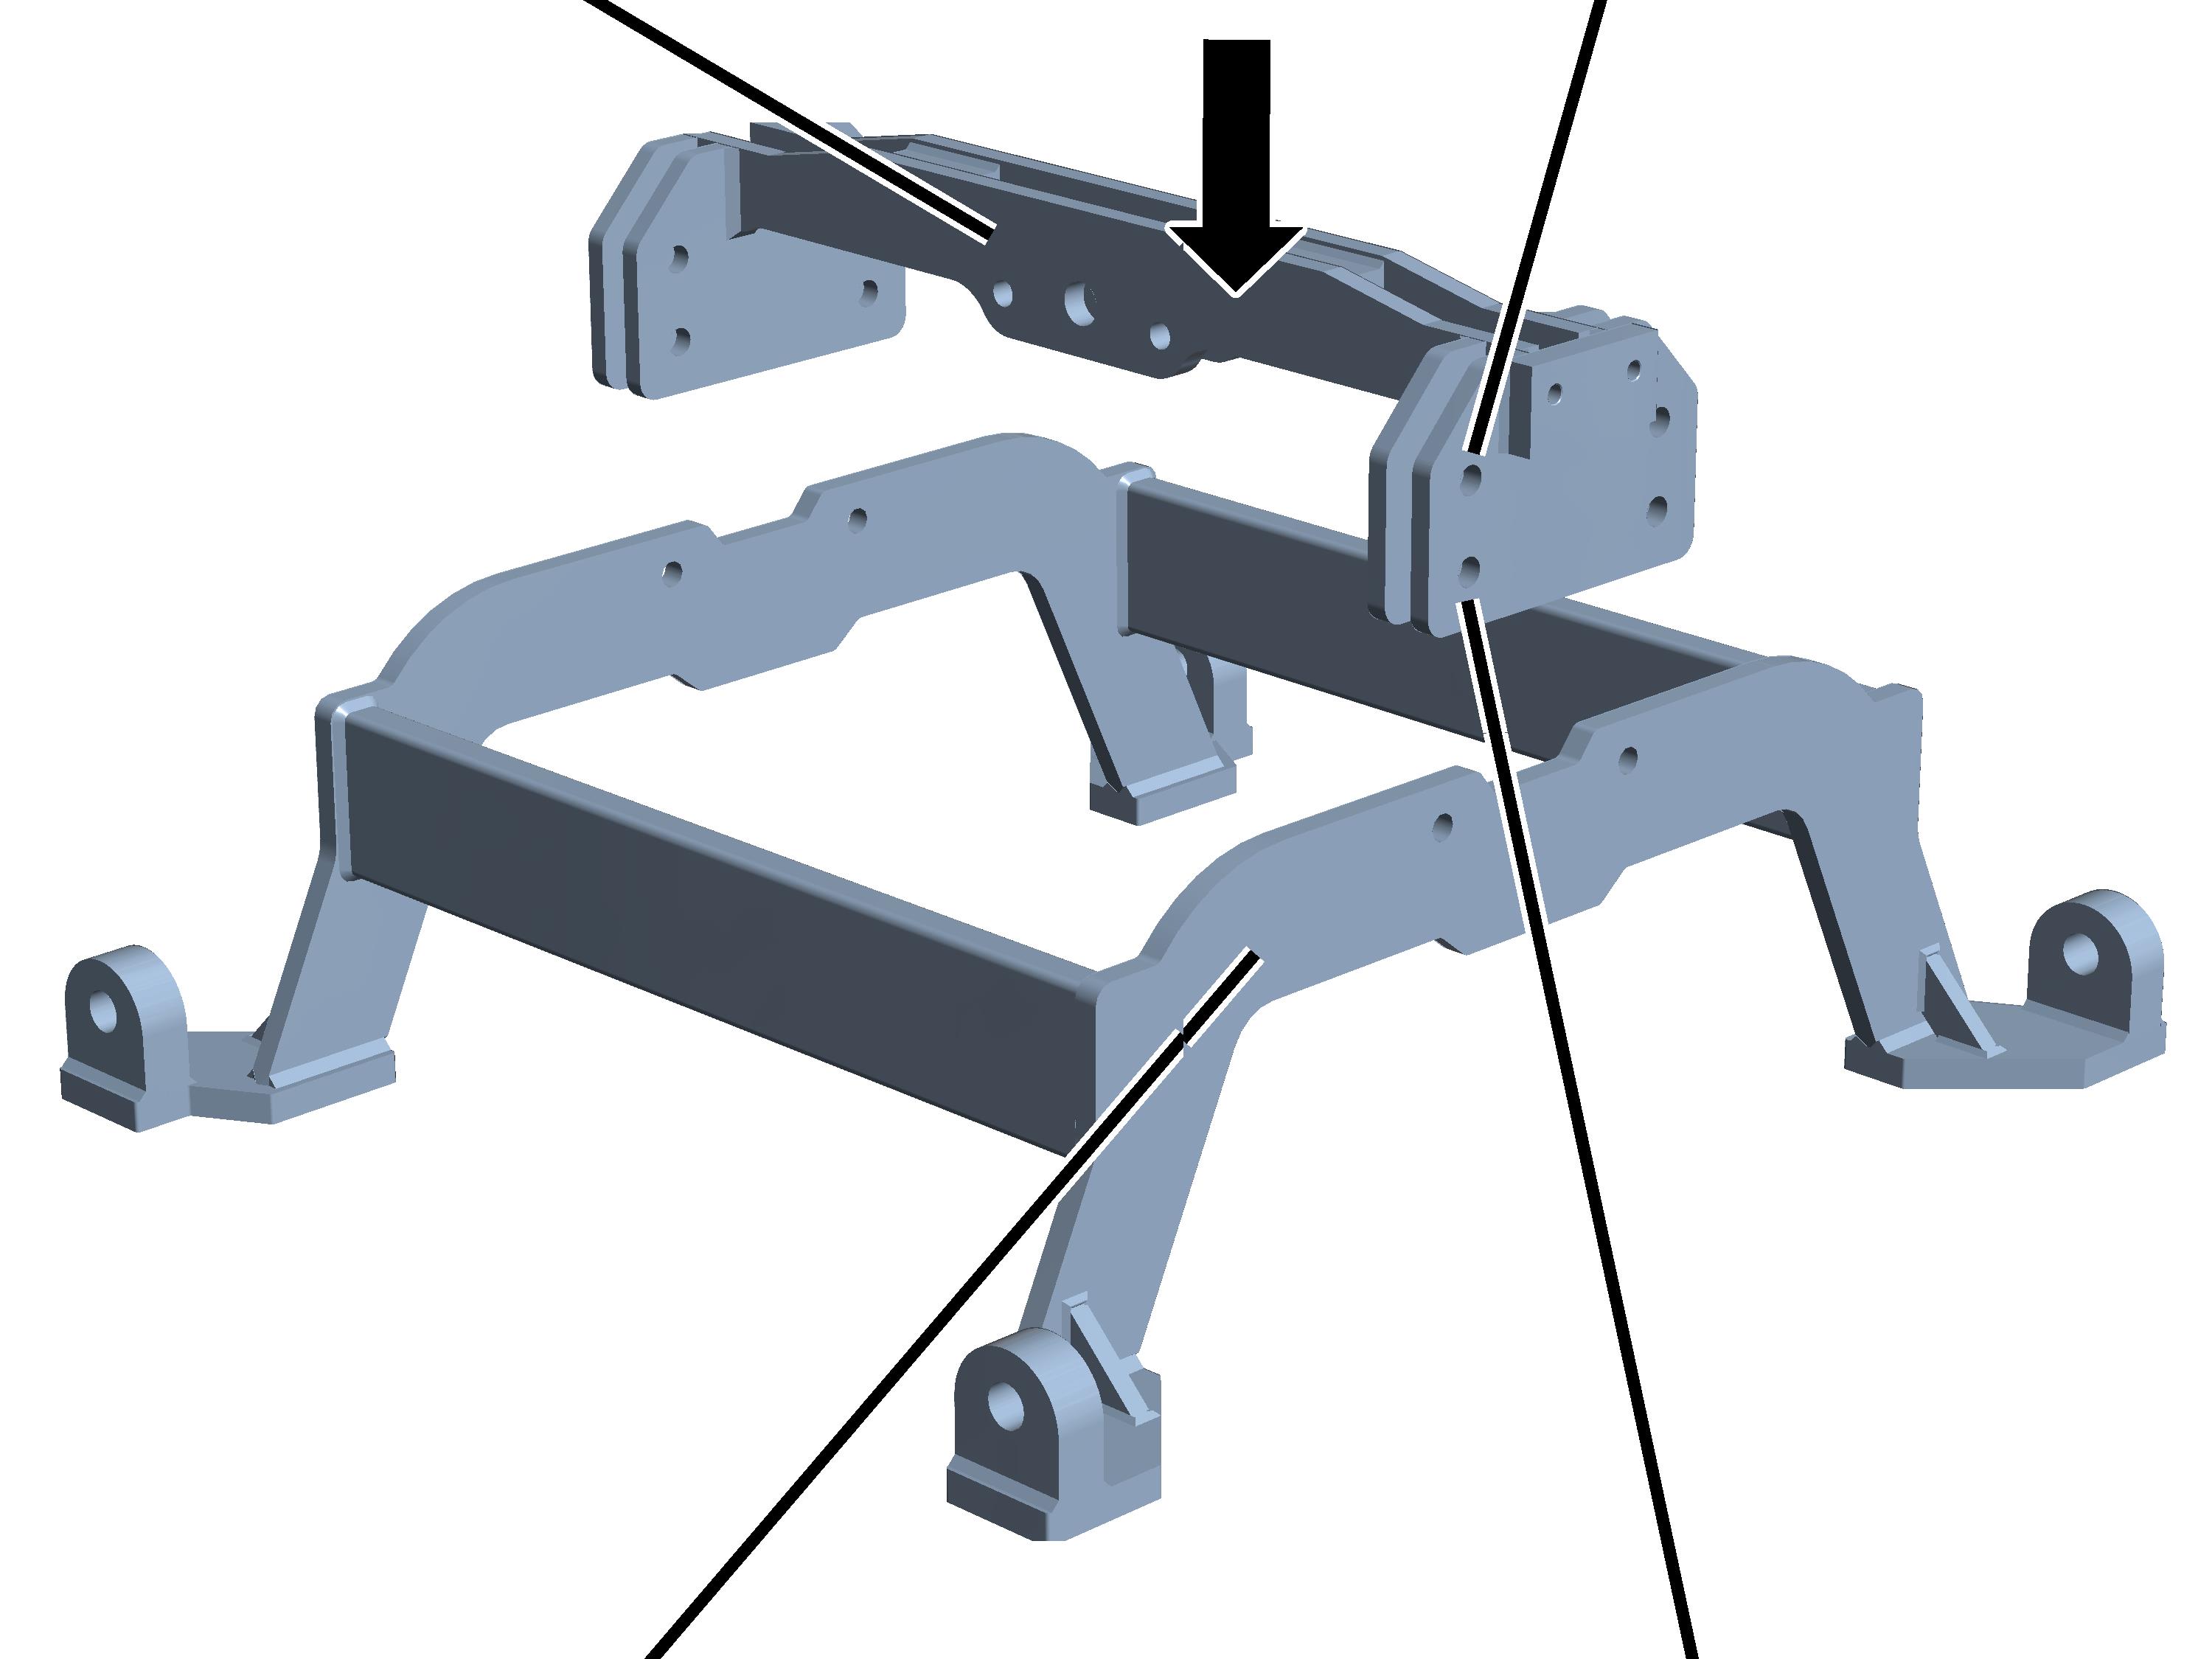
Installing the
trolley cross arm
|
Trolley
cross arm |
Drilled
holes at top for HB150 |
|
|
|
Trolley
base frame |
Drilled
holes at bottom for HB190 and HB240 |
 Move the trolley cross arm
into the required installation position:
Move the trolley cross arm
into the required installation position:
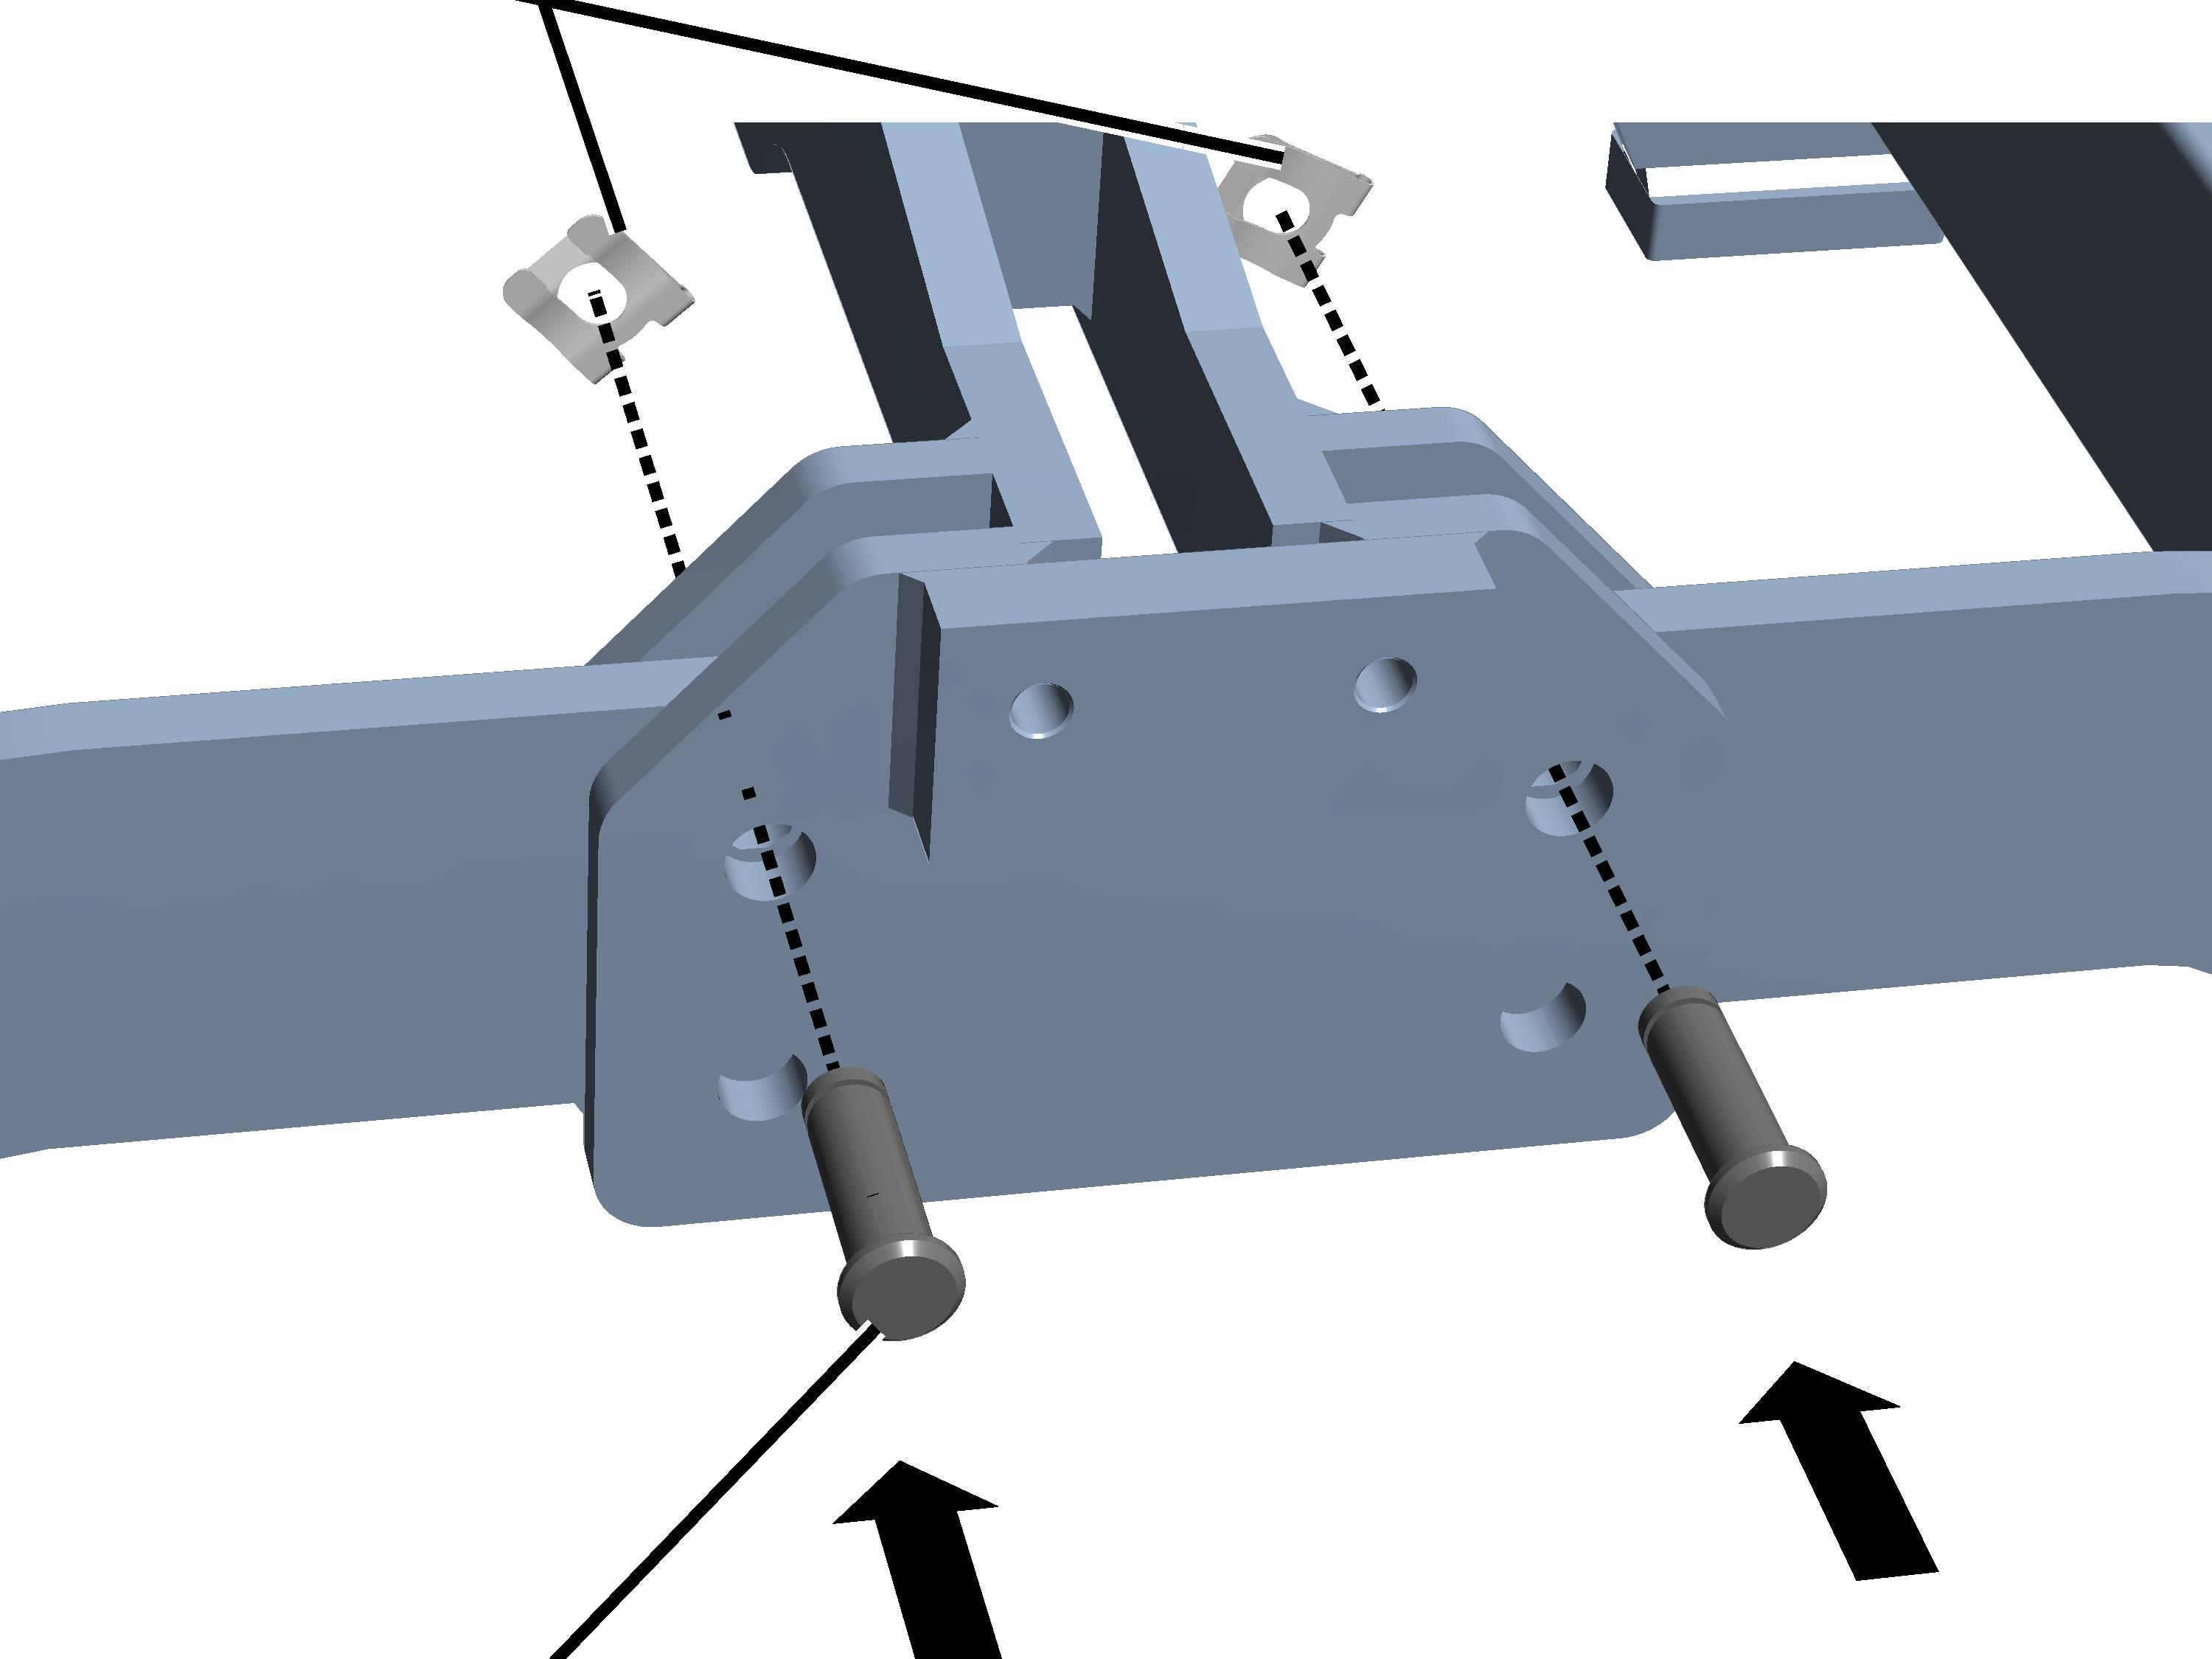
─ For
HB150: move the trolley cross arm onto the upper drilled holes.
─ For
HB190 and HB240: move the trolley cross arm onto the lower drilled holes.
On both sides of the trolley cross arm:
|
SL
safety clip |
|
|
|
|
Bolt |
|
Insert bolts (2x) through
trolley cross arm and trolley base frame.
Secure bolts with SL
safety clips (4x).
|
Trolley |
|
|
|
|
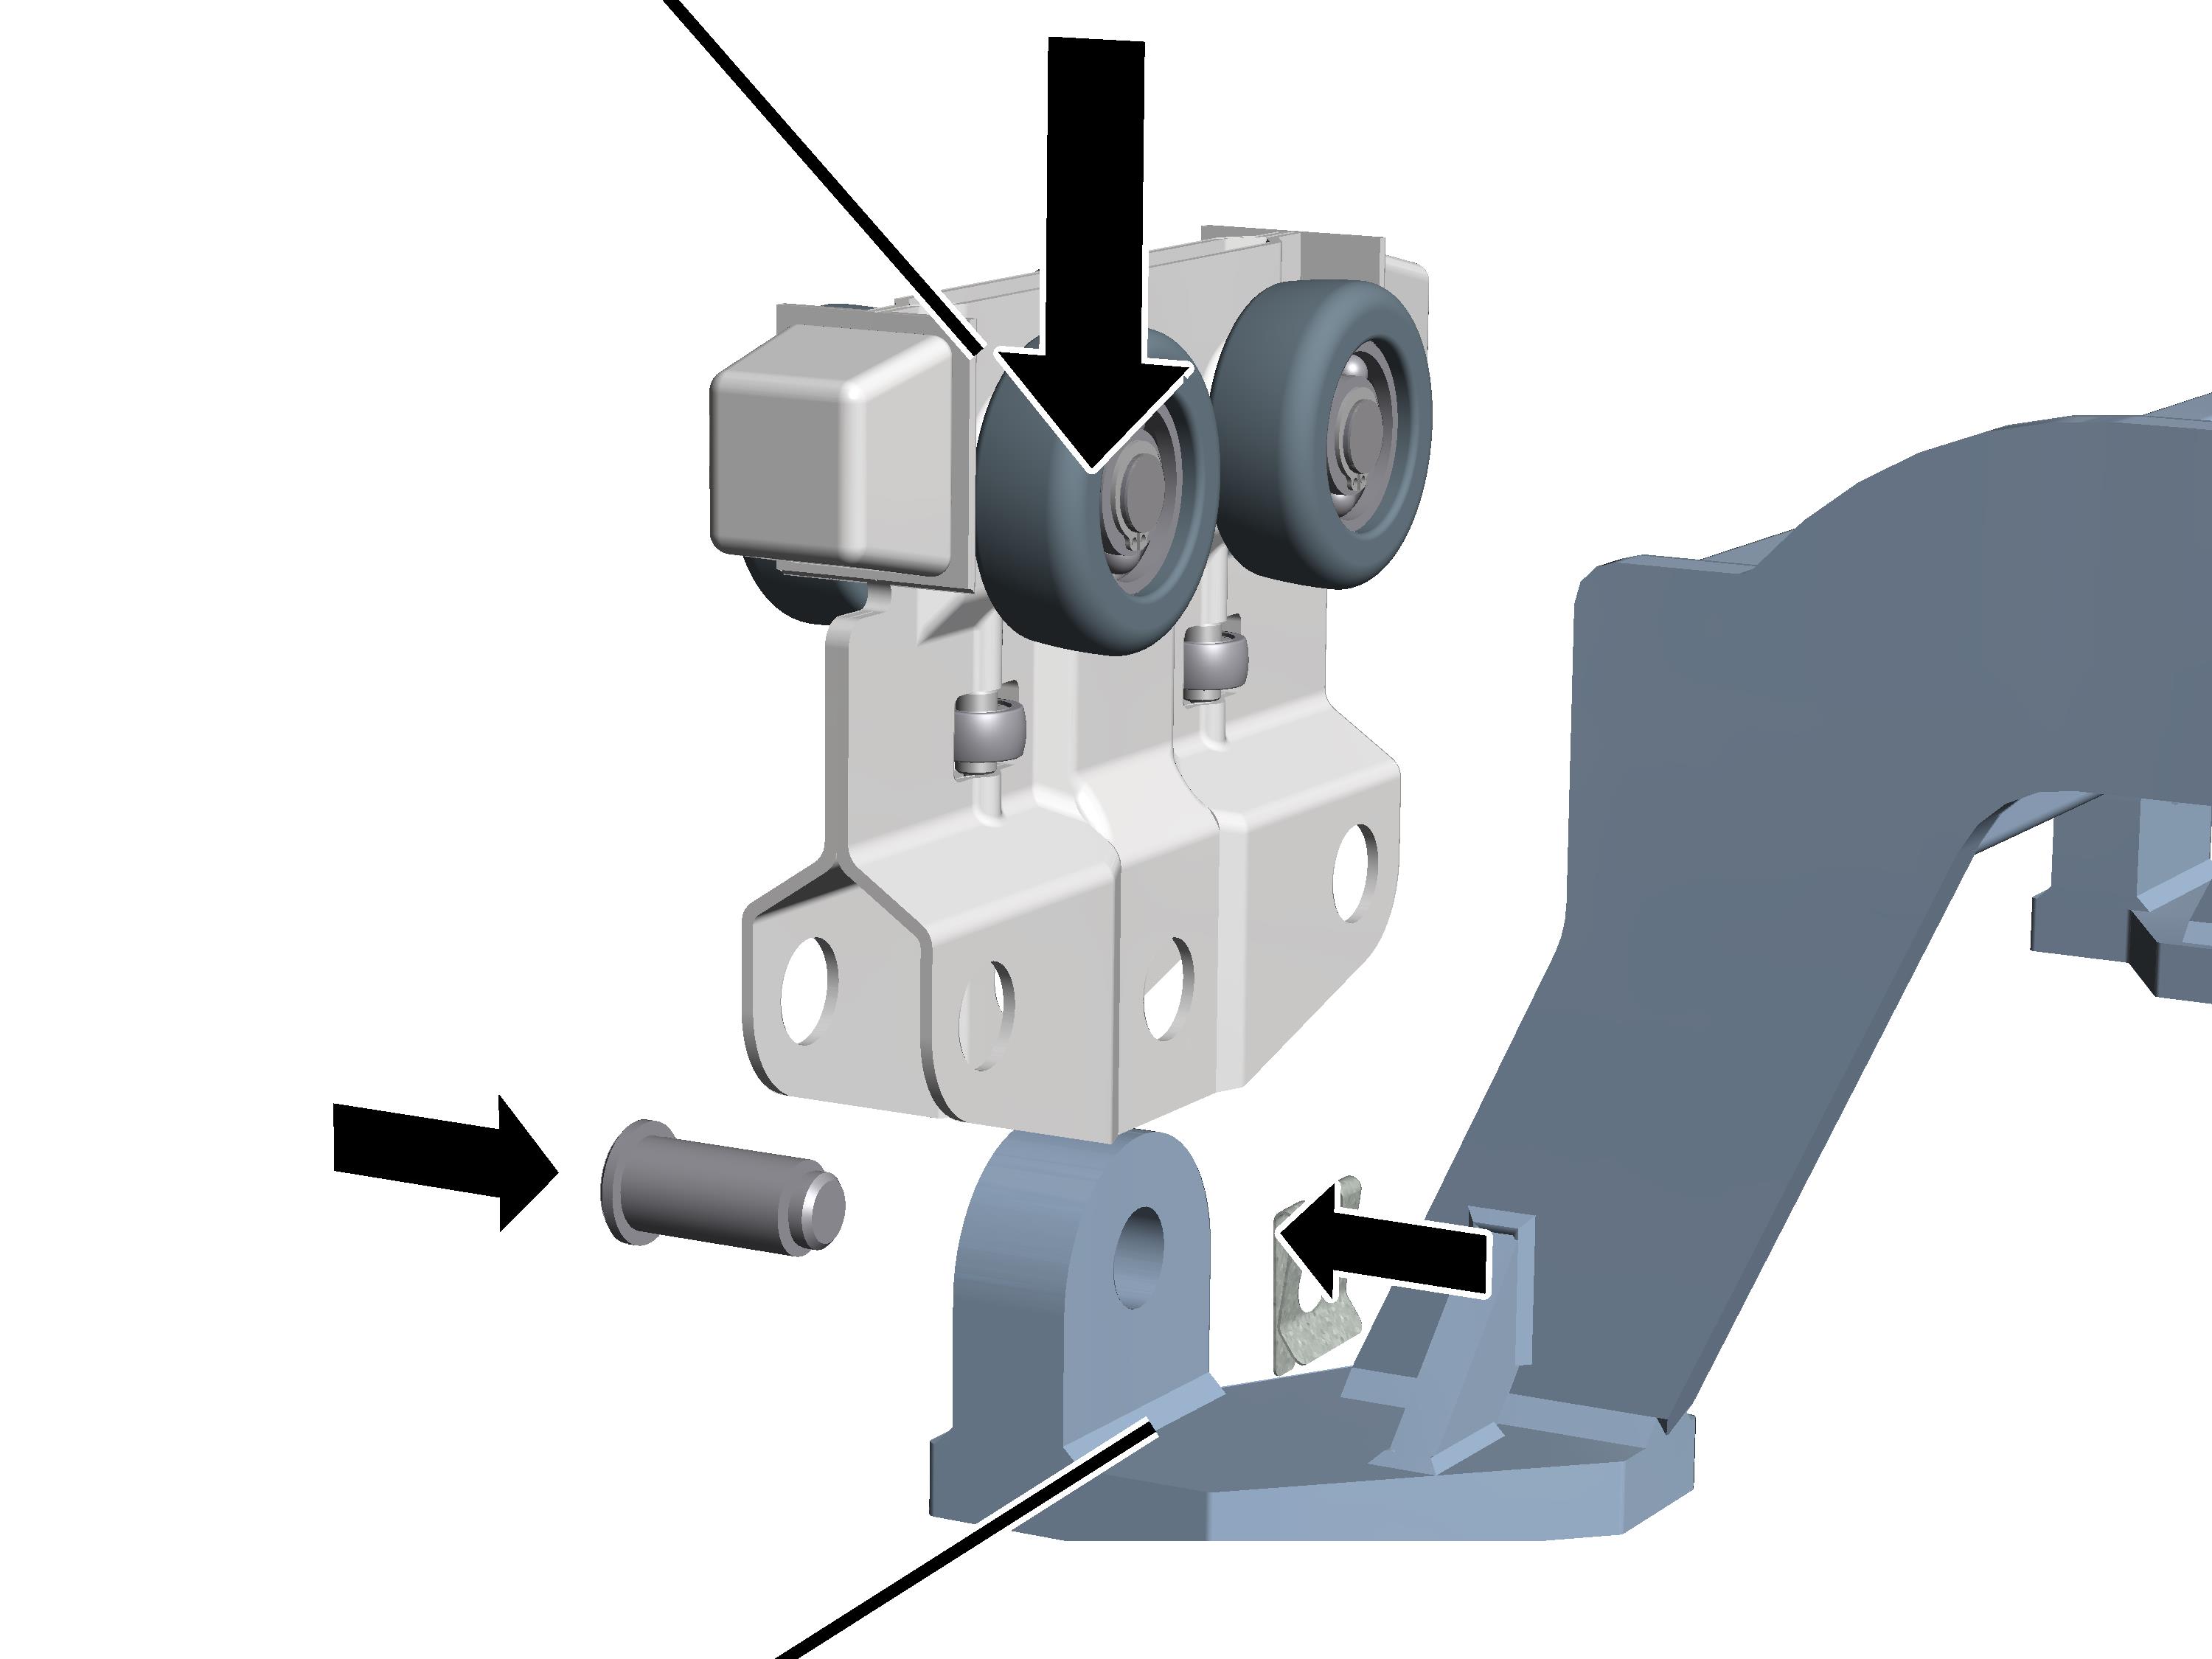
Trolley
eyelet |
|
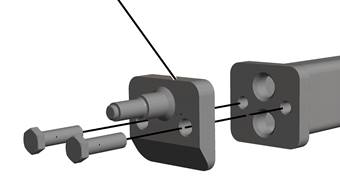
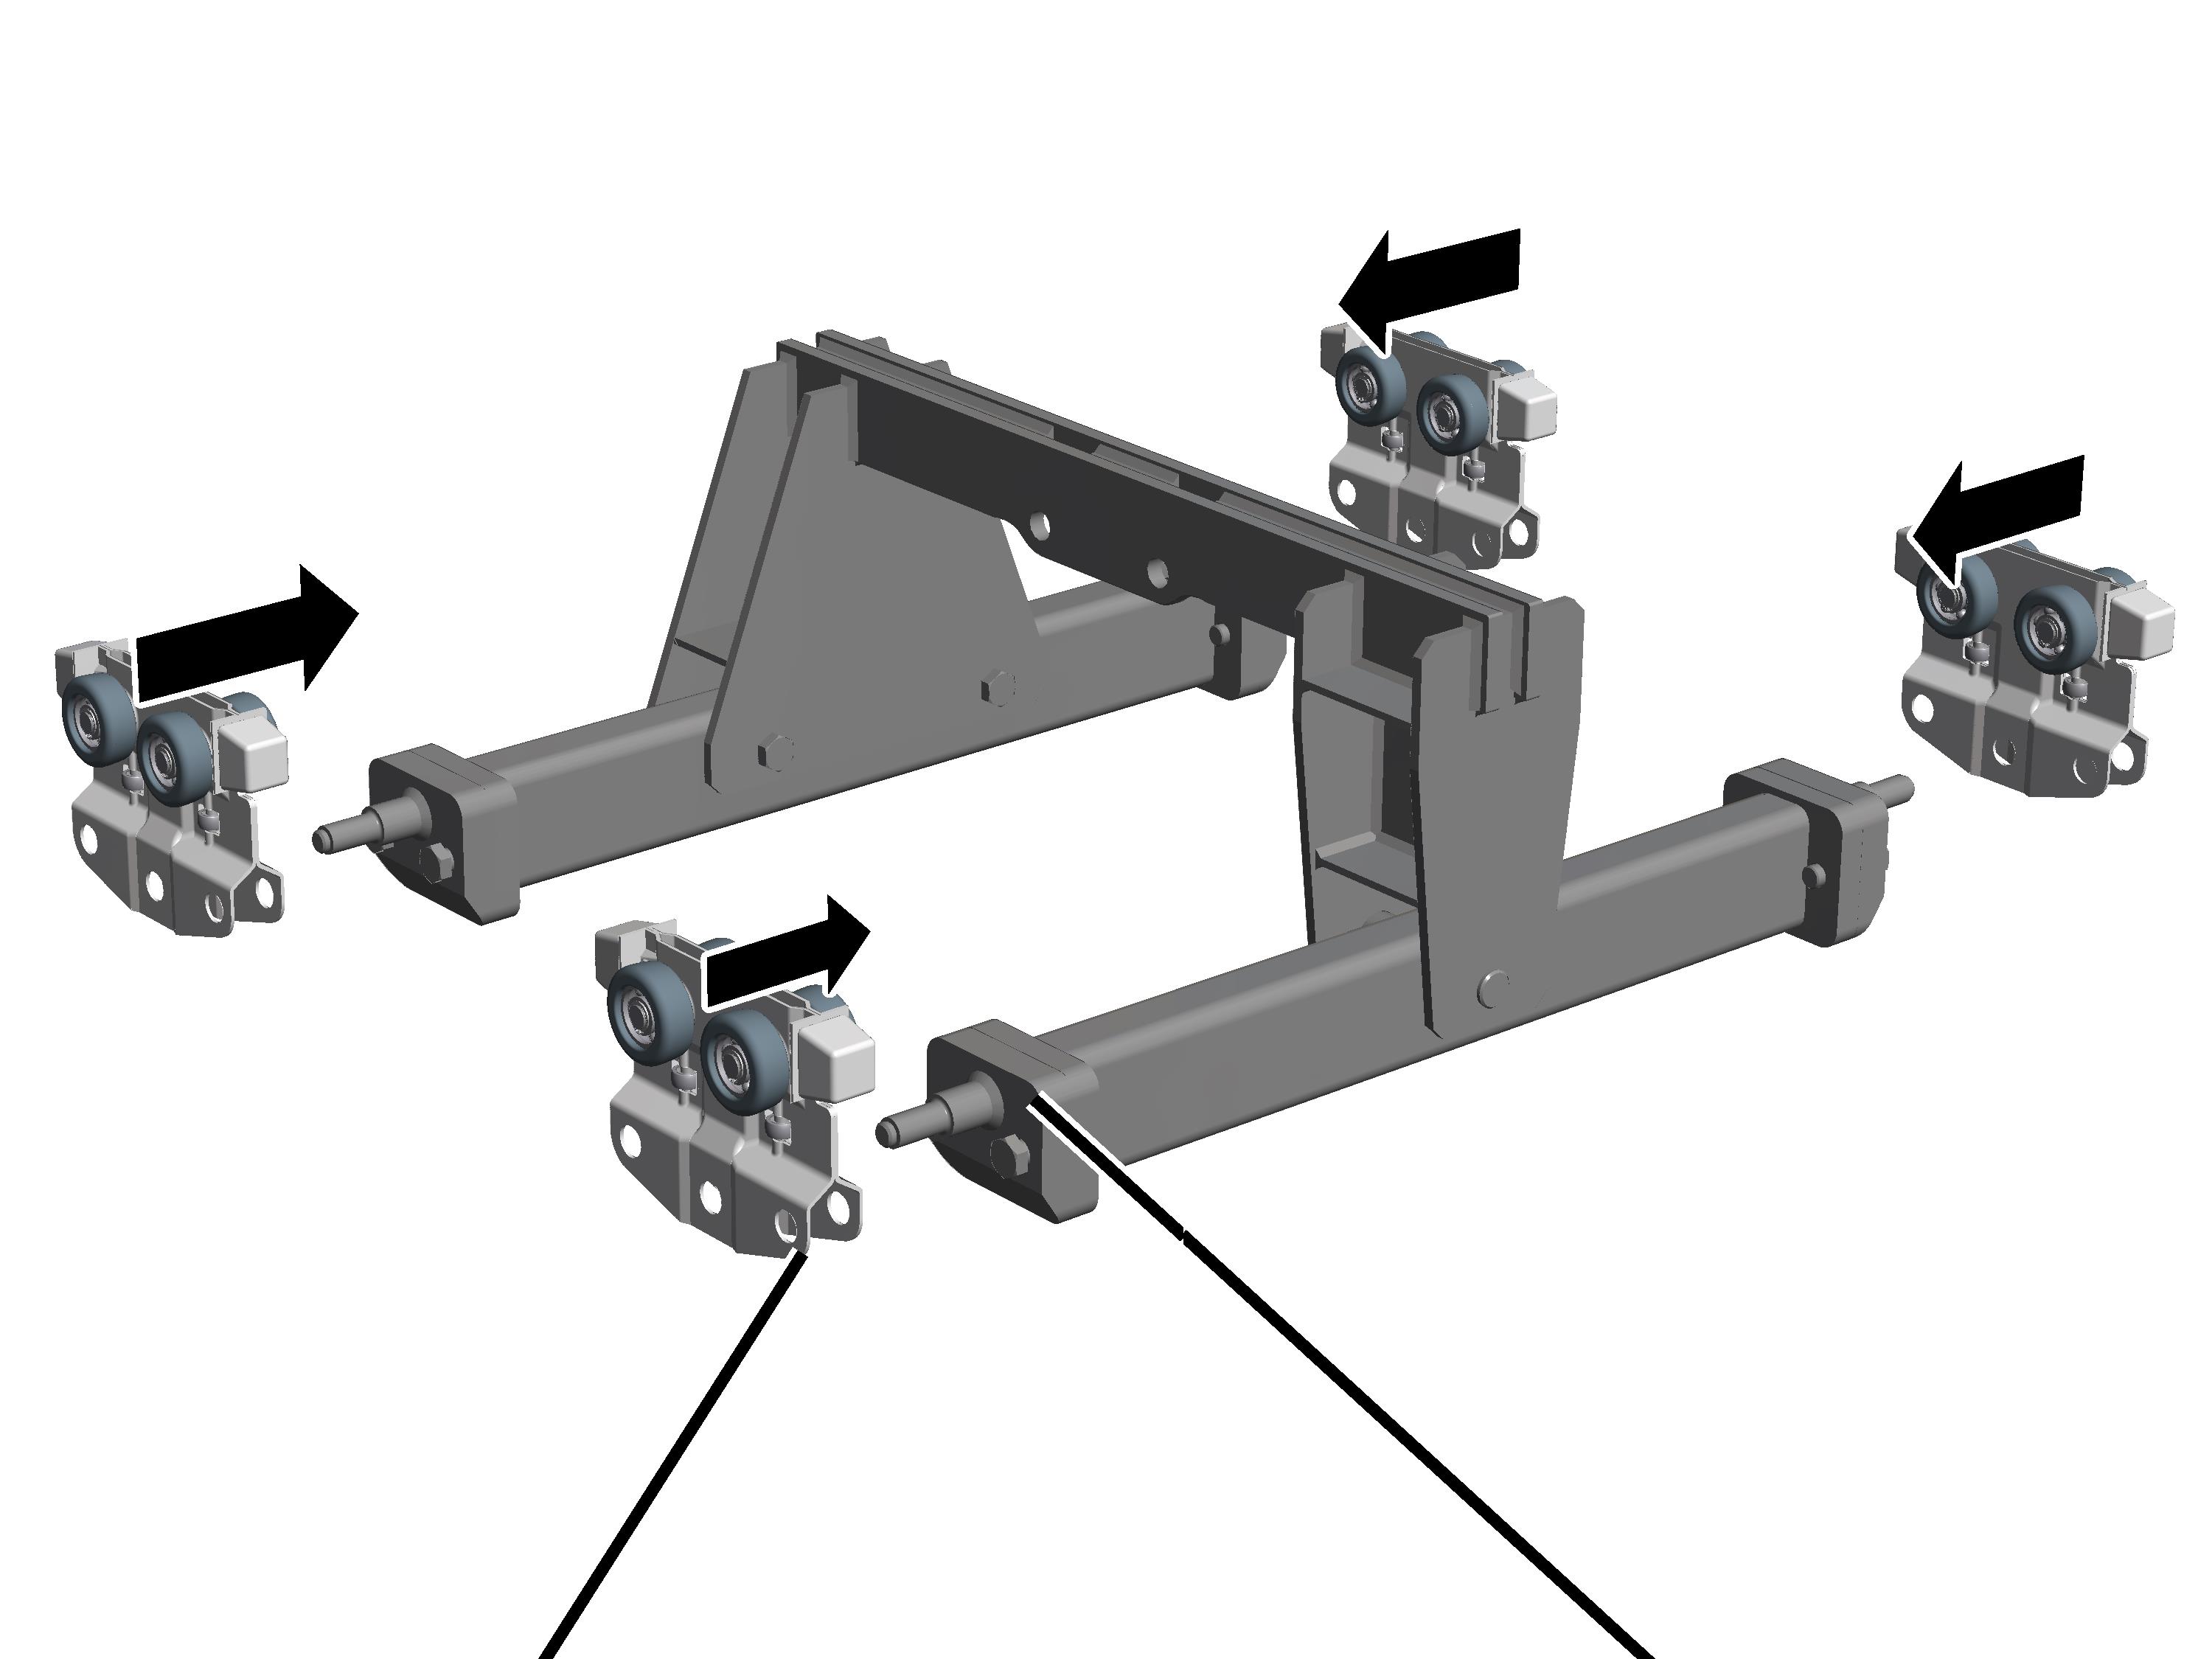
Move the HB6 trolleys (4x)
over the trolley eyelets on the trolley frame.
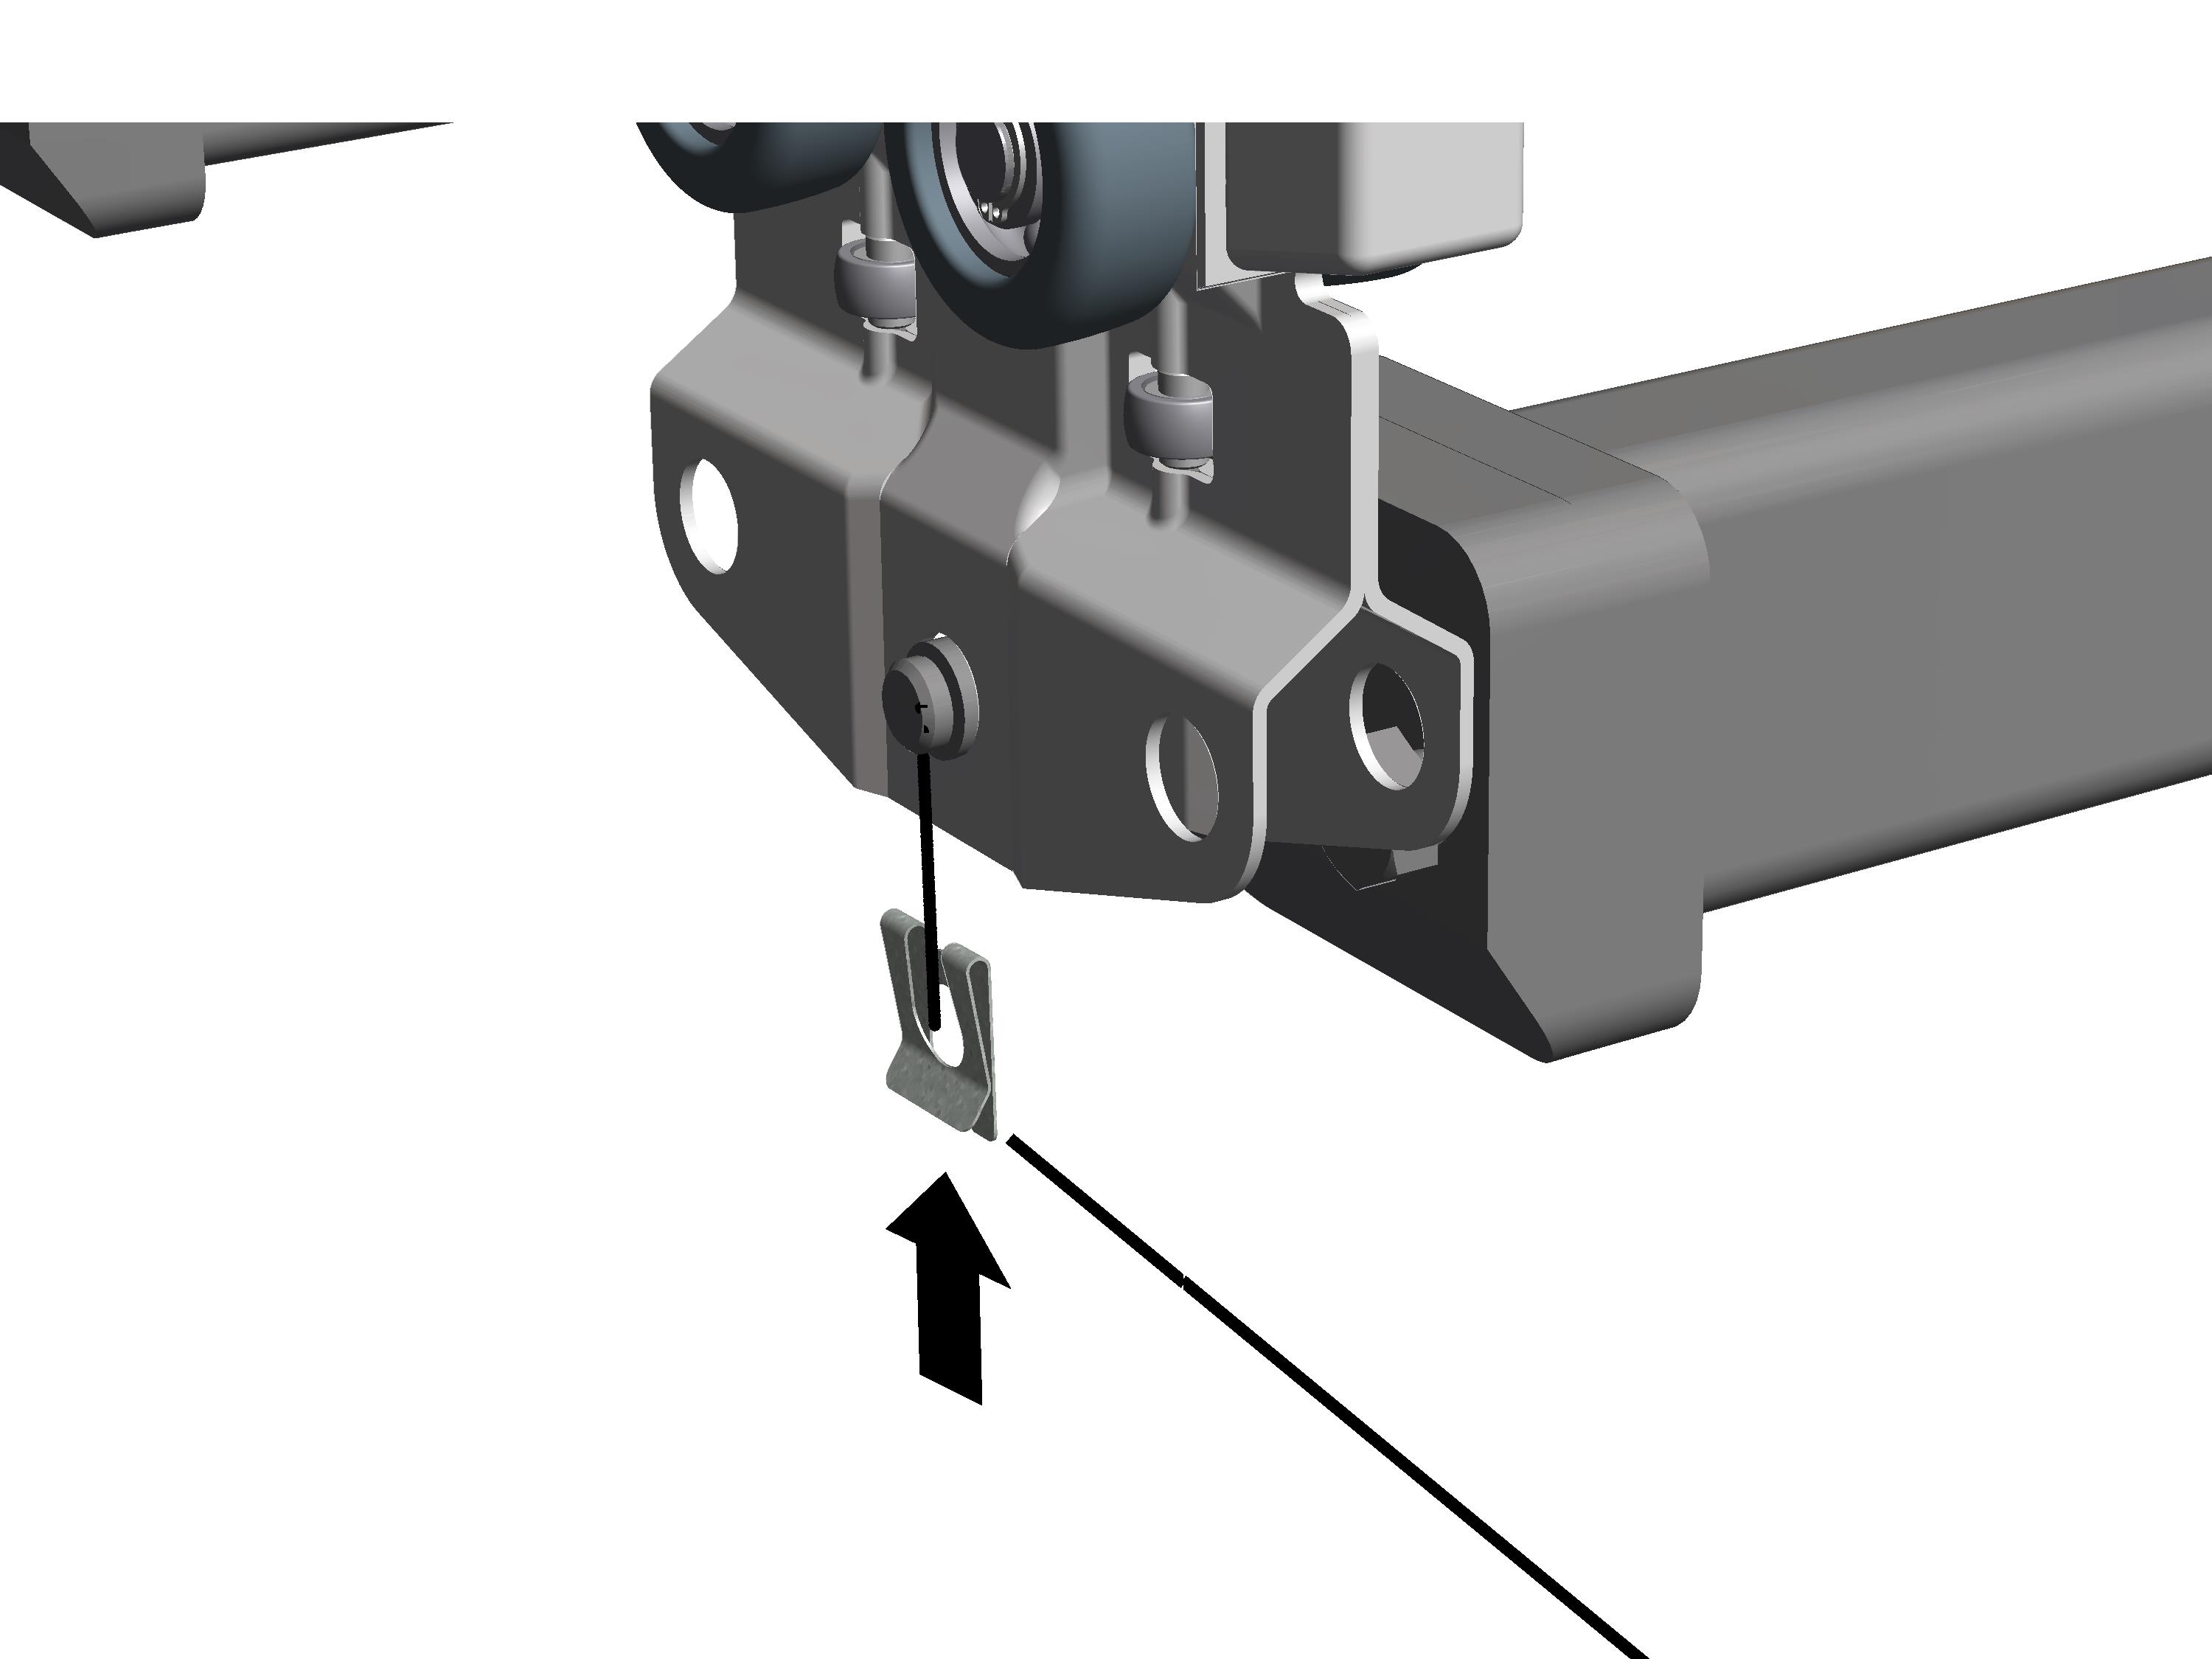
Insert bolts (4x) through
trolley and trolley eyelet.
Secure bolts with SL
safety clips (4x).
Only for jacked up trolley
frame with track gauge 700
Installing
trolleys
|
Trolley |
|
|

|
|
Trolley
eyelet |
|
Move the HB6 trolleys (4x)
over the trolley eyelets on the trolley frame.
 Insert bolts (4x) through
trolley and trolley eyelet.
Insert bolts (4x) through
trolley and trolley eyelet.
Secure bolts with SL
safety clips (4x).
Only with trolley frames
with normal overall height and track gauge 850
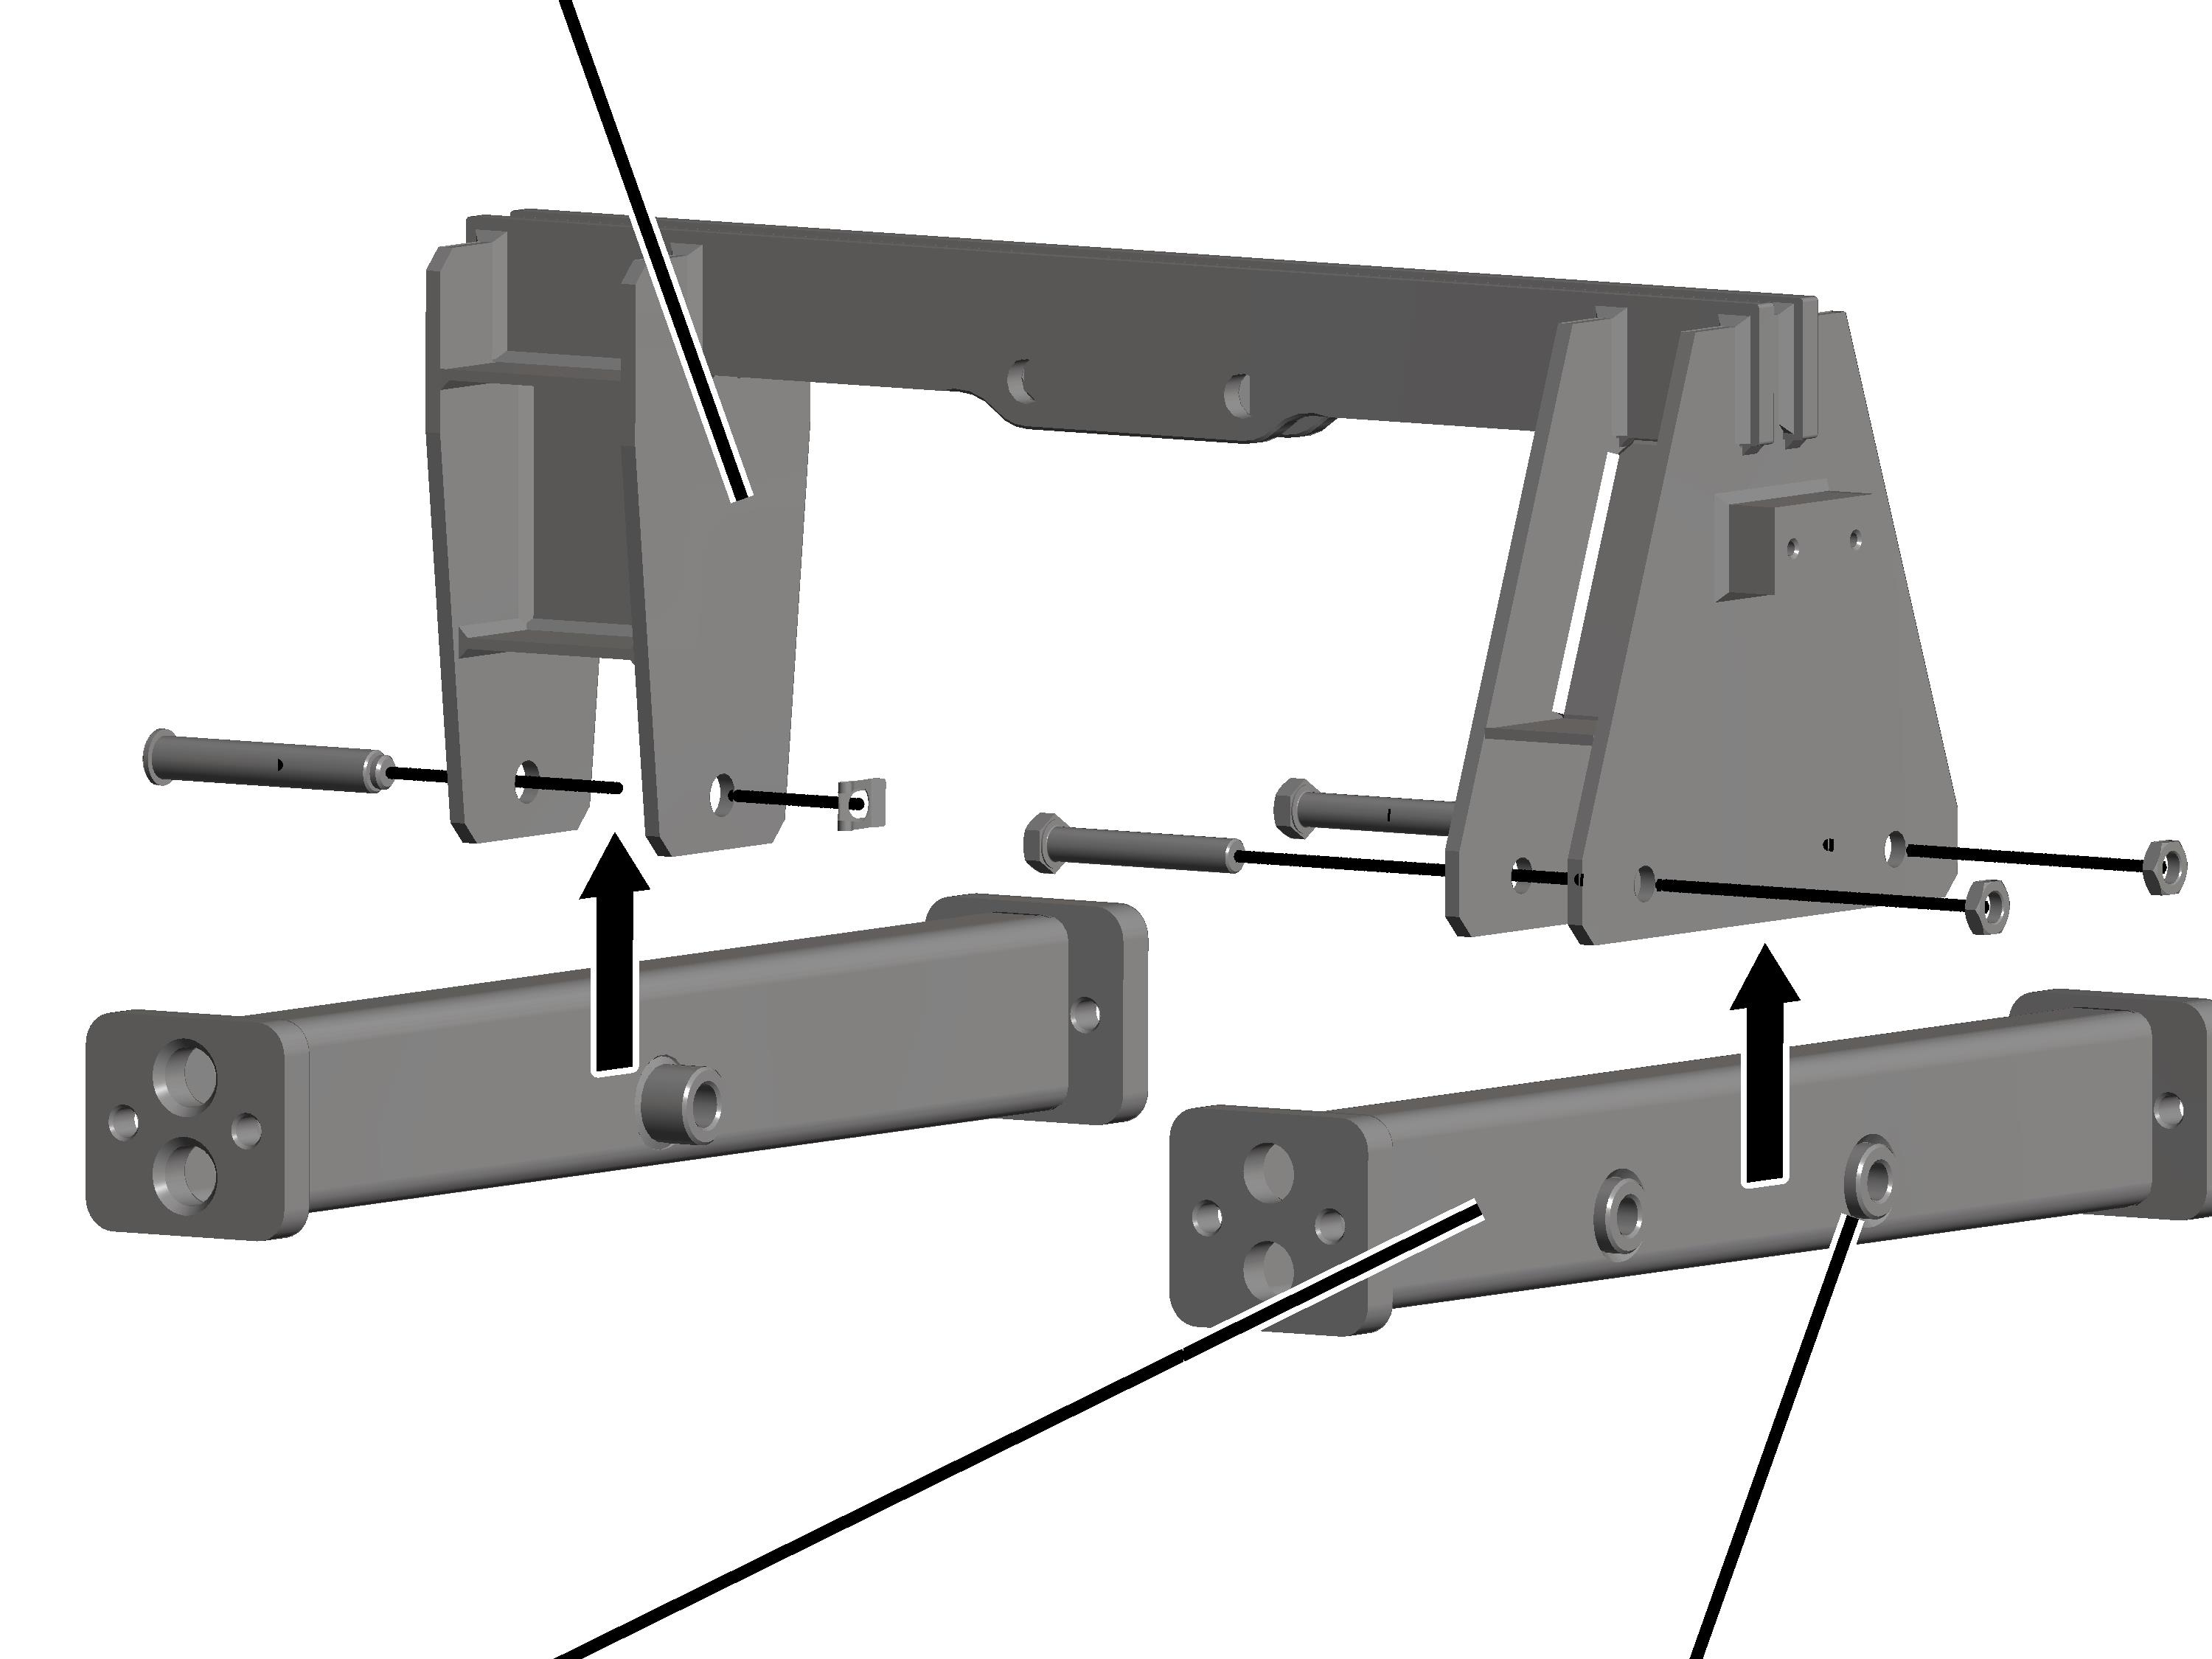
Installing the
trolley frame
|
Trolley
cross arm |
|
|
|
|
Support |
Drilled
hole facing down for HB150 and HB190
Drilled holes facing up for
HB240 |
|
|
|
Turn both beams so that
the drilled hole is in the required installation position:
─ For
HB150 and HB190: turn holes facing down.
─ For
HB240: turn holes facing up.
On the articulated side:
fasten the support with bolt and SL safety clip.
On the side without the
joint: fasten support with hexagon head screws M16x105 (2x), washers (4x) and
nuts M16 (2x). 250 Nm.
|
Axle
bracket |
|
|
|
Move the axle bracket into
the required installation position:
─ For
HB150: turn the axle bracket so the axle is on the top.
─ For
HB190 and HB240: turn the axle bracket so the axle is at the bottom.
Screw on the axle bracket
with the rib screw M16x55 (2x each). 70 Nm.
Installing
trolleys
|
|
|
Trolley |
Axle
bracket |
Insert the trolleys (4x)
on the axle bracket.
|
|
|
|
SL
safety clip |
Secure trolleys with SL
safety clips (4x).