The figures show the installation of a chain hoist on the trolley frame with track gauge 700 in normal overall height. The installation on other trolley frames does not essentially differ.
The chain hoist is now attached to the installed trolley frame.
|
|
The figures show the installation of a chain hoist on the trolley frame with track gauge 700 in normal overall height. The installation on other trolley frames does not essentially differ. |
|
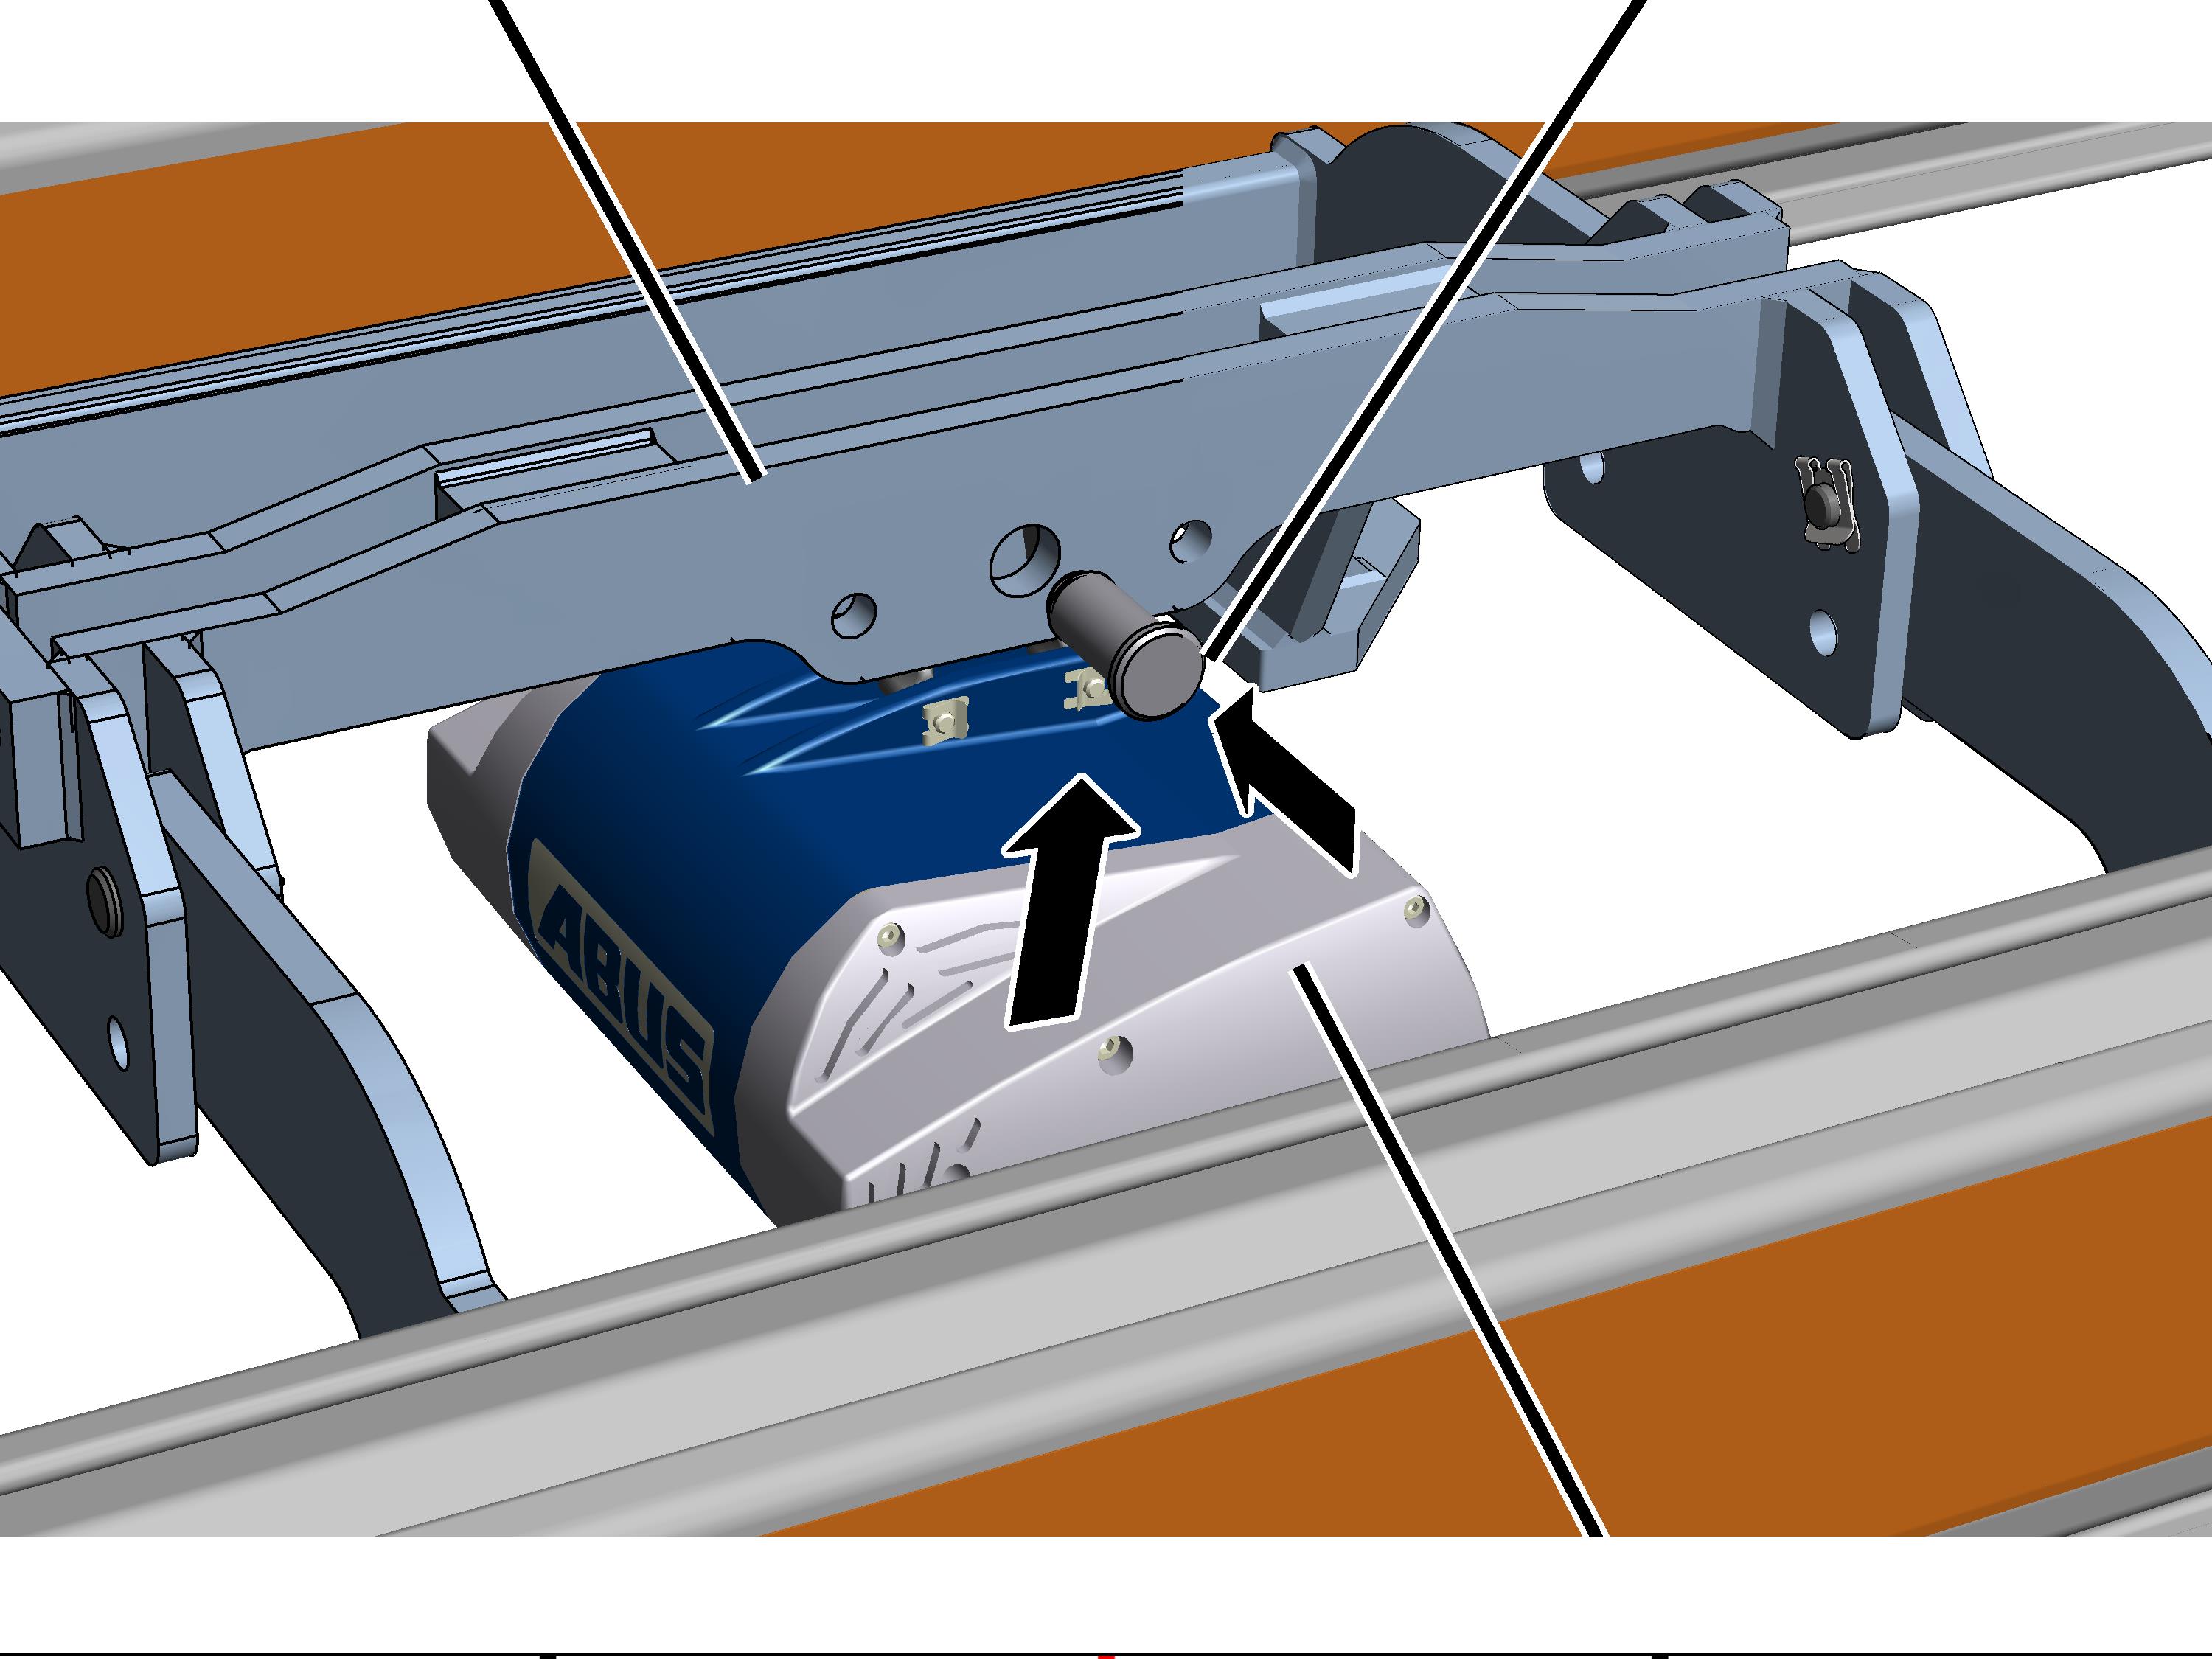
Trolley frame |
Bolt |
|
| |
|
|
ABUCompact chain hoist |
 Attach the chain hoist with the suspension
bracket under the trolley frame.
Attach the chain hoist with the suspension
bracket under the trolley frame.
Insert bolt (1x) through
trolley frame and suspension bracket on the chain hoist.
Secure bolt with SL safety
clips (1x).
See also the product manual for the chain hoist.
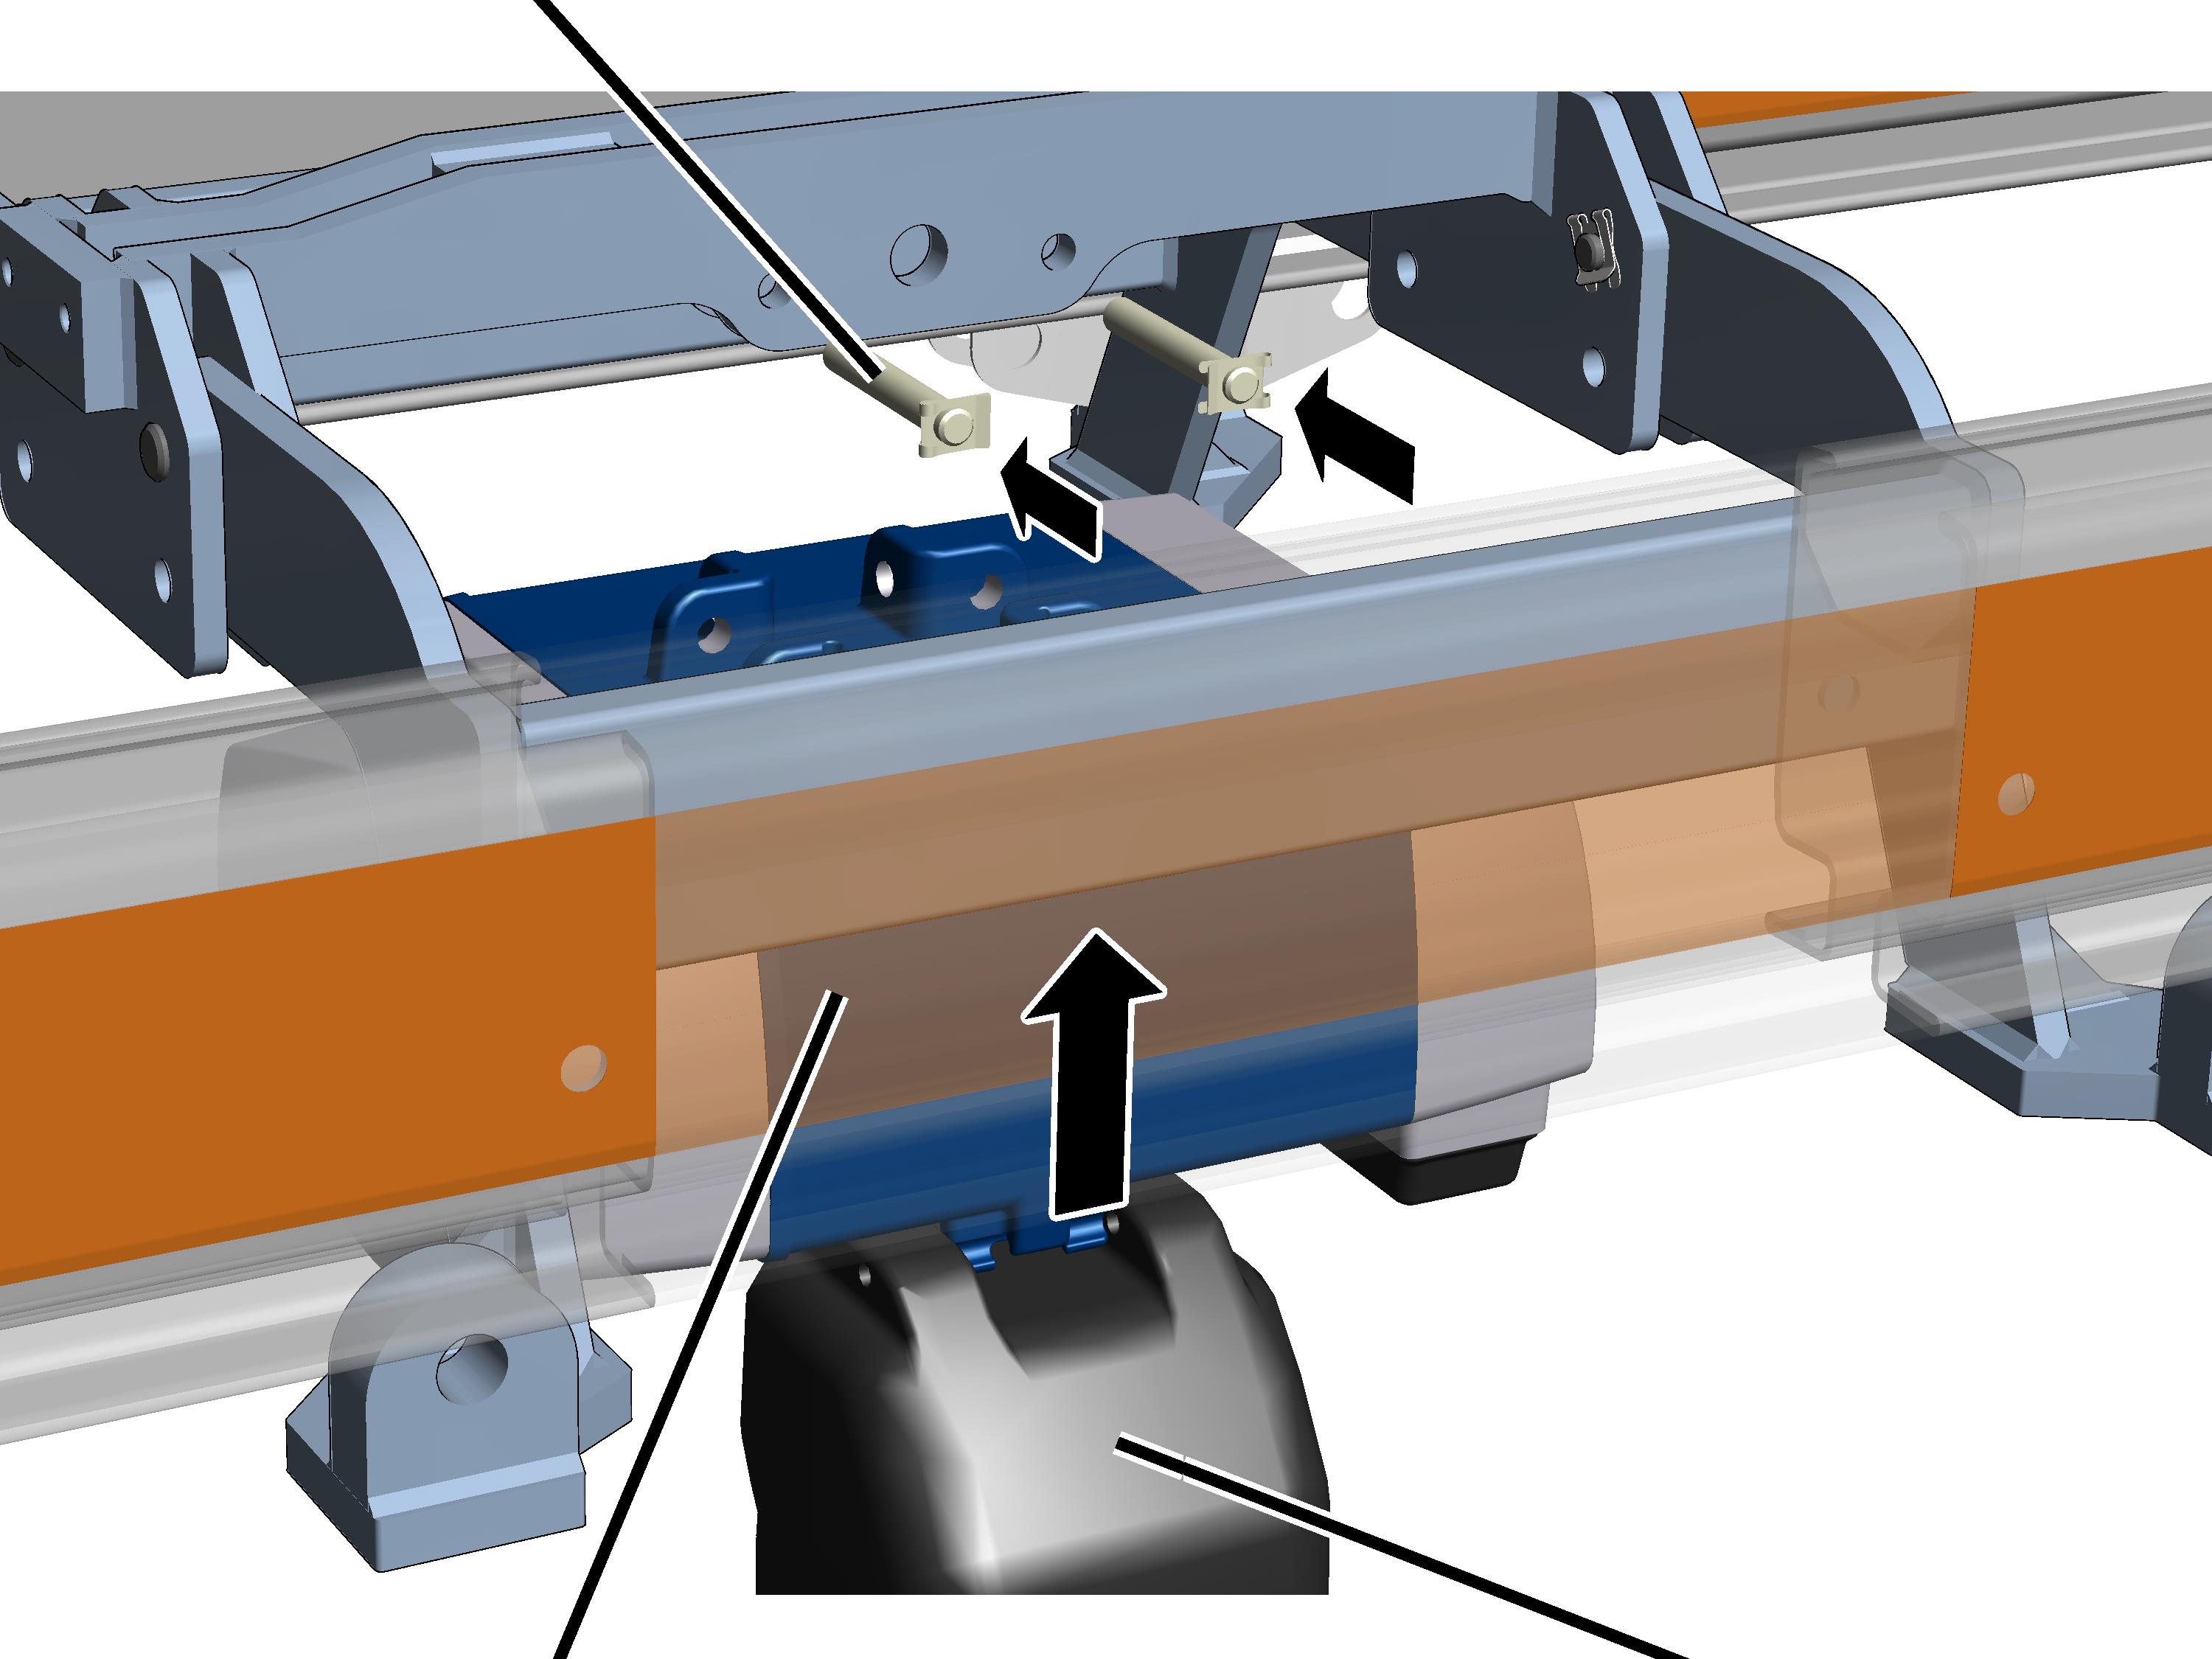
 Release SL safety clips
(2x).
Release SL safety clips
(2x).
Push out the bolts
(2x).
Remove suspension
bracket.
|
Bolt |
|
|
| |
|
Chain hoist |
Chain box |
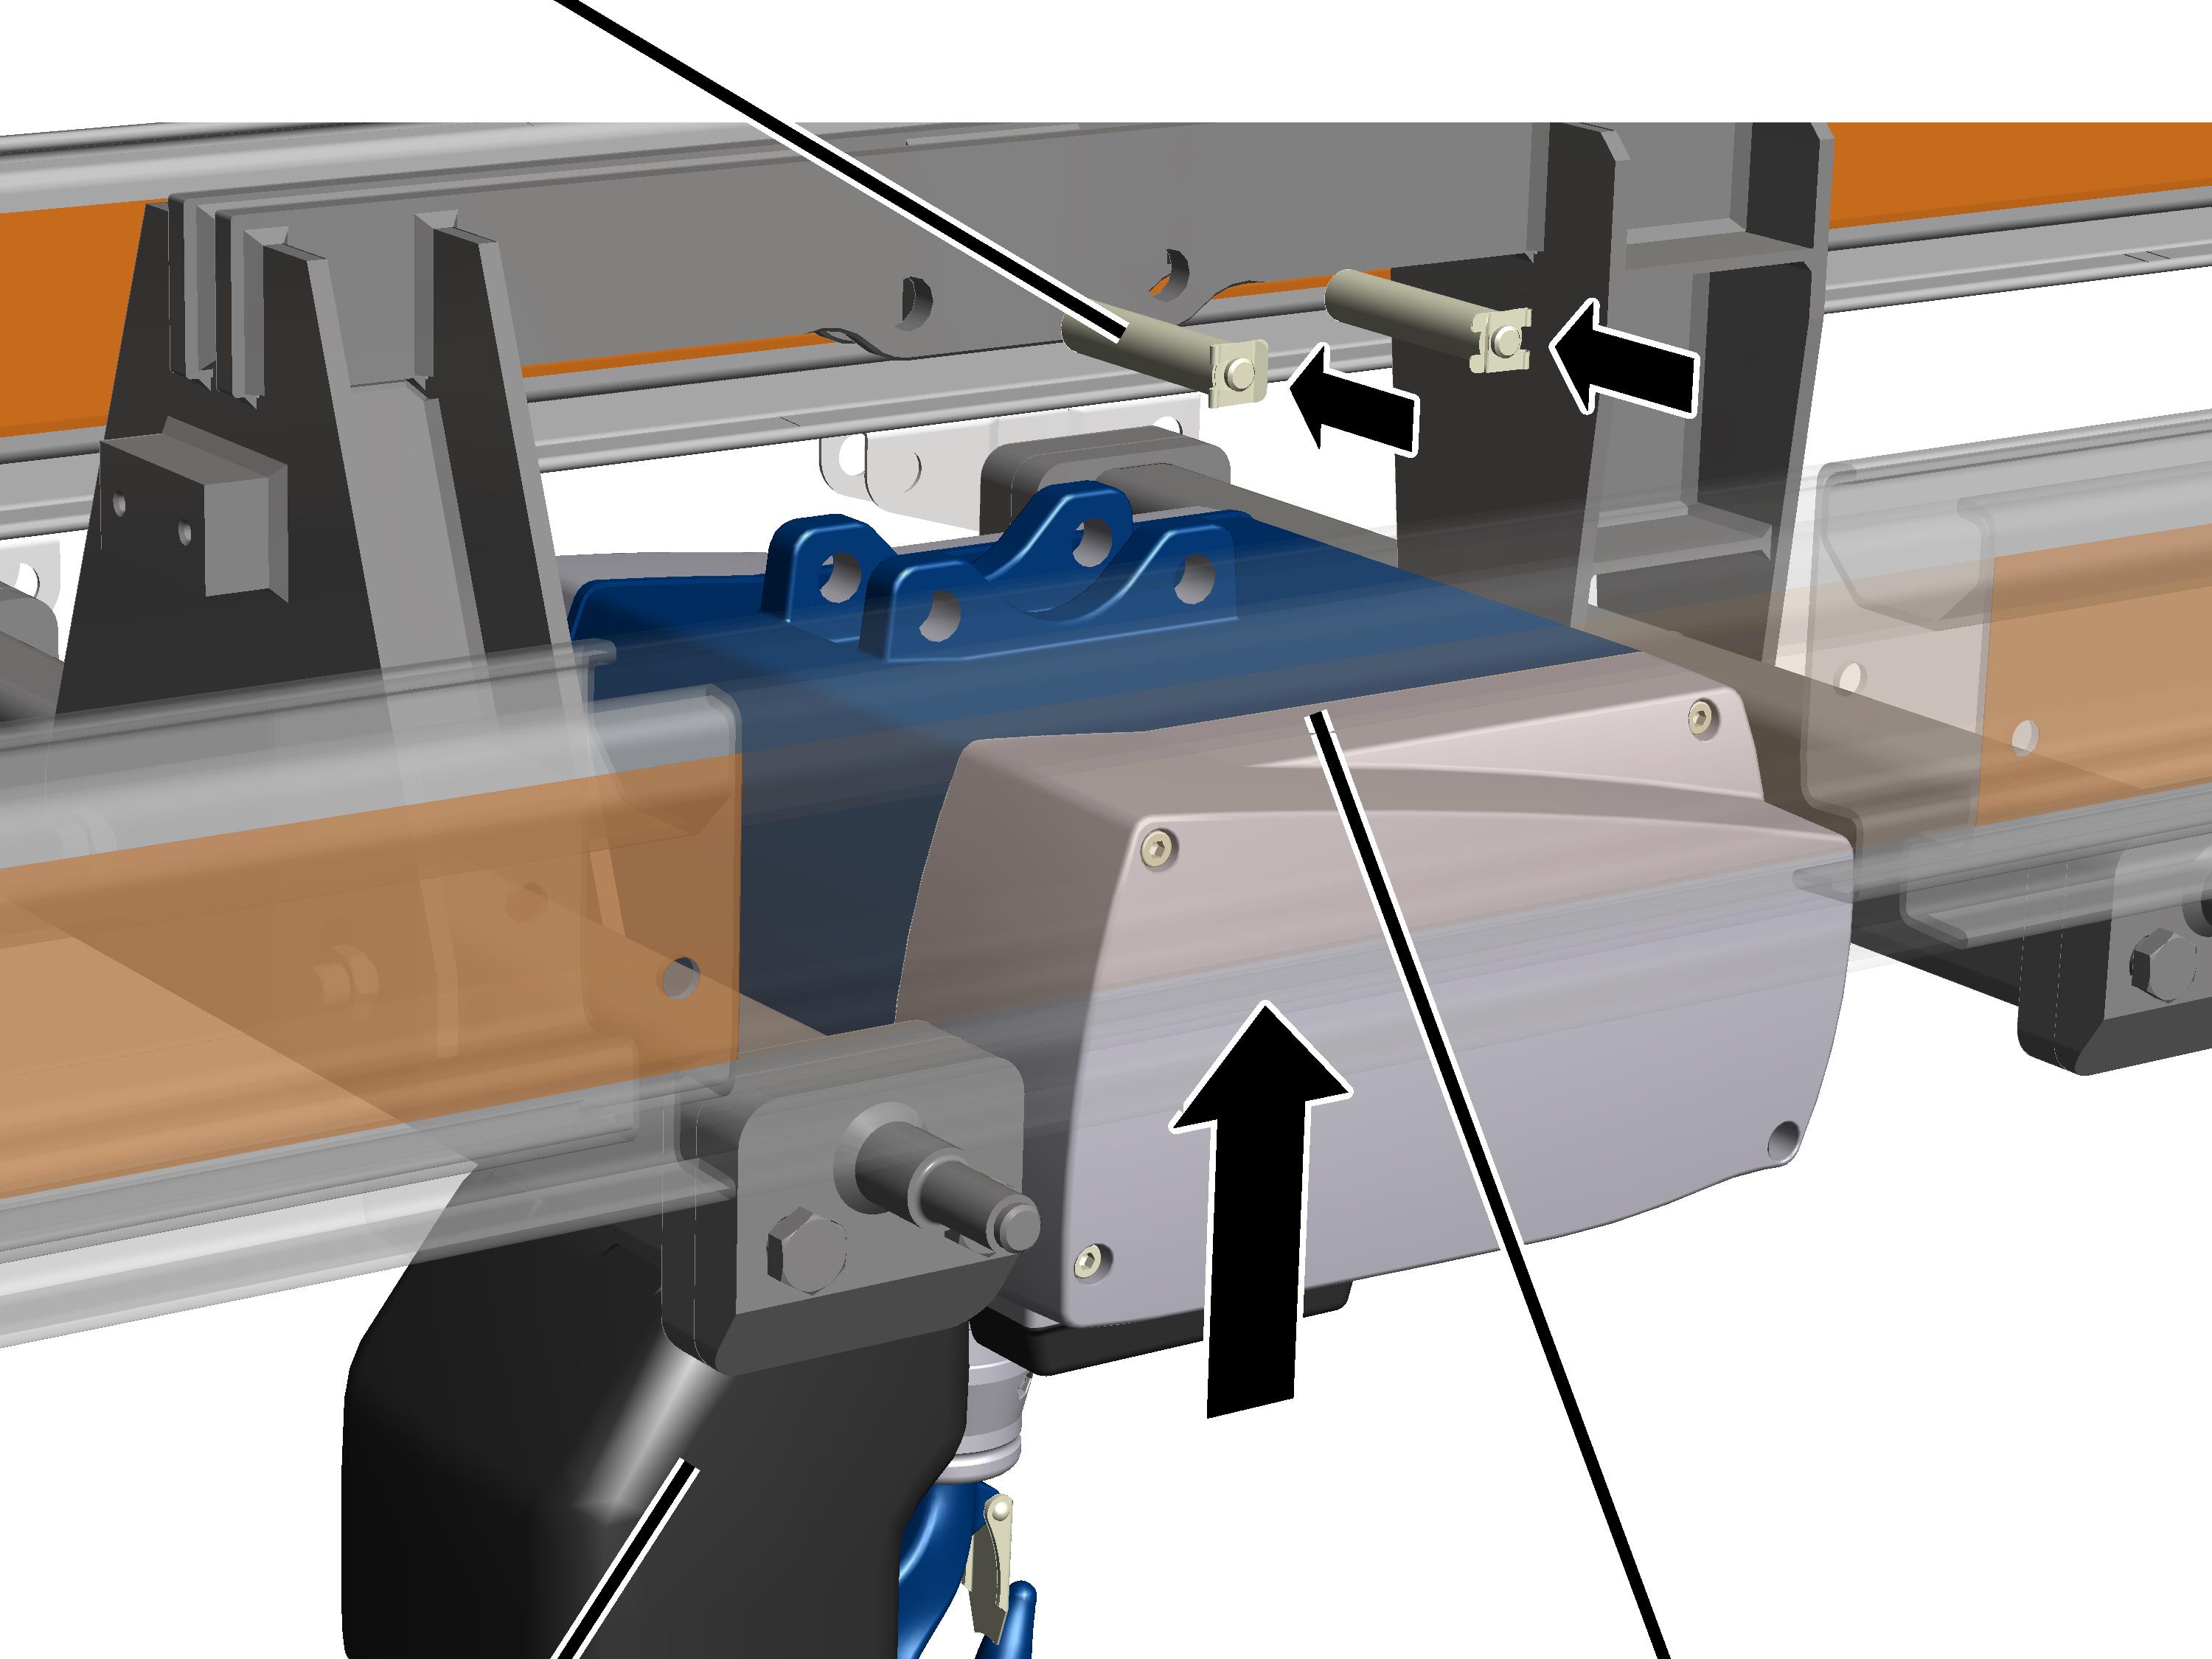
For ABURemote AC (smaller receiver mounted and connected directly on the chain hoist): turn the chain hoist so that the receiver lies on the opposite side of the trolley drive.
Attach the chain hoist without the
suspension bracket under the trolley frame.
Insert bolts (2x) through
trolley frame and suspension on the chain hoist.
Secure bolts with SL
safety clips (2x).
See also the product manual for the chain hoist.
Release SL safety clips
(2x).
Push out the bolts
(2x).
Remove suspension
bracket.
|
Bolt |
|
|
| |
|
Chain box |
Chain hoist |
Turn the chain hoist so
that it appears as shown in the figure (chain box positioned crosswise to HB
profile rail).
For ABURemote AC (smaller receiver mounted and connected directly on the chain hoist): turn the chain hoist so that the receiver lies on the opposite side of the trolley drive.
Attach the chain hoist
without the suspension bracket under the trolley frame.
Insert bolts (2x) through
trolley frame and suspension on the chain hoist.
Secure bolts with SL
safety clips (2x).