Only with electric trolley drive
|
|
The figures show the insertion of the trolley frame of track gauge 700 in normal overall height. The installation of the other trolley frames does not essentially differ. |

Preparing the HBF drive
|
HBF trolley |
Rubber buffer |
|
| |
|
Coupling bar |
Coupling on eyebolt |
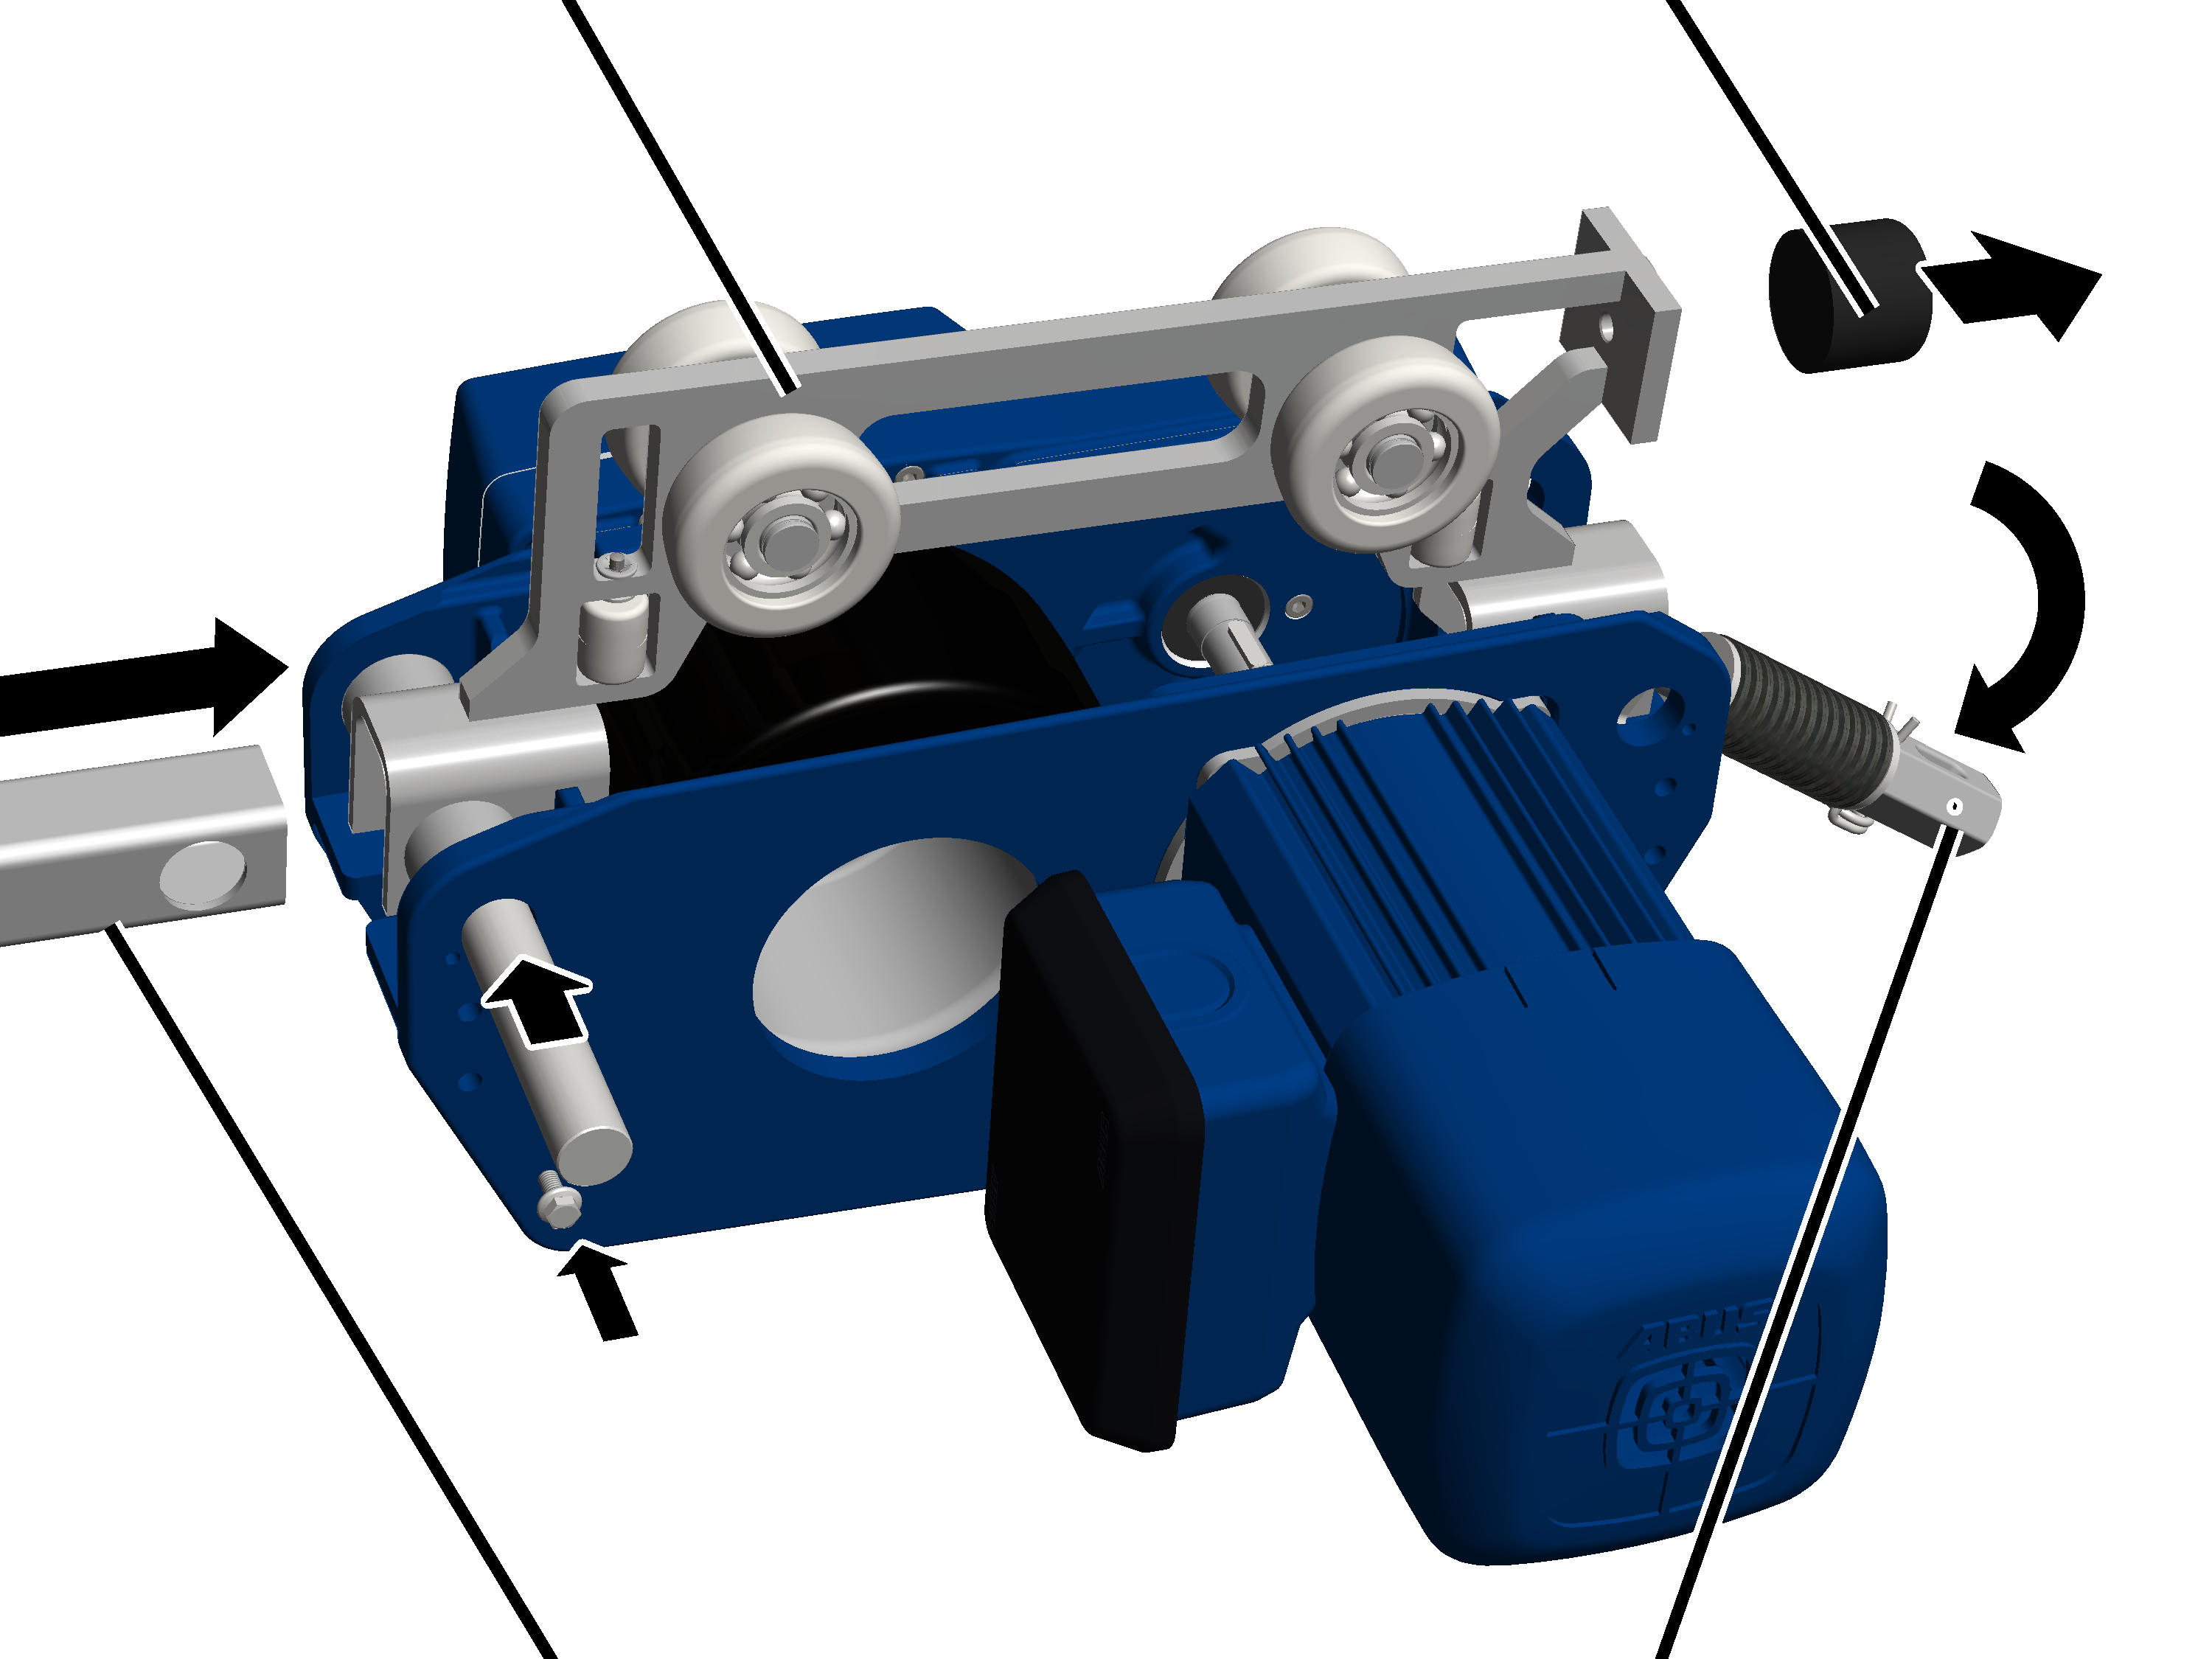
 Turn the HBF trolley and
HBF drive so that they appear as shown in the figure.
Turn the HBF trolley and
HBF drive so that they appear as shown in the figure.
The motor must face outward in the installed state, not inward into the trolley frame.
Push the coupling bar
between the fork part from the front.
Push the bolt laterally through the HBF drive, the
bushes, the fork part and the coupling bar.
Screw the rib screw M5x10
(2x) in next to the bolt. 11 Nm.
● The bolt is fixed in place from both sides by the rib screw.
Unscrew the rubber
buffer.
Unscrew the coupling from the eyebolt until it is
only a few turns from the end.
● This allows the eyebolt to be suspended without counter-pressure from the plate springs.
Hook the eyebolt in the
recess on the HBF drive. The plate spring pack then goes under the recess on the
HBF drive.
Inserting the trolley frame and HBF drive
|
Trolley frame |
|
|
| |
|
HBF trolley |
Trolley |

The HB profile rails on
which the HBF trolley drive is to be installed is specified in the planning
documents.
Observe the occupational
health and safety requirements and lift the trolley frame.
Push the trolley frame
into the HB profile rail until two of the trolleys are completely inserted in
the HB profile rail.
Push the HBF trolley with
pre-assembled HBF drive on the intended side into the HB profile rail.
Push the trolley frame
completely into the HB profile rail.
Fixing the HBF drive
|
Bolt |
|
|
| |
|
|
Spacer bracket |
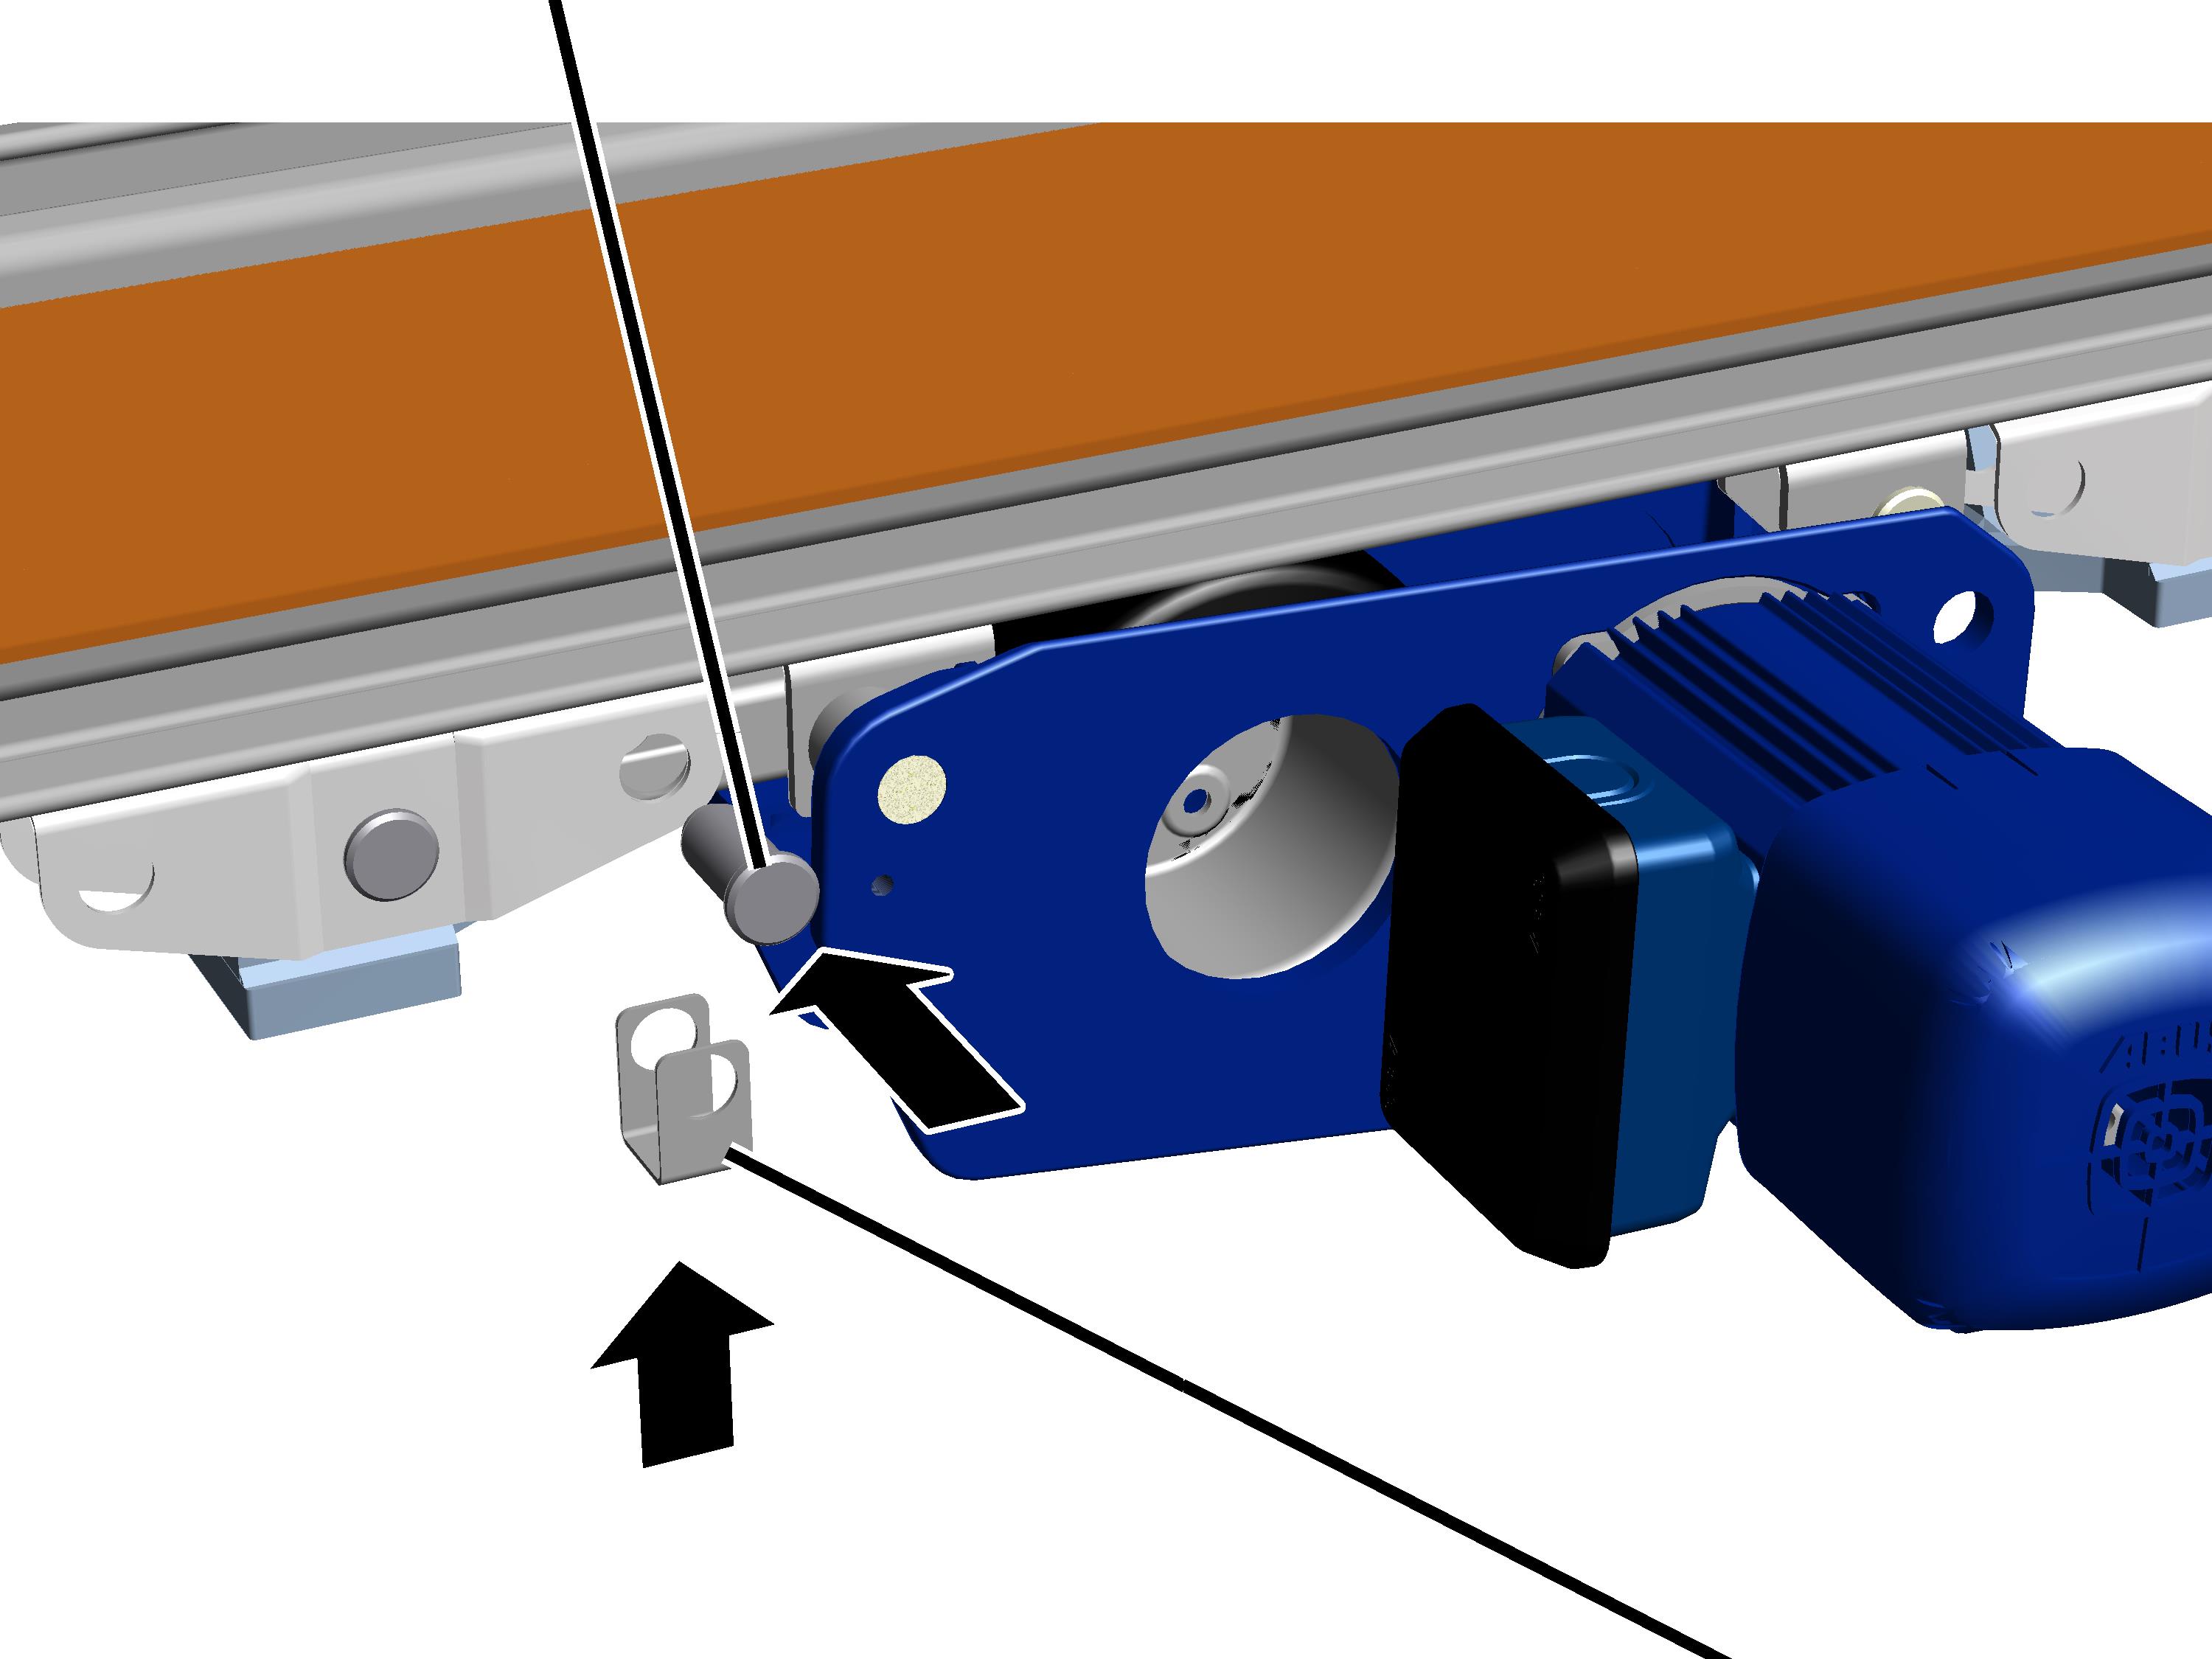
Insert a spacer bracket between trolley and coupling
rod.
Insert bolt through
trolley and coupling bar.
Secure bolt with SL safety
clip.
The plate springs serve in setting the pressure with which the friction wheel presses the HBF drive against the HB profile rail.
|
|
|
Plate springs |
|
|
| |
|
|
|
Coupling |
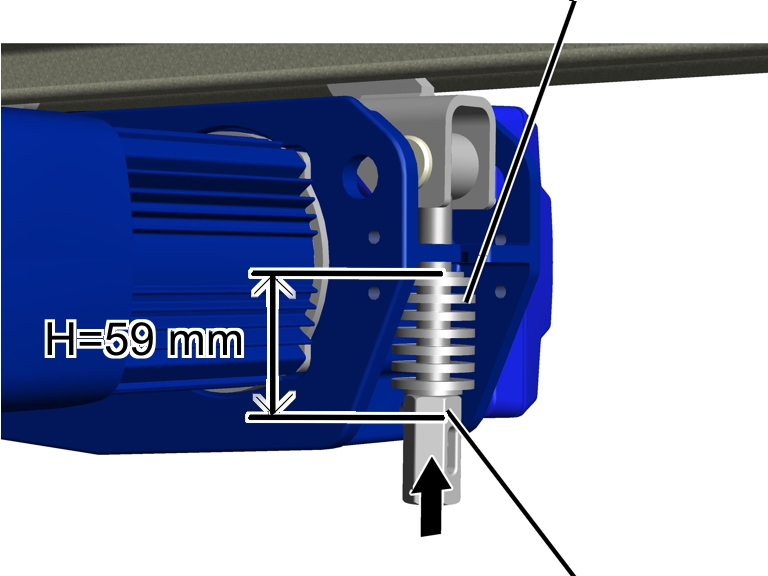
Turn the coupling until
the plate springs (including the upper and lower discs) are H = 59 mm in
length.
Secure coupling with
spring cotter.
● The friction wheel now presses hard enough against the HB profile rail.