Only with wall mounting using weld-on plates
Preparing the anchor plates
|
Moulded anchor plate |
Supporting structure |
|
| |
|
Grinder |
|
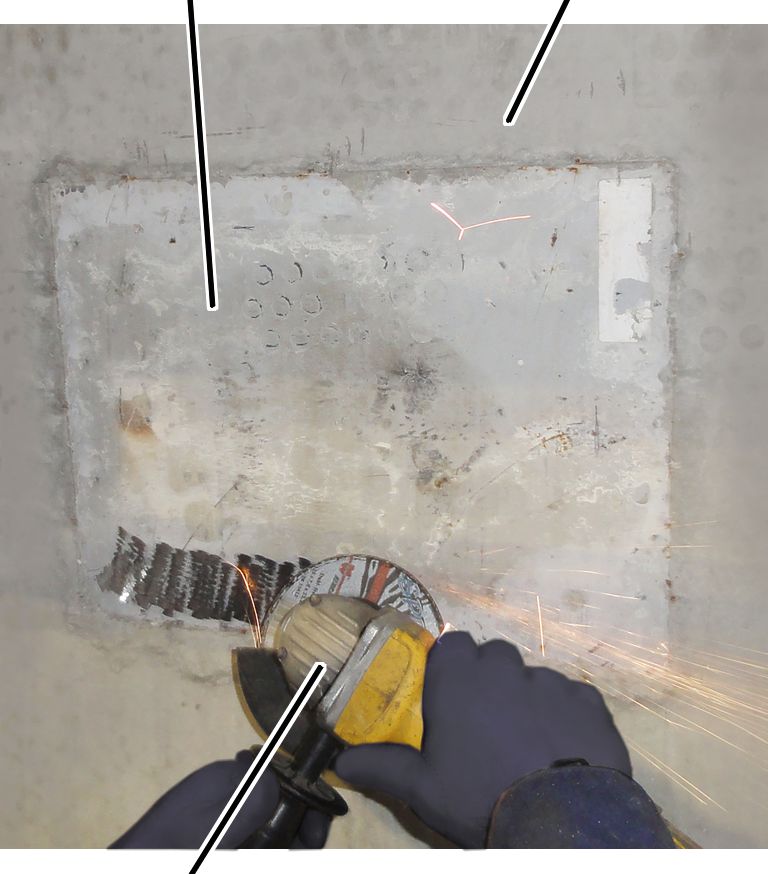
 Grind the top and bottom anchor
plates with a grinder and clean them prior to welding.
Grind the top and bottom anchor
plates with a grinder and clean them prior to welding.
● The anchor plates must be free of dirt, rust, scaling, paint, grease and oil.
Marking the anchor plates
|
Upper anchor plate |
Centre
|
|
| |
|
Lower anchor plate |
Centre of anchor plate |

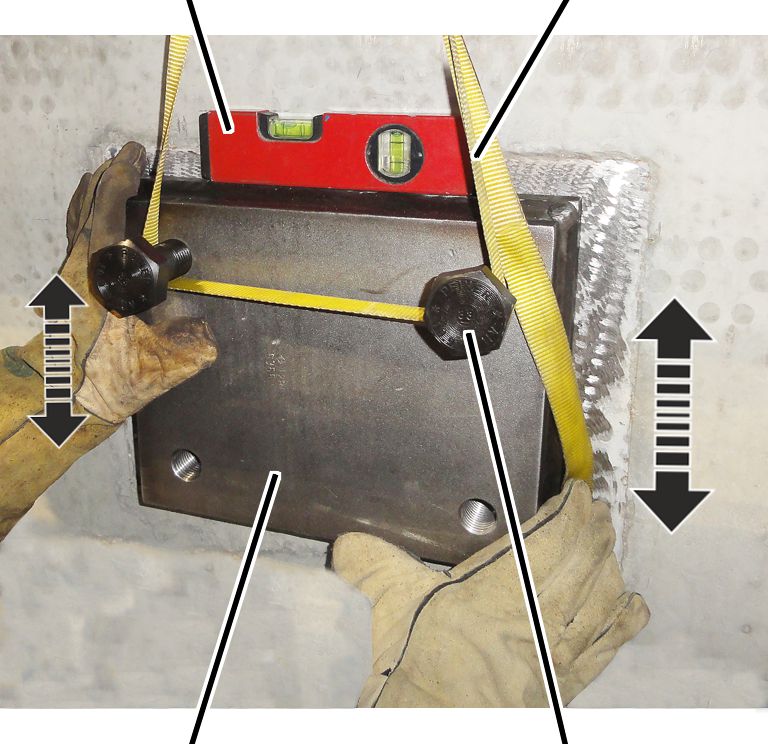
 Using a spirit level, compare
the anchor plates to the crane drawing and whether they are plumb to each
other.
Using a spirit level, compare
the anchor plates to the crane drawing and whether they are plumb to each
other.
Mark the centre of the upper
anchor plate.
Mark the centre or plumb line of
the lower anchor plate.
Mark the centre of the upper
edge of the anchor plates.
Welding on the weld-on plates
|
Spirit level |
Safety belt |
|
| |
|
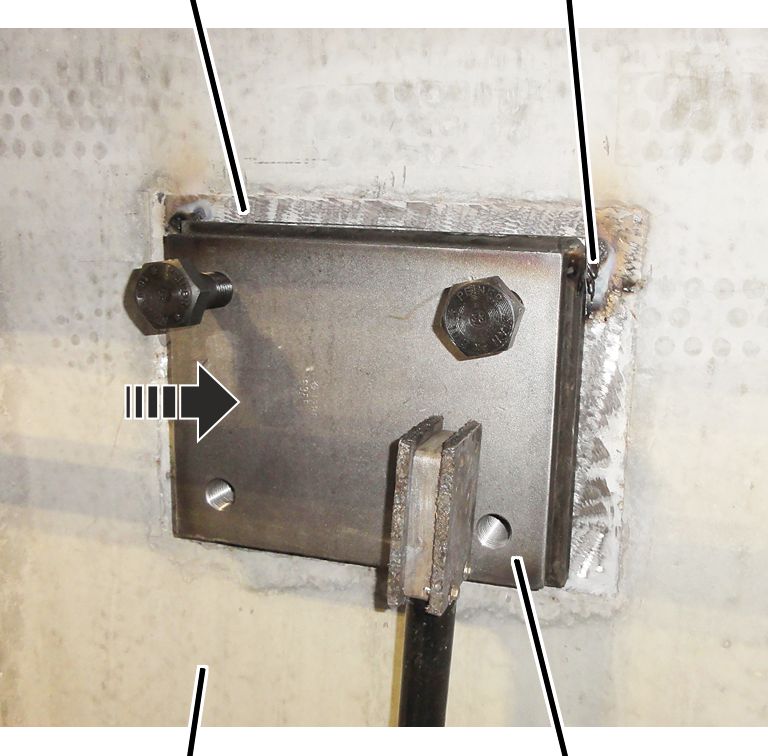
Weld-on plate |
Hexagon head screw |
Screw the hexagon head screws
(2x) slightly more than halfway into the top weld-on plate.
Fasten a suitable securing tool
(e.g. safety belt) to the screwed-in hexagon head screws.
Position the weld-on plate in
front of the upper anchor plate as per the markings using a spirit level.
Tack weld the weld-on plate onto
the anchor plate.
|
Anchor plate |
Weld points |
|
| |
|
Supporting structure |
Lower weld-on plate |
Screw the hexagon head screws
(2x) slightly more than halfway into the bottom weld-on plate.
Fasten a suitable securing tool
(e.g. safety belt) to the screwed-in hexagon head screws.
Position the weld-on plate in
front of the lower anchor plate as per the markings using a spirit level.
Fasten the weld-on plate onto
the anchor plate.
Check the position of both
weld-on plates and correct if necessary.
Being positioned perpendicular to each other is important as this is crucial for the slewing process.
Weld on the weld-on plates
fully.
Only have welding work done by
companies certified as per EN 1090 EXC-3.
Monitor welded joints according
to this standard.
Design welded joints to at least
quality class B of DIN EN ISO 5817.
Weld seam cross sections depending on size:
|
Size |
Weld seam cross section [mm] |
|
WL 35 |
4.5 |
|
WL 50 |
5.0 |
|
WL 60 |
6.0 |
|
WL 70 |
7.5 |