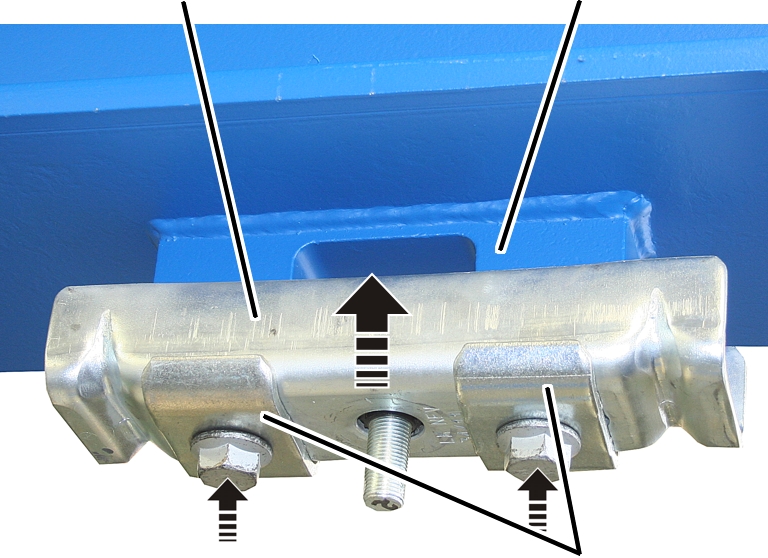
Threaded rod
Articulated girder
|
| |
|
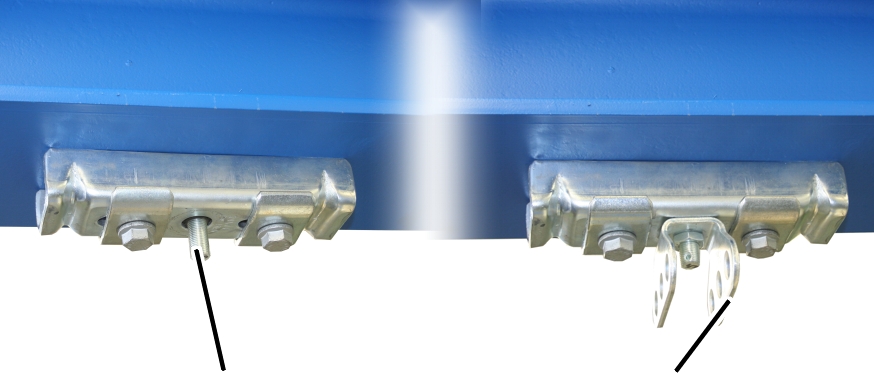
Threaded rod |
Articulated girder |
|
|
The figures show the installation of a ceiling-mounted bracket 2LP/M16 or M20 with projecting threaded rod (with normal suspension, short suspension and normal stiffener). The installation of a ceiling-mounted bracket 2LP/M16 with bolted-on articulated girder (with normal stiffener, inclined suspension, inclined stiffener and V-suspension) does not differ significantly from this. |
|
|
The figures show the installation of a ceiling-mounted bracket 2LP/M16 with bolted-on articulated girder. The installation of ceiling-mounted bracket 2LP/M20 does not essentially differ. |
|
|
The installation of the ceiling-mounted bracket 4LP/M20 is described in the product manual "Installing the ceiling-mounted bracket 4LP/M20 and craneway suspension M20". |
The firm contracting the specialist welding company is responsible for the selection and the proper qualifications of the welding company.
|
|
Danger to persons! Persons can be injured if the welding work is performed incorrectly. If ABUS company personnel are not employed to perform the test, it is the end user's responsibility to ensure that adequately qualified persons test the installation. |
Before the welding work can be carried out:
─ A welding supervisor (e.g. of a specialist welding company) must create a set of instructions for the welding work.
─ These welding instructions are used by specialist welding staff as the basis for all welding work.
─ In Europe: the welding supervisor and welding company must have a certification according to DIN EN 1090 EXC-3.
On every ceiling-mounted bracket 2LP/M16 or M20:
|
|
Where and at what suspension intervals the ceiling-mounted brackets are fixed to the supporting structure is specified in the planning documents. |
The specified dimensions, positions and clearances must be followed exactly.
|
| |
|
|
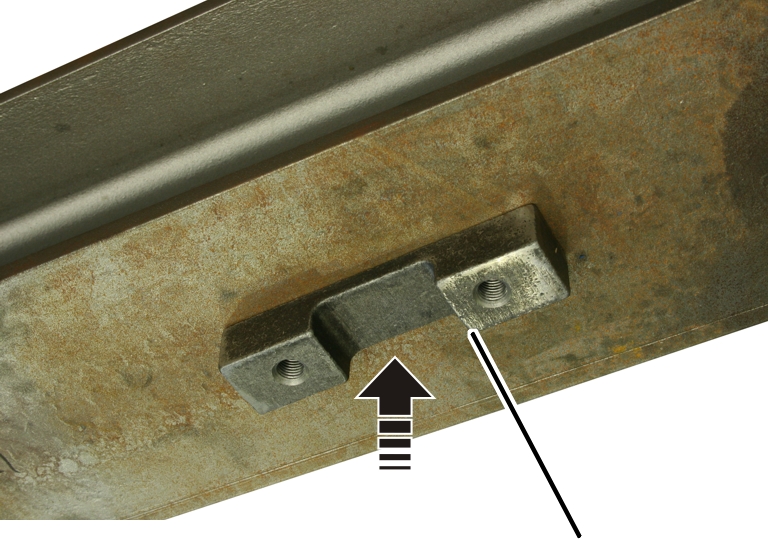
Weld-on block |
|
Ceiling-mounted bracket centred in relation to HB profile rail |
Ceiling-mounted bracket perpendicular to HB profile rail |
|
| |
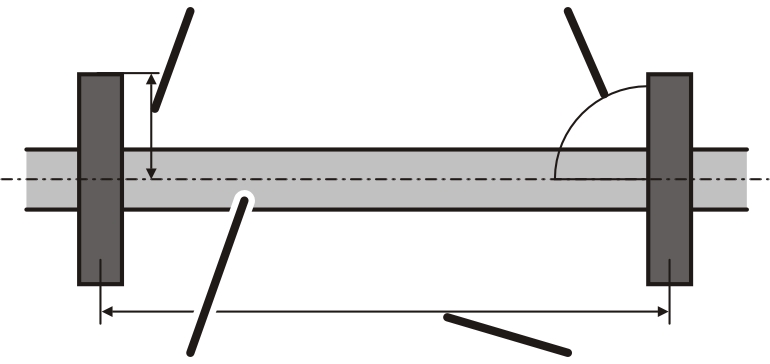
|
Later-installed HB profile rail |
Suspension distance LB |
 Align the weld-on block so that it is
lengthwise exactly perpendicular to the later-installed HB profile rail.
Align the weld-on block so that it is
lengthwise exactly perpendicular to the later-installed HB profile rail.
Position the weld-on block so that it
is exactly centred in relation to the later-installed HB profile rail.
This is necessary so that the HB profile rail can later be aligned.
|
| |
|
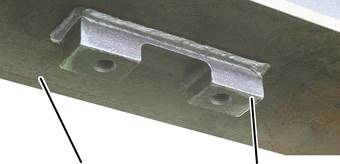
Supporting structure |
Weld-on block |
 Weld on the block with a
circumferential fillet weld (a = 4 mm).
Weld on the block with a
circumferential fillet weld (a = 4 mm).
─ Material of weld-on block: S 235 JR.
─ Quality of weld seams: quality class B according to DIN EN ISO 5817.
Paint the weld-on block and the entire
supporting structure (or provide another means of protection against rust).
This section only applies to the ceiling-mounted bracket 2LP/M16 with bolted-on articulated girder (with normal stiffener, inclined suspension, inclined stiffener and V-suspension)
On every ceiling-mounted bracket 2LP/M16 with articulated girder:
The articulated girders can be mounted lengthwise or crosswise to the ceiling-mounted bracket 4LP/M20 as appropriate for the alignment of the supporting structure.
|
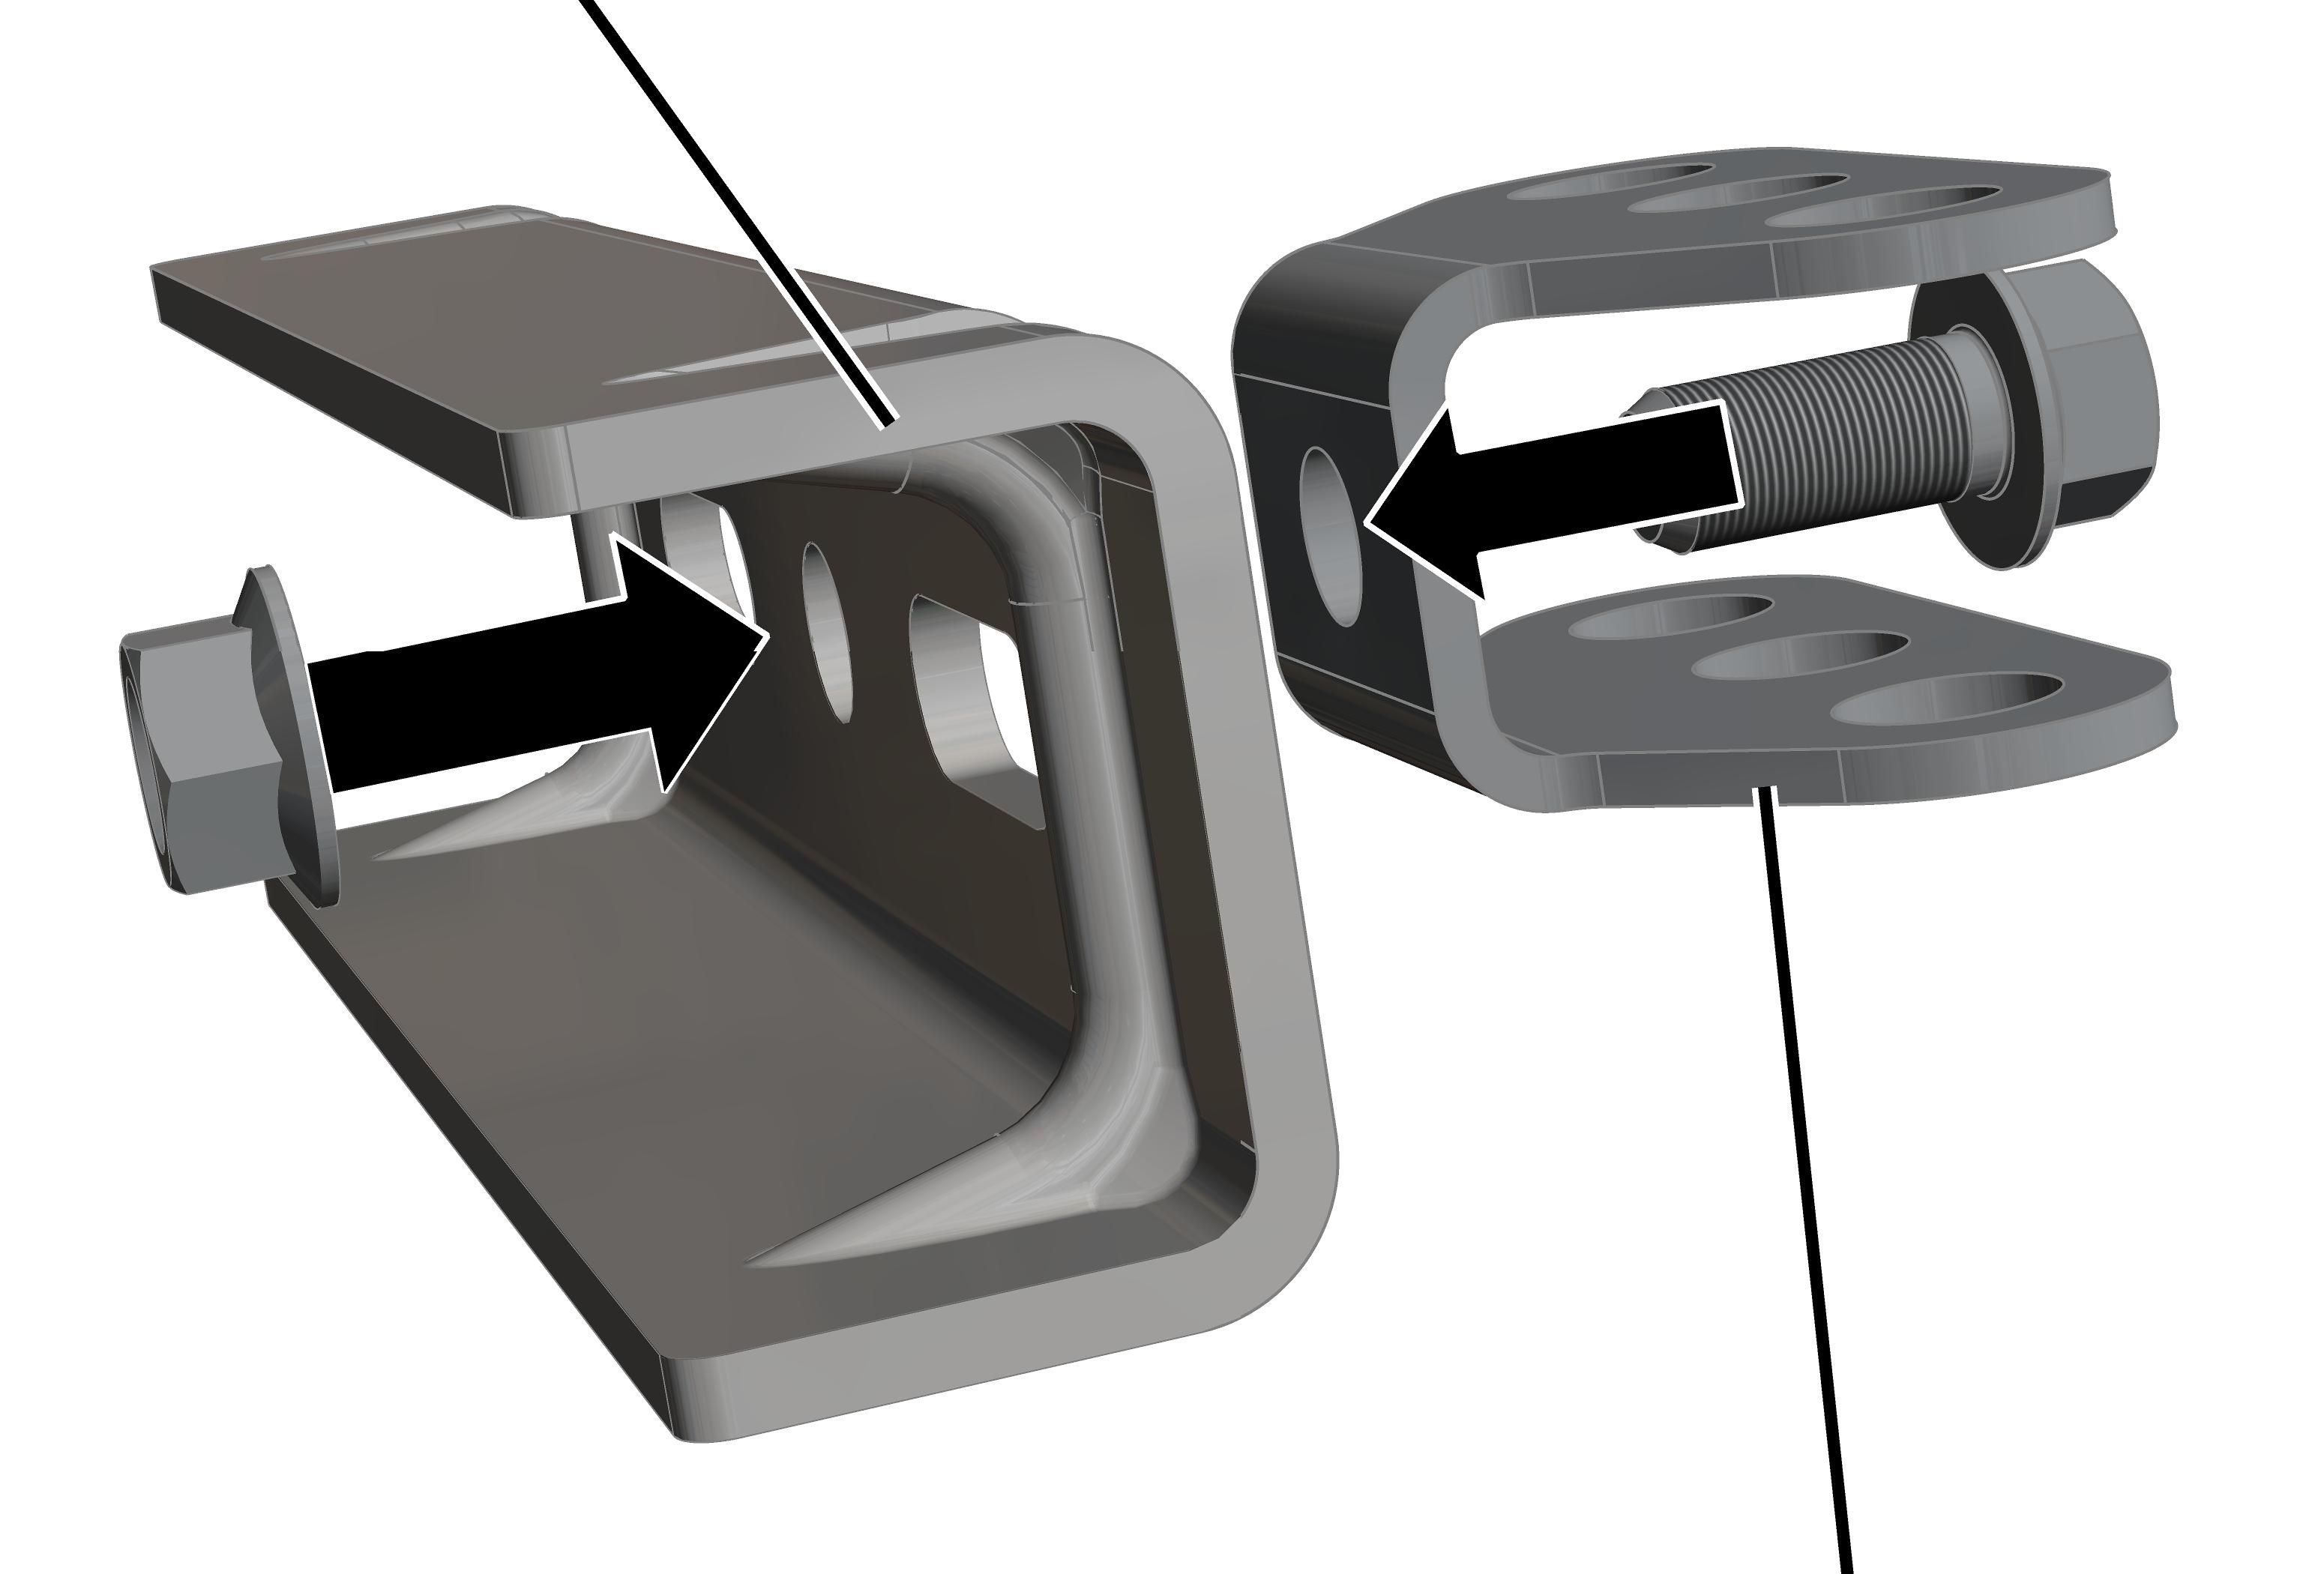
Ceiling-mounted bracket |
|
|
| |
|
|
Articulated girder |
Insert M16x35 rib screw through
articulated girder.
Insert articulated girder with rib
screw in ceiling-mounted bracket.
Screw the M16 rib nut loosely onto the
rib screw from the back.
Shift the articulated girder
lengthwise or crosswise to the ceiling-mounted bracket as necessary.
Screw the rib nut on. 300 Nm.
On every ceiling-mounted bracket 2LP/M16 or M20:
|
Ceiling-mounted bracket |
Weld-on block |
|
| |
|
|
Clamping plate |
Hold the ceilng-mounted bracket under
the weld-on block.
Insert clamping plates (2x) on M16x45
rib screws (2x).
Screw in rib screws with clamping
plates.
Screw in the rib screws.
200 Nm.