Now the profile
connections are mounted in the profile head. The profile connections are used to
later hang the crane track on the suspensions.
|

|
The figures show the installation of a steel HB
profile rail of size HB150S. The installation of larger or smaller HB
profile rails or aluminium HB profile rails does not differ significantly
from this. |
|

|
This product manual describes the installing of
profile connections for M16 suspensions. To install profile connections
for M20 suspensions, see "Installing the ceiling-mounted bracket 4LP/M20
and craneway suspension M20". |
For every suspension:
 Refer to the planning documents for the points intended for the
profile connections. The specified dimensions, positions and clearances must be
followed exactly.
Refer to the planning documents for the points intended for the
profile connections. The specified dimensions, positions and clearances must be
followed exactly.
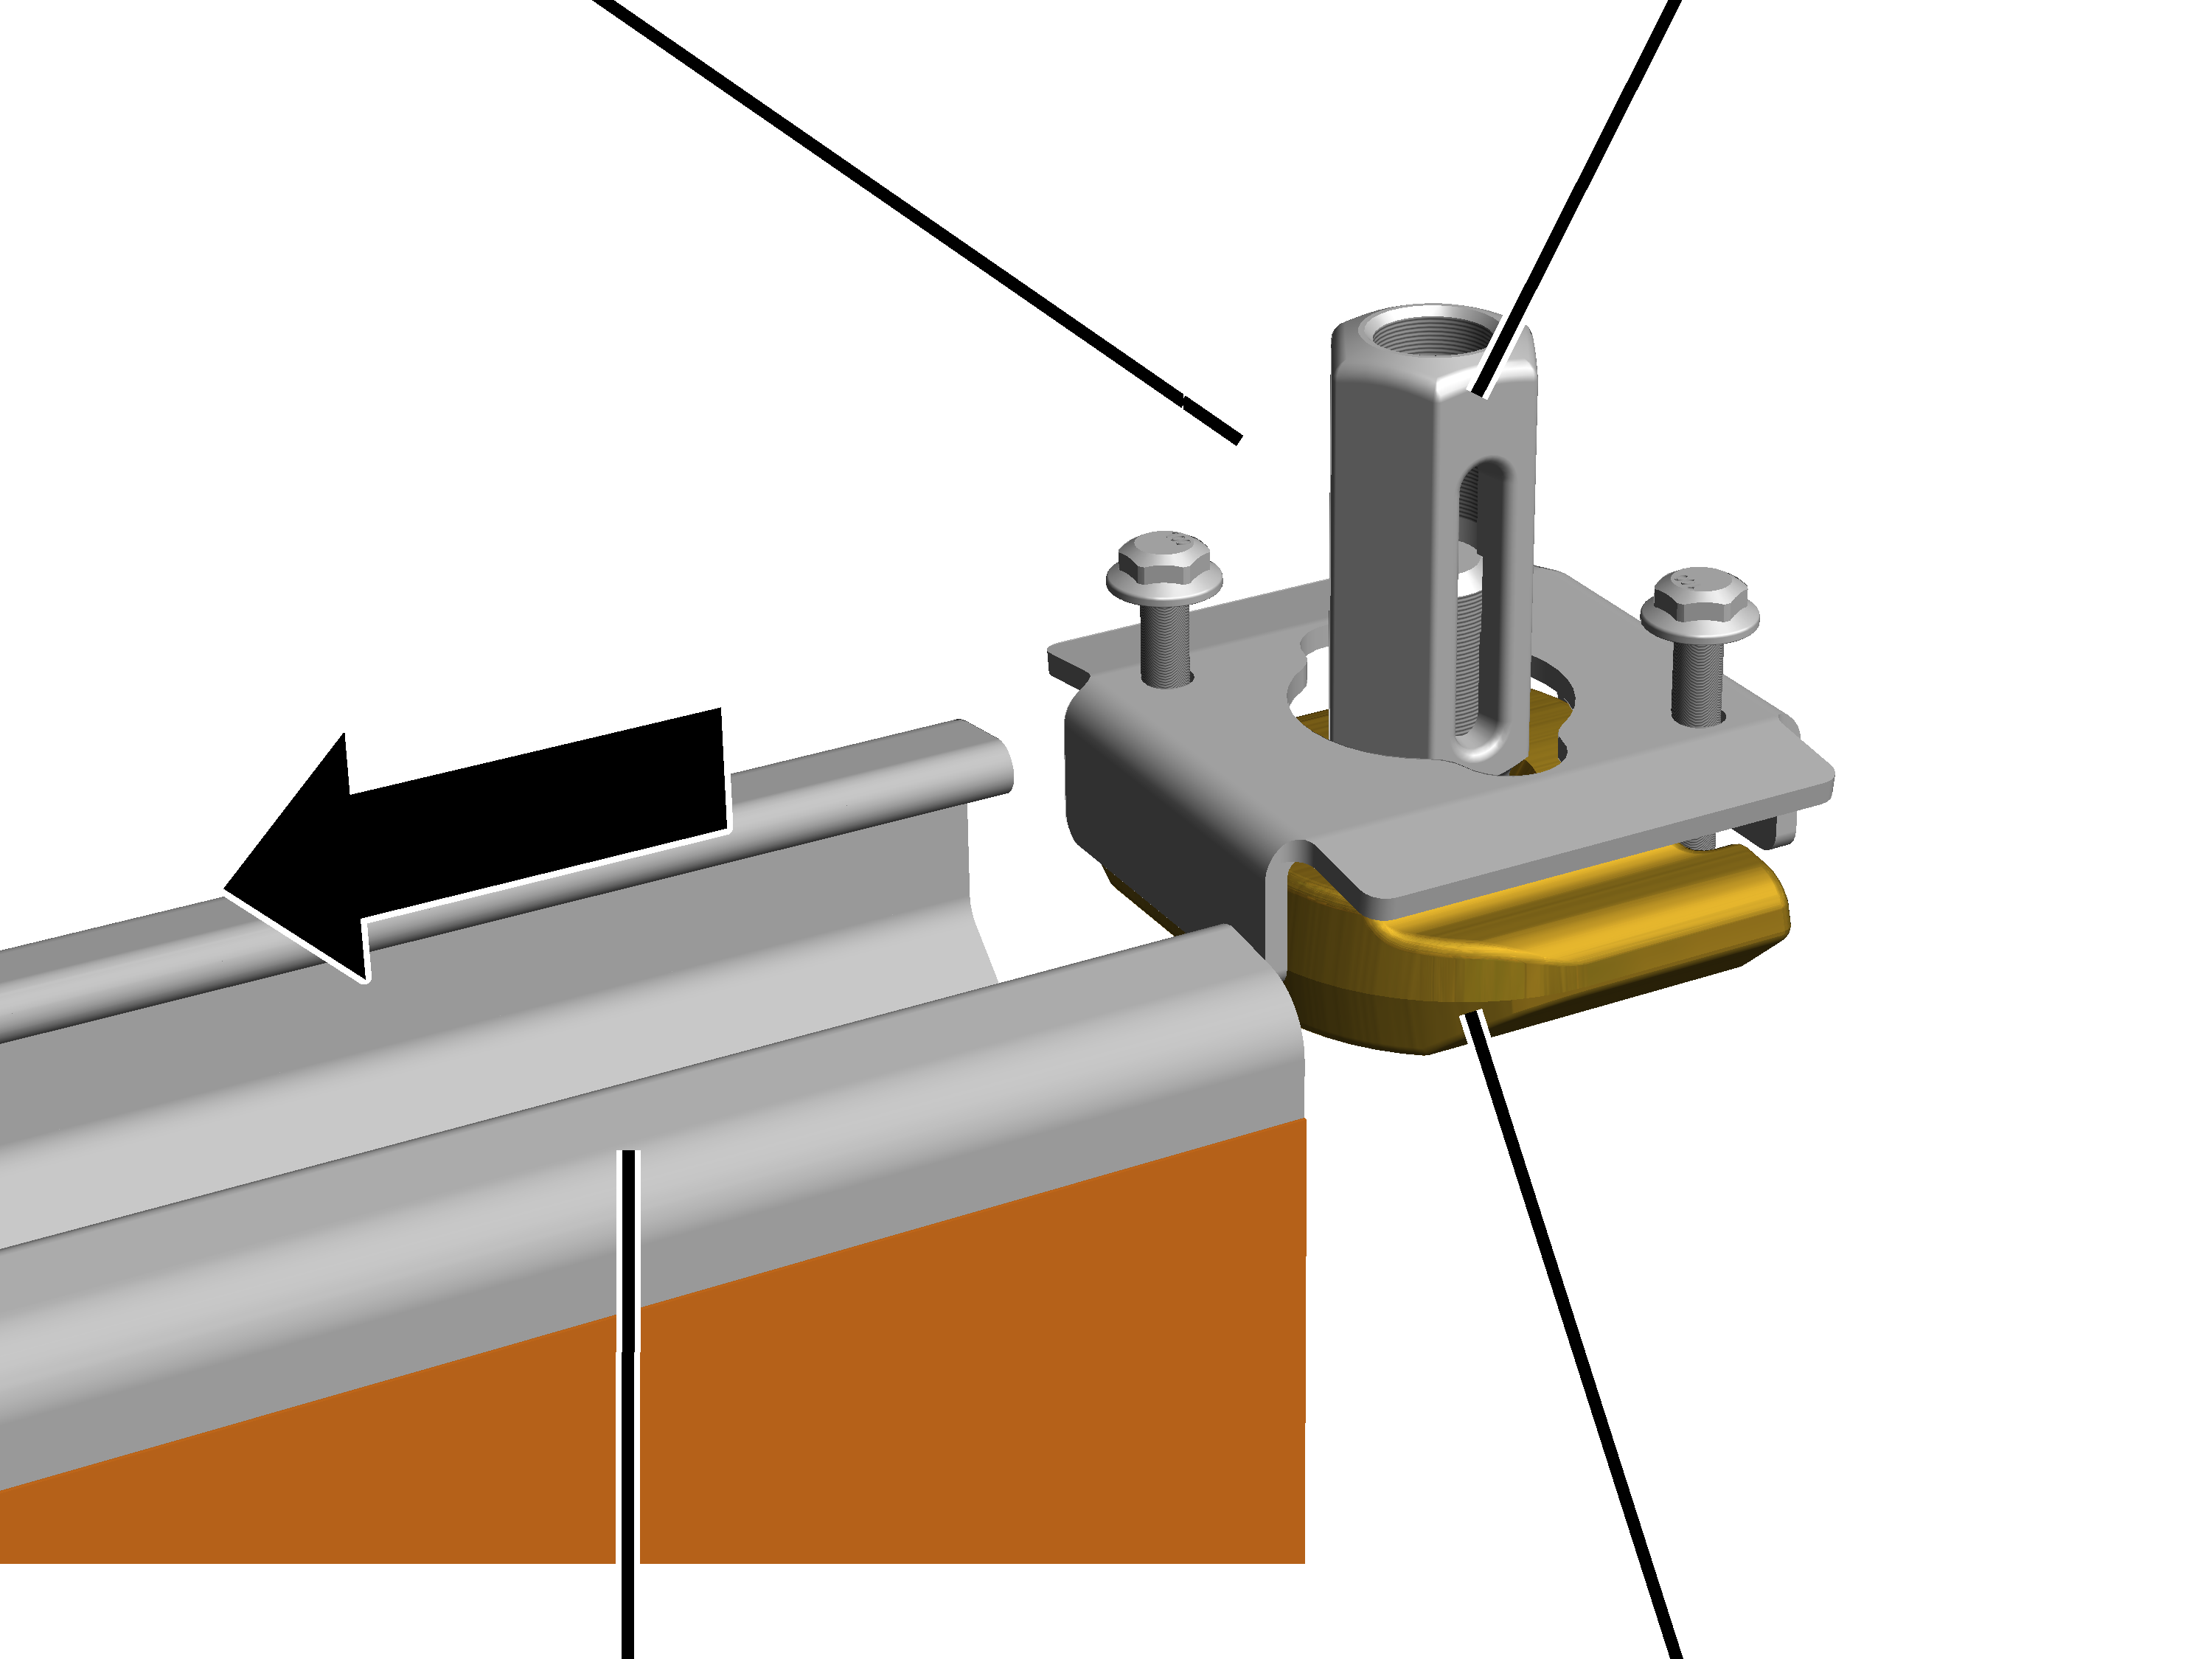
Only with a craneway
suspension in the area of a clamping plate
This work step only applies if
a suspension will be installed in the area of a profile joint.
|

|
The figures show the installation of a suspension on
a clamping plate on a steel HB profile rail. The installation on an
aluminium HB profile rail does not differ significantly from
this. |
|
|
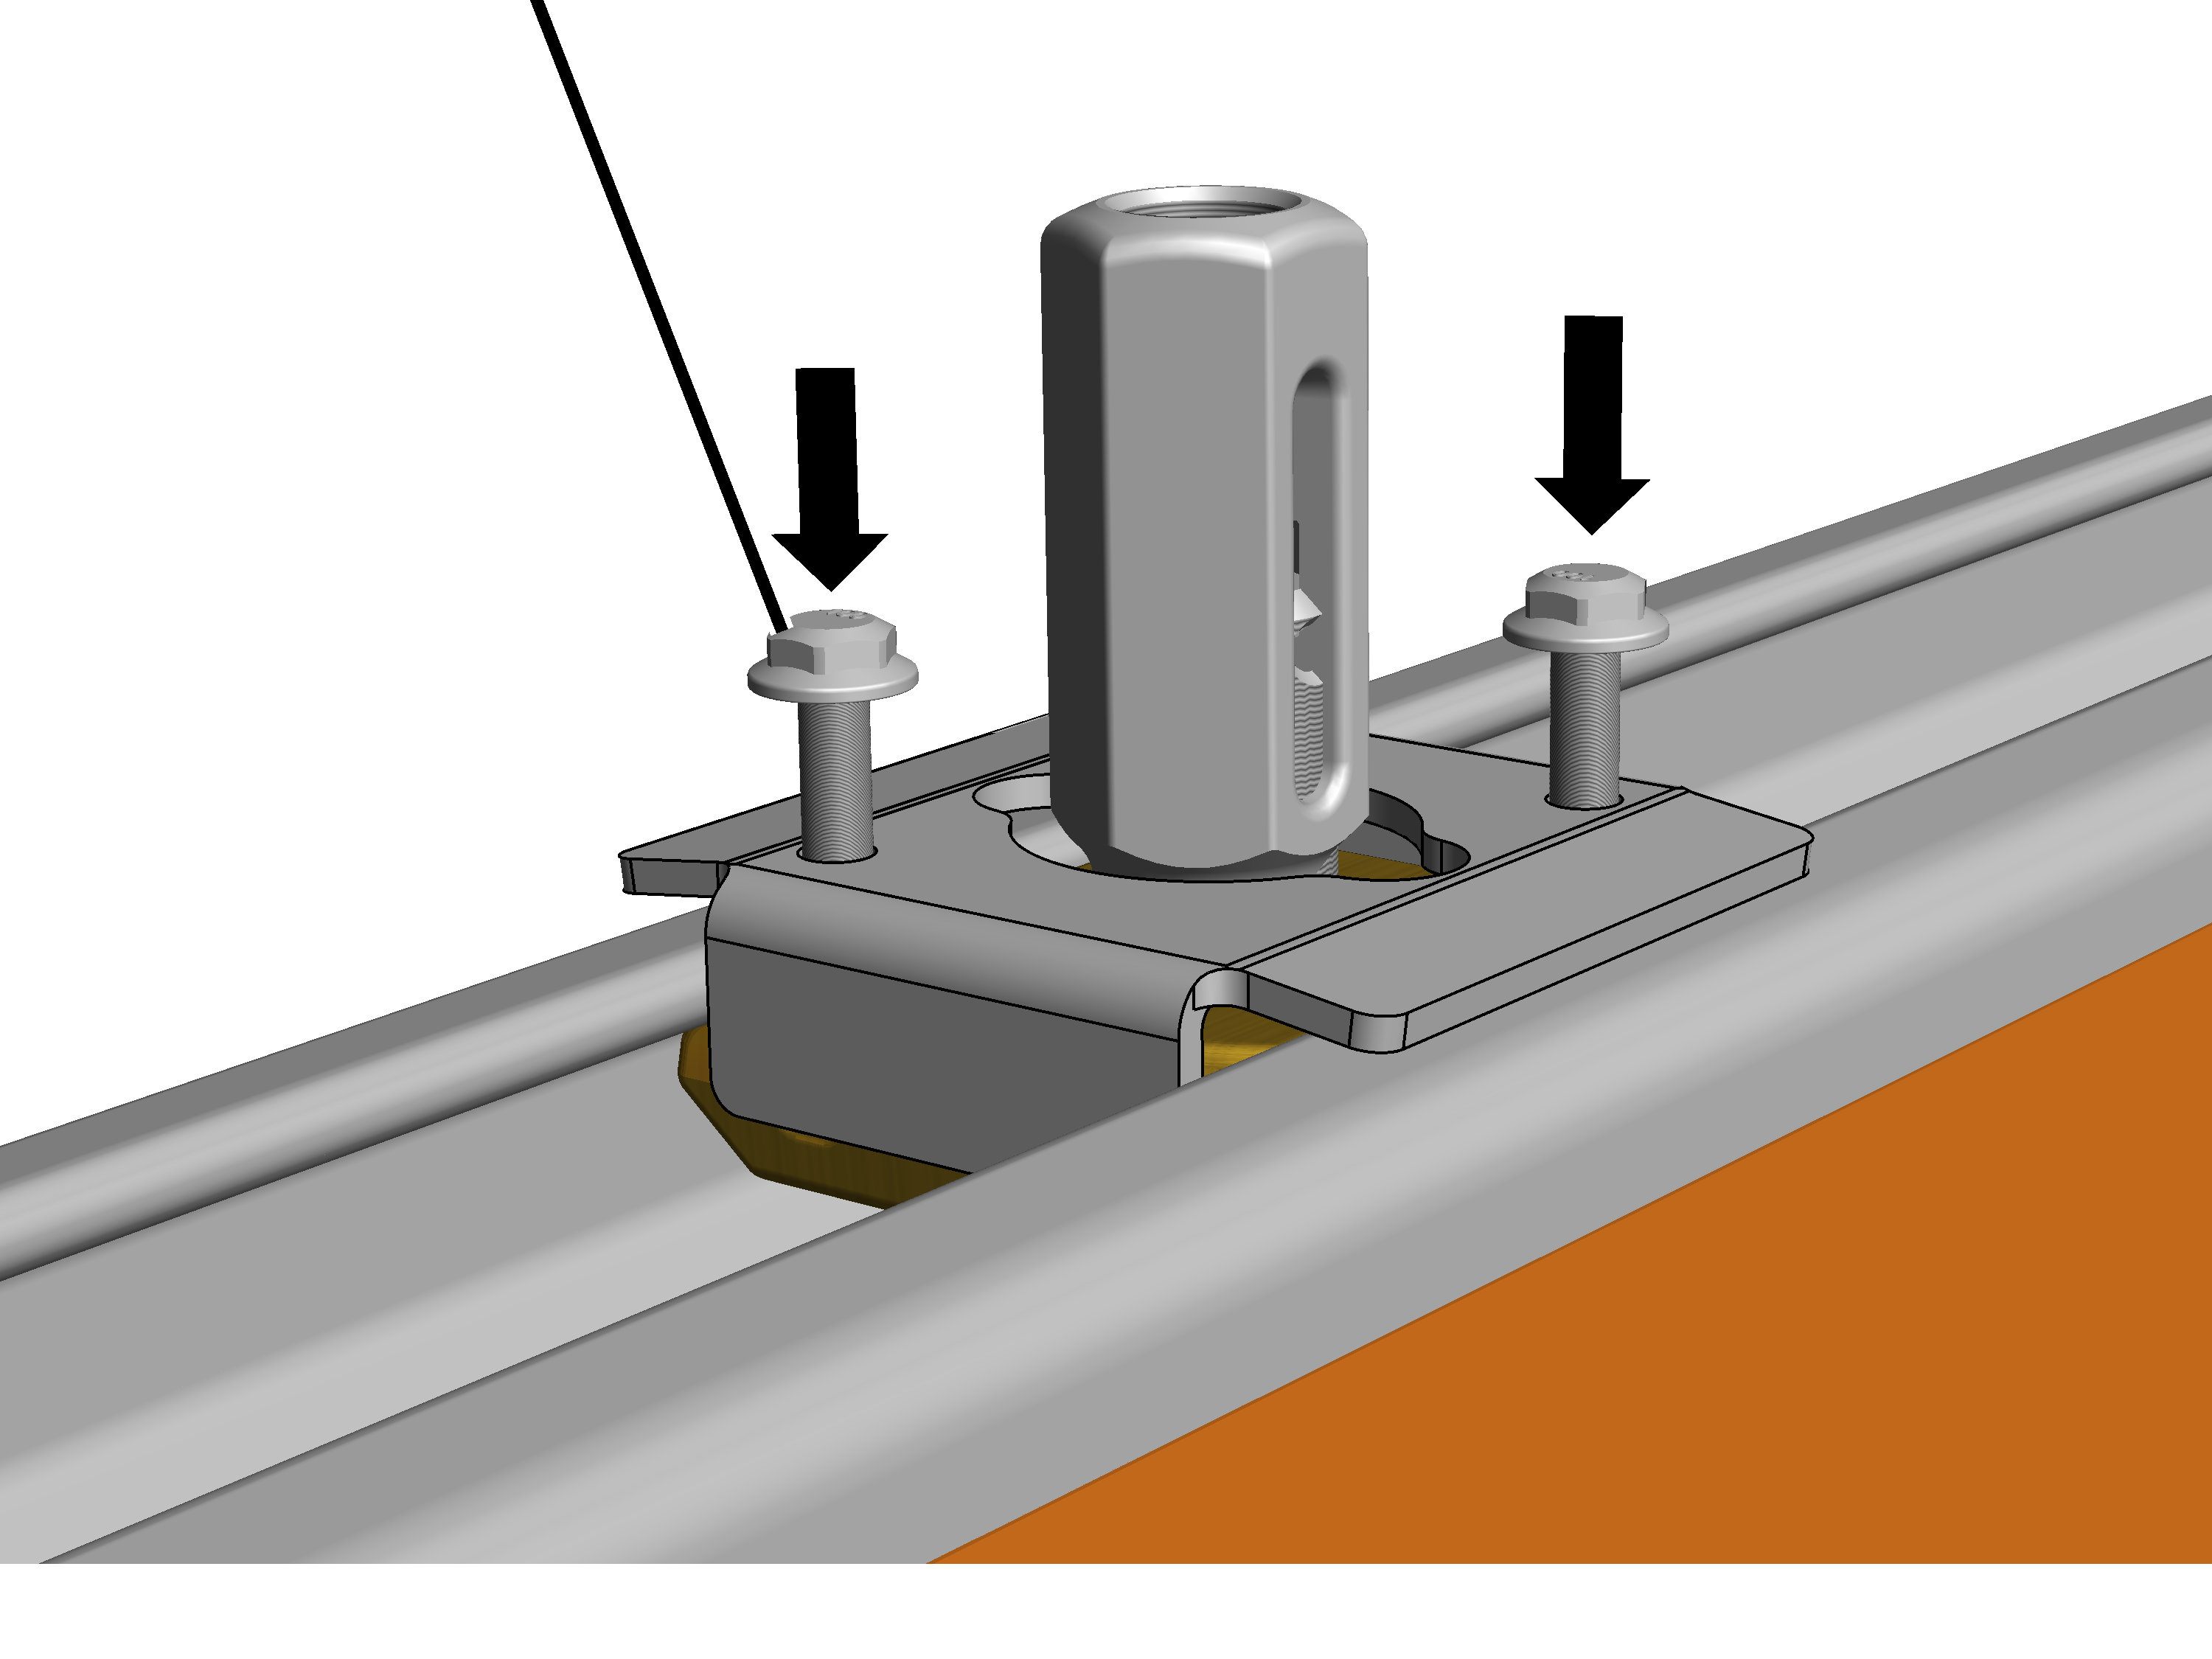
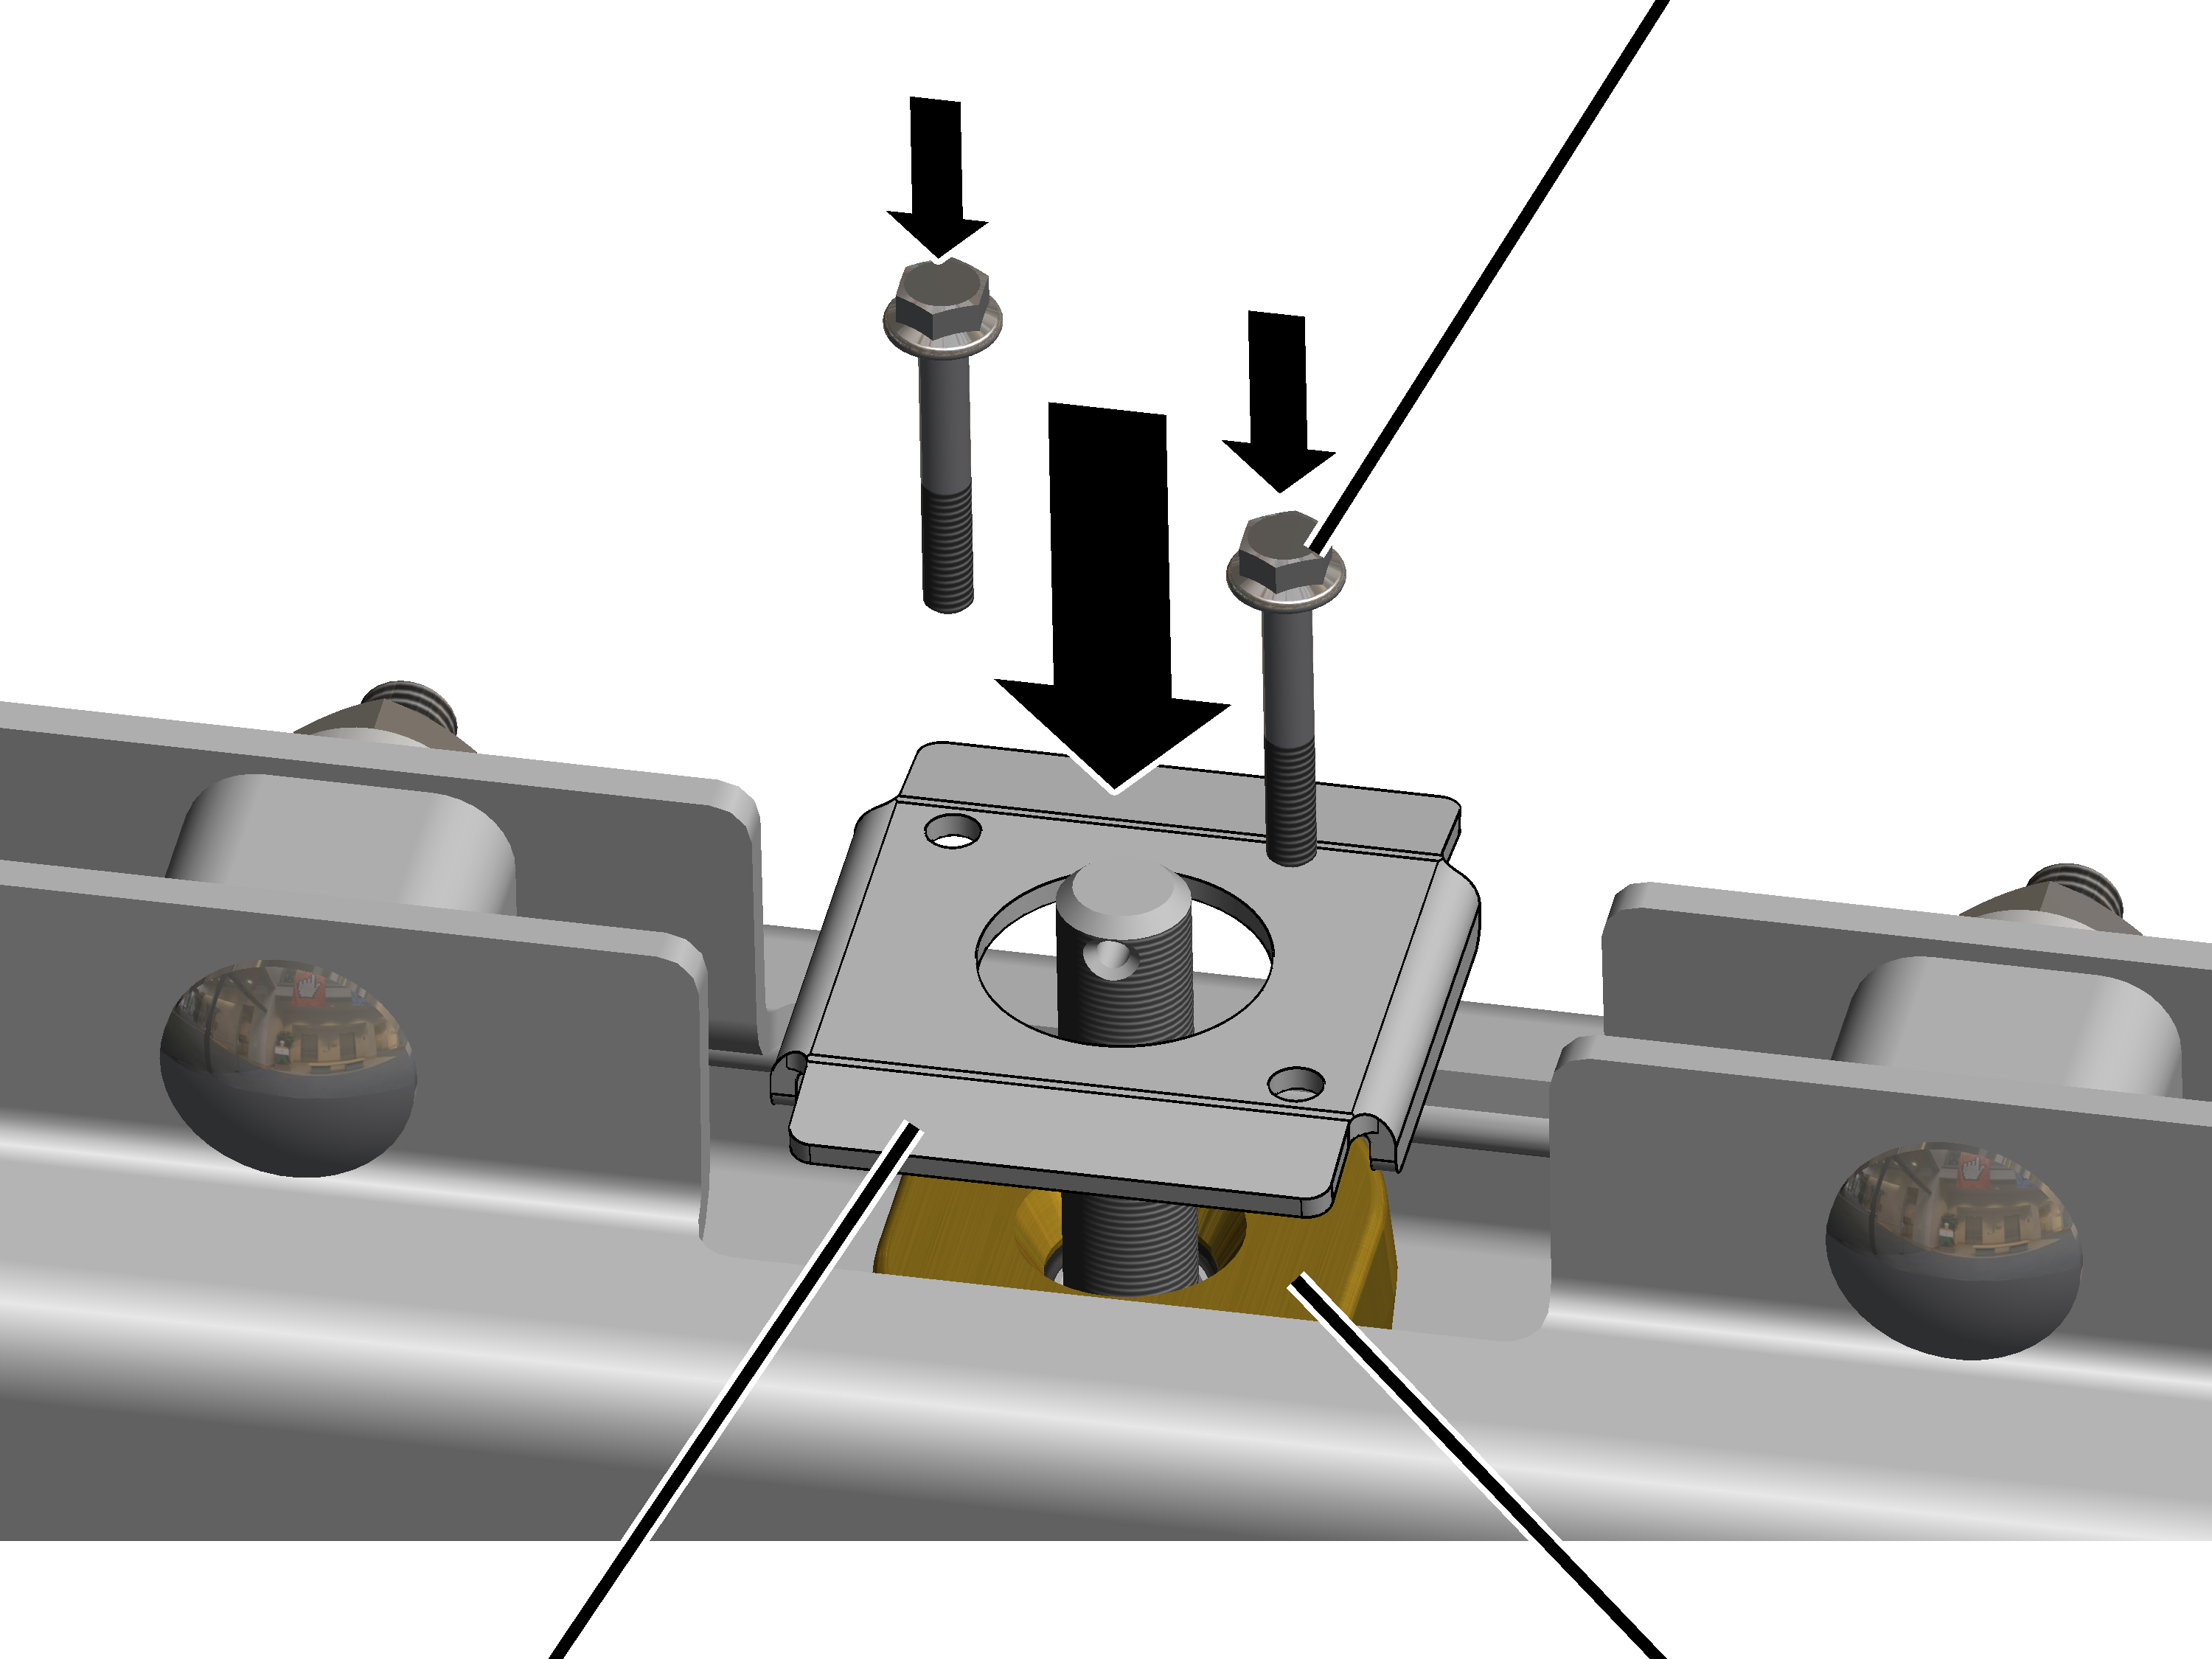
Rib
screws M6x40 |
|
|
|
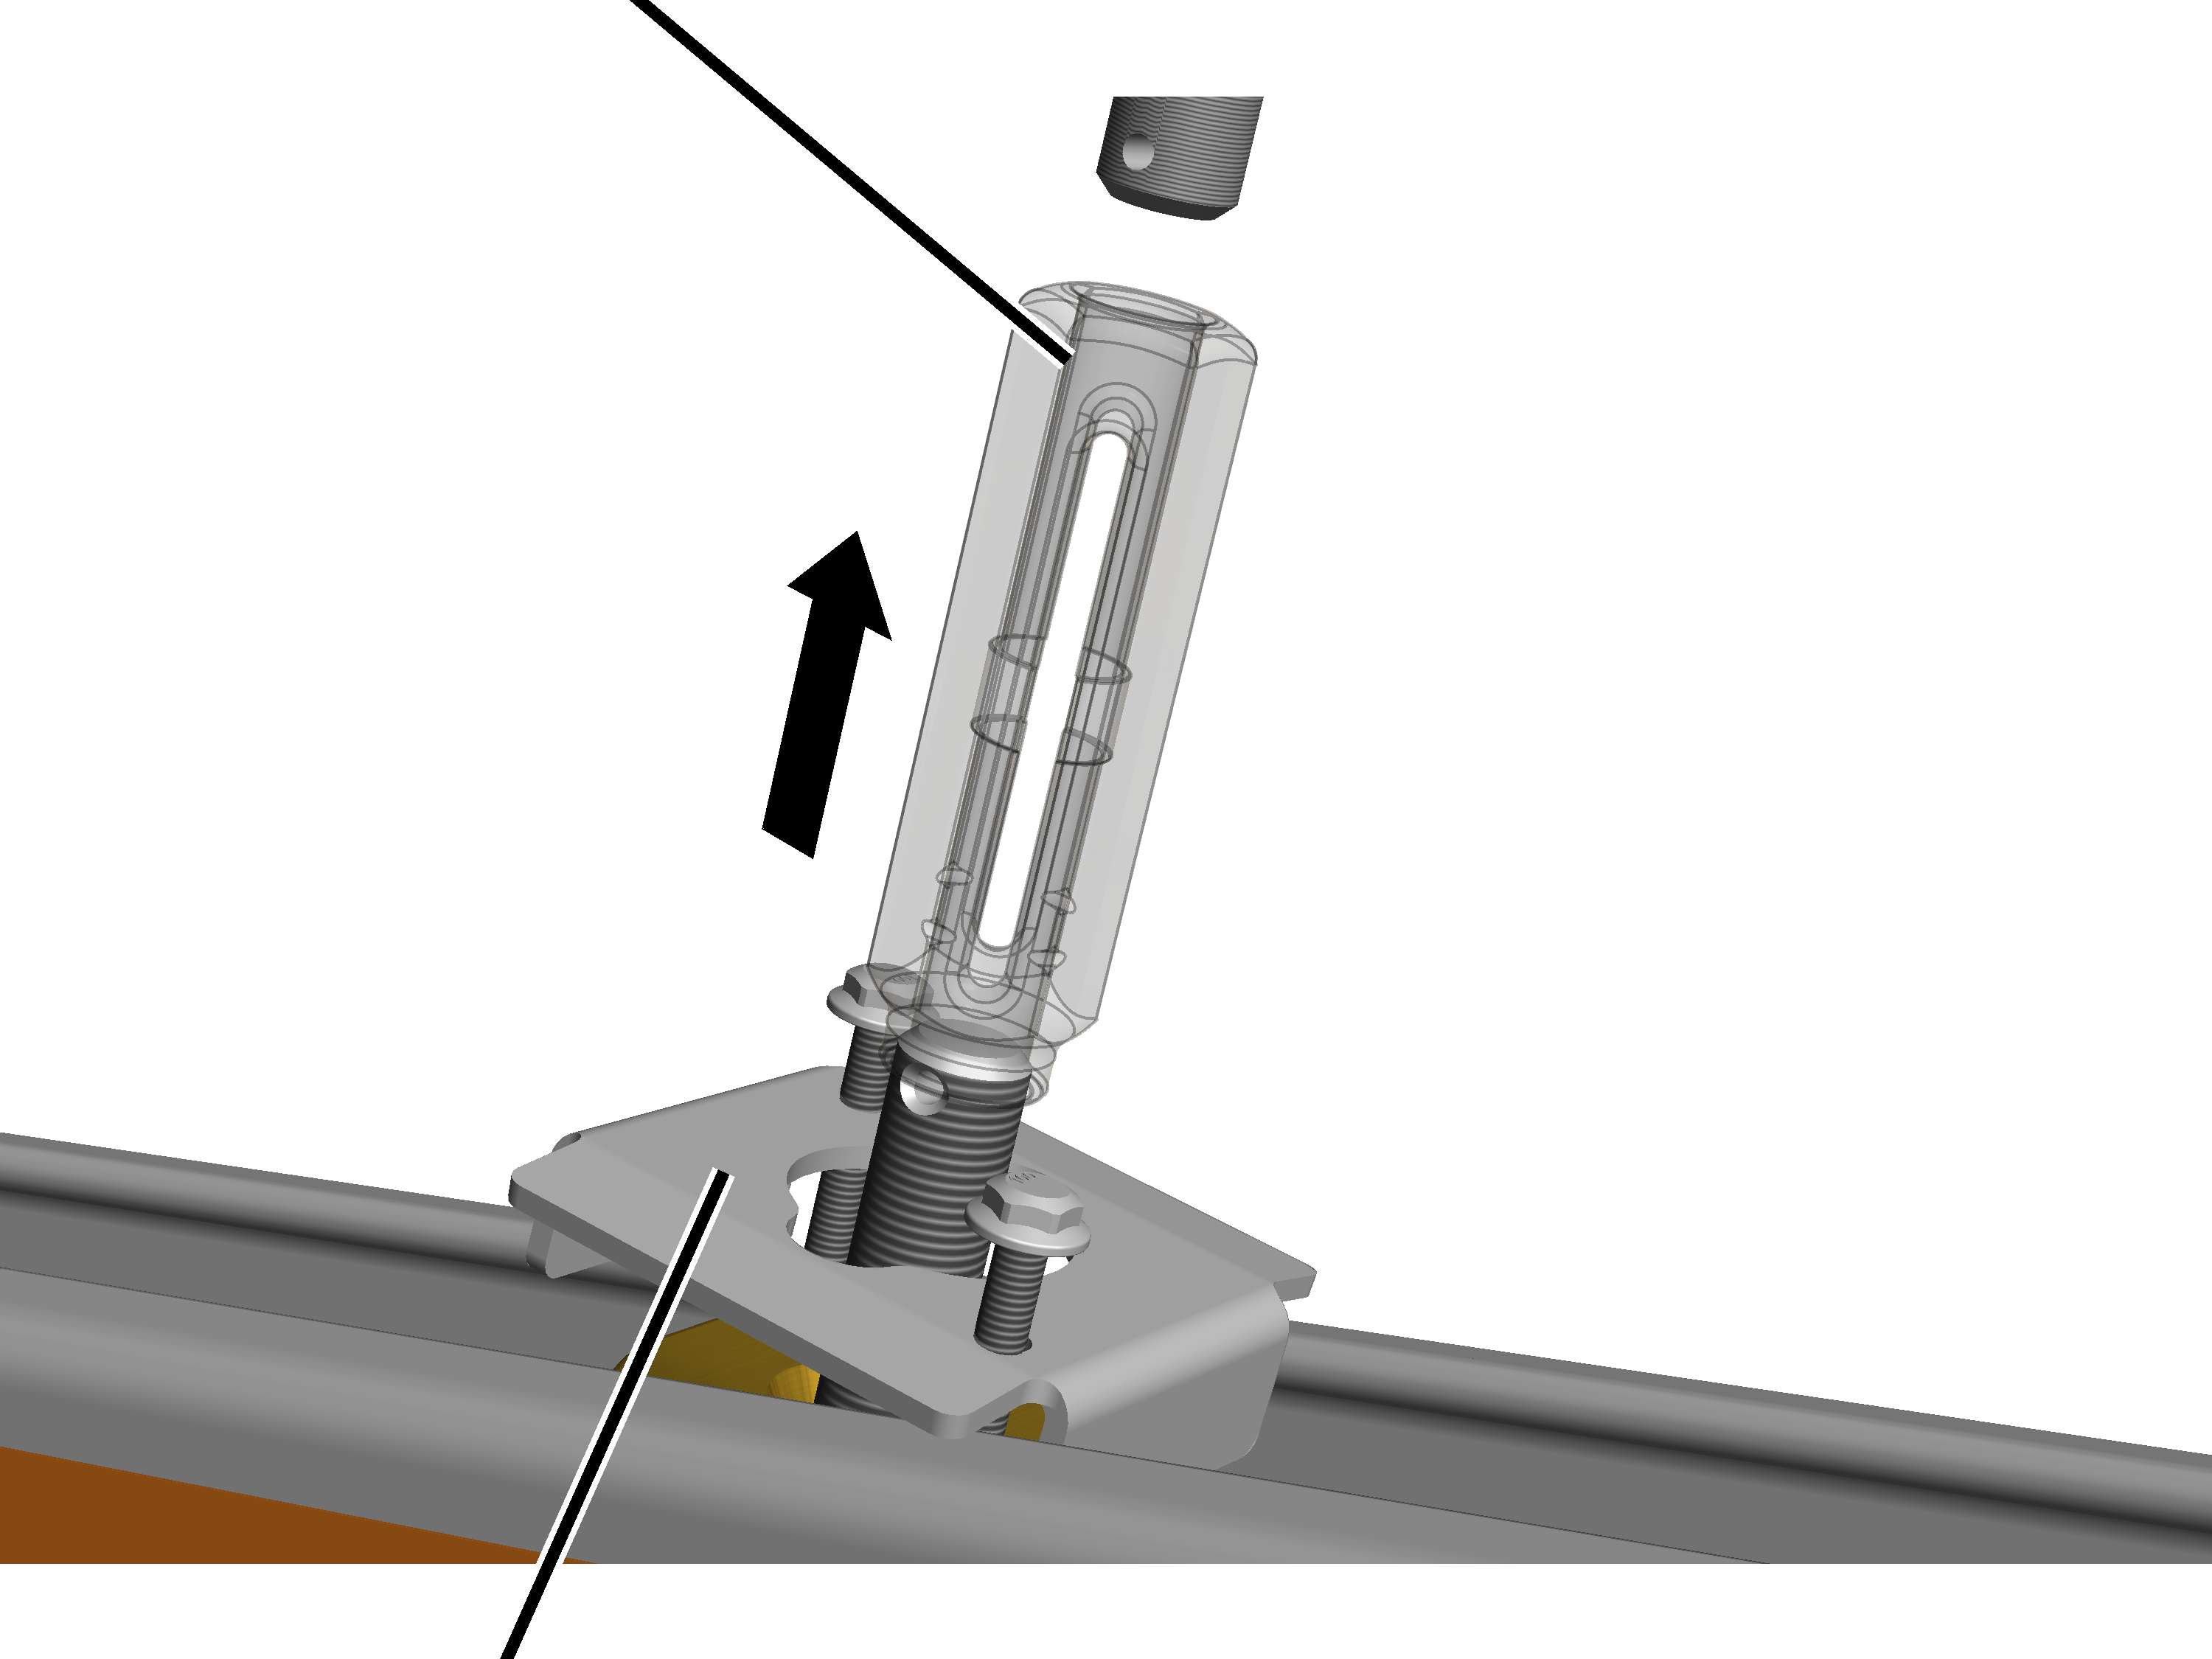
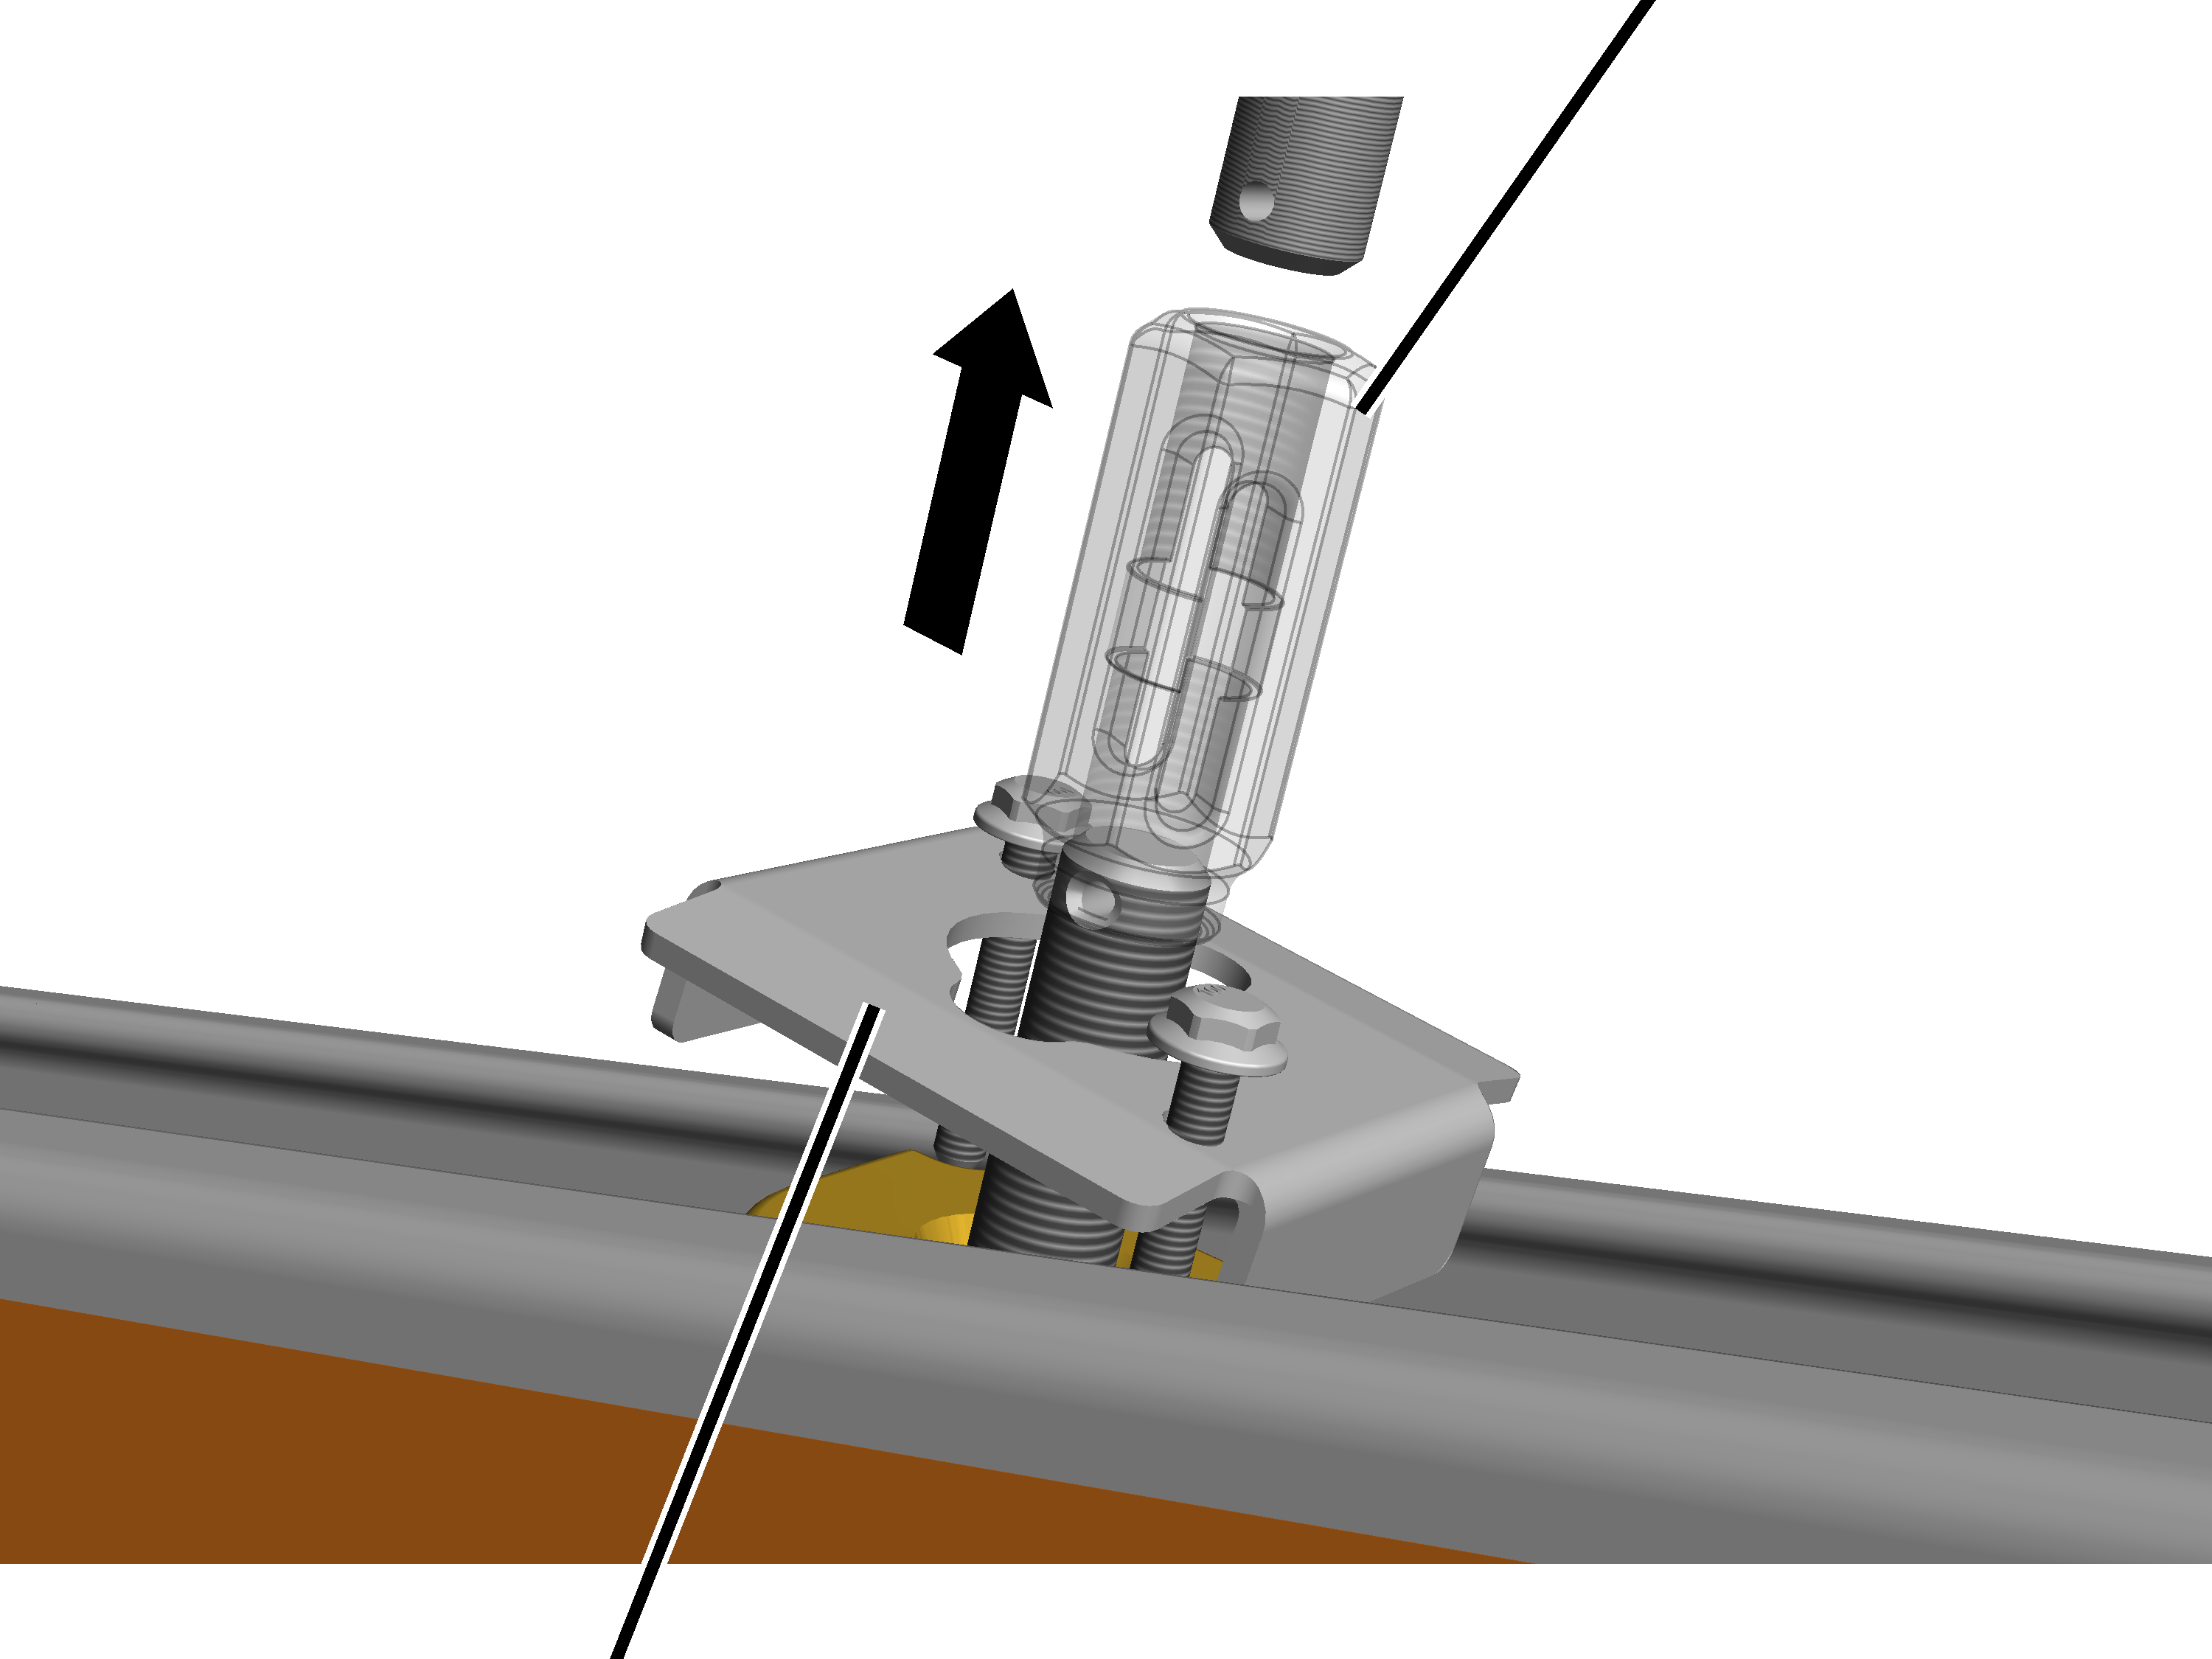
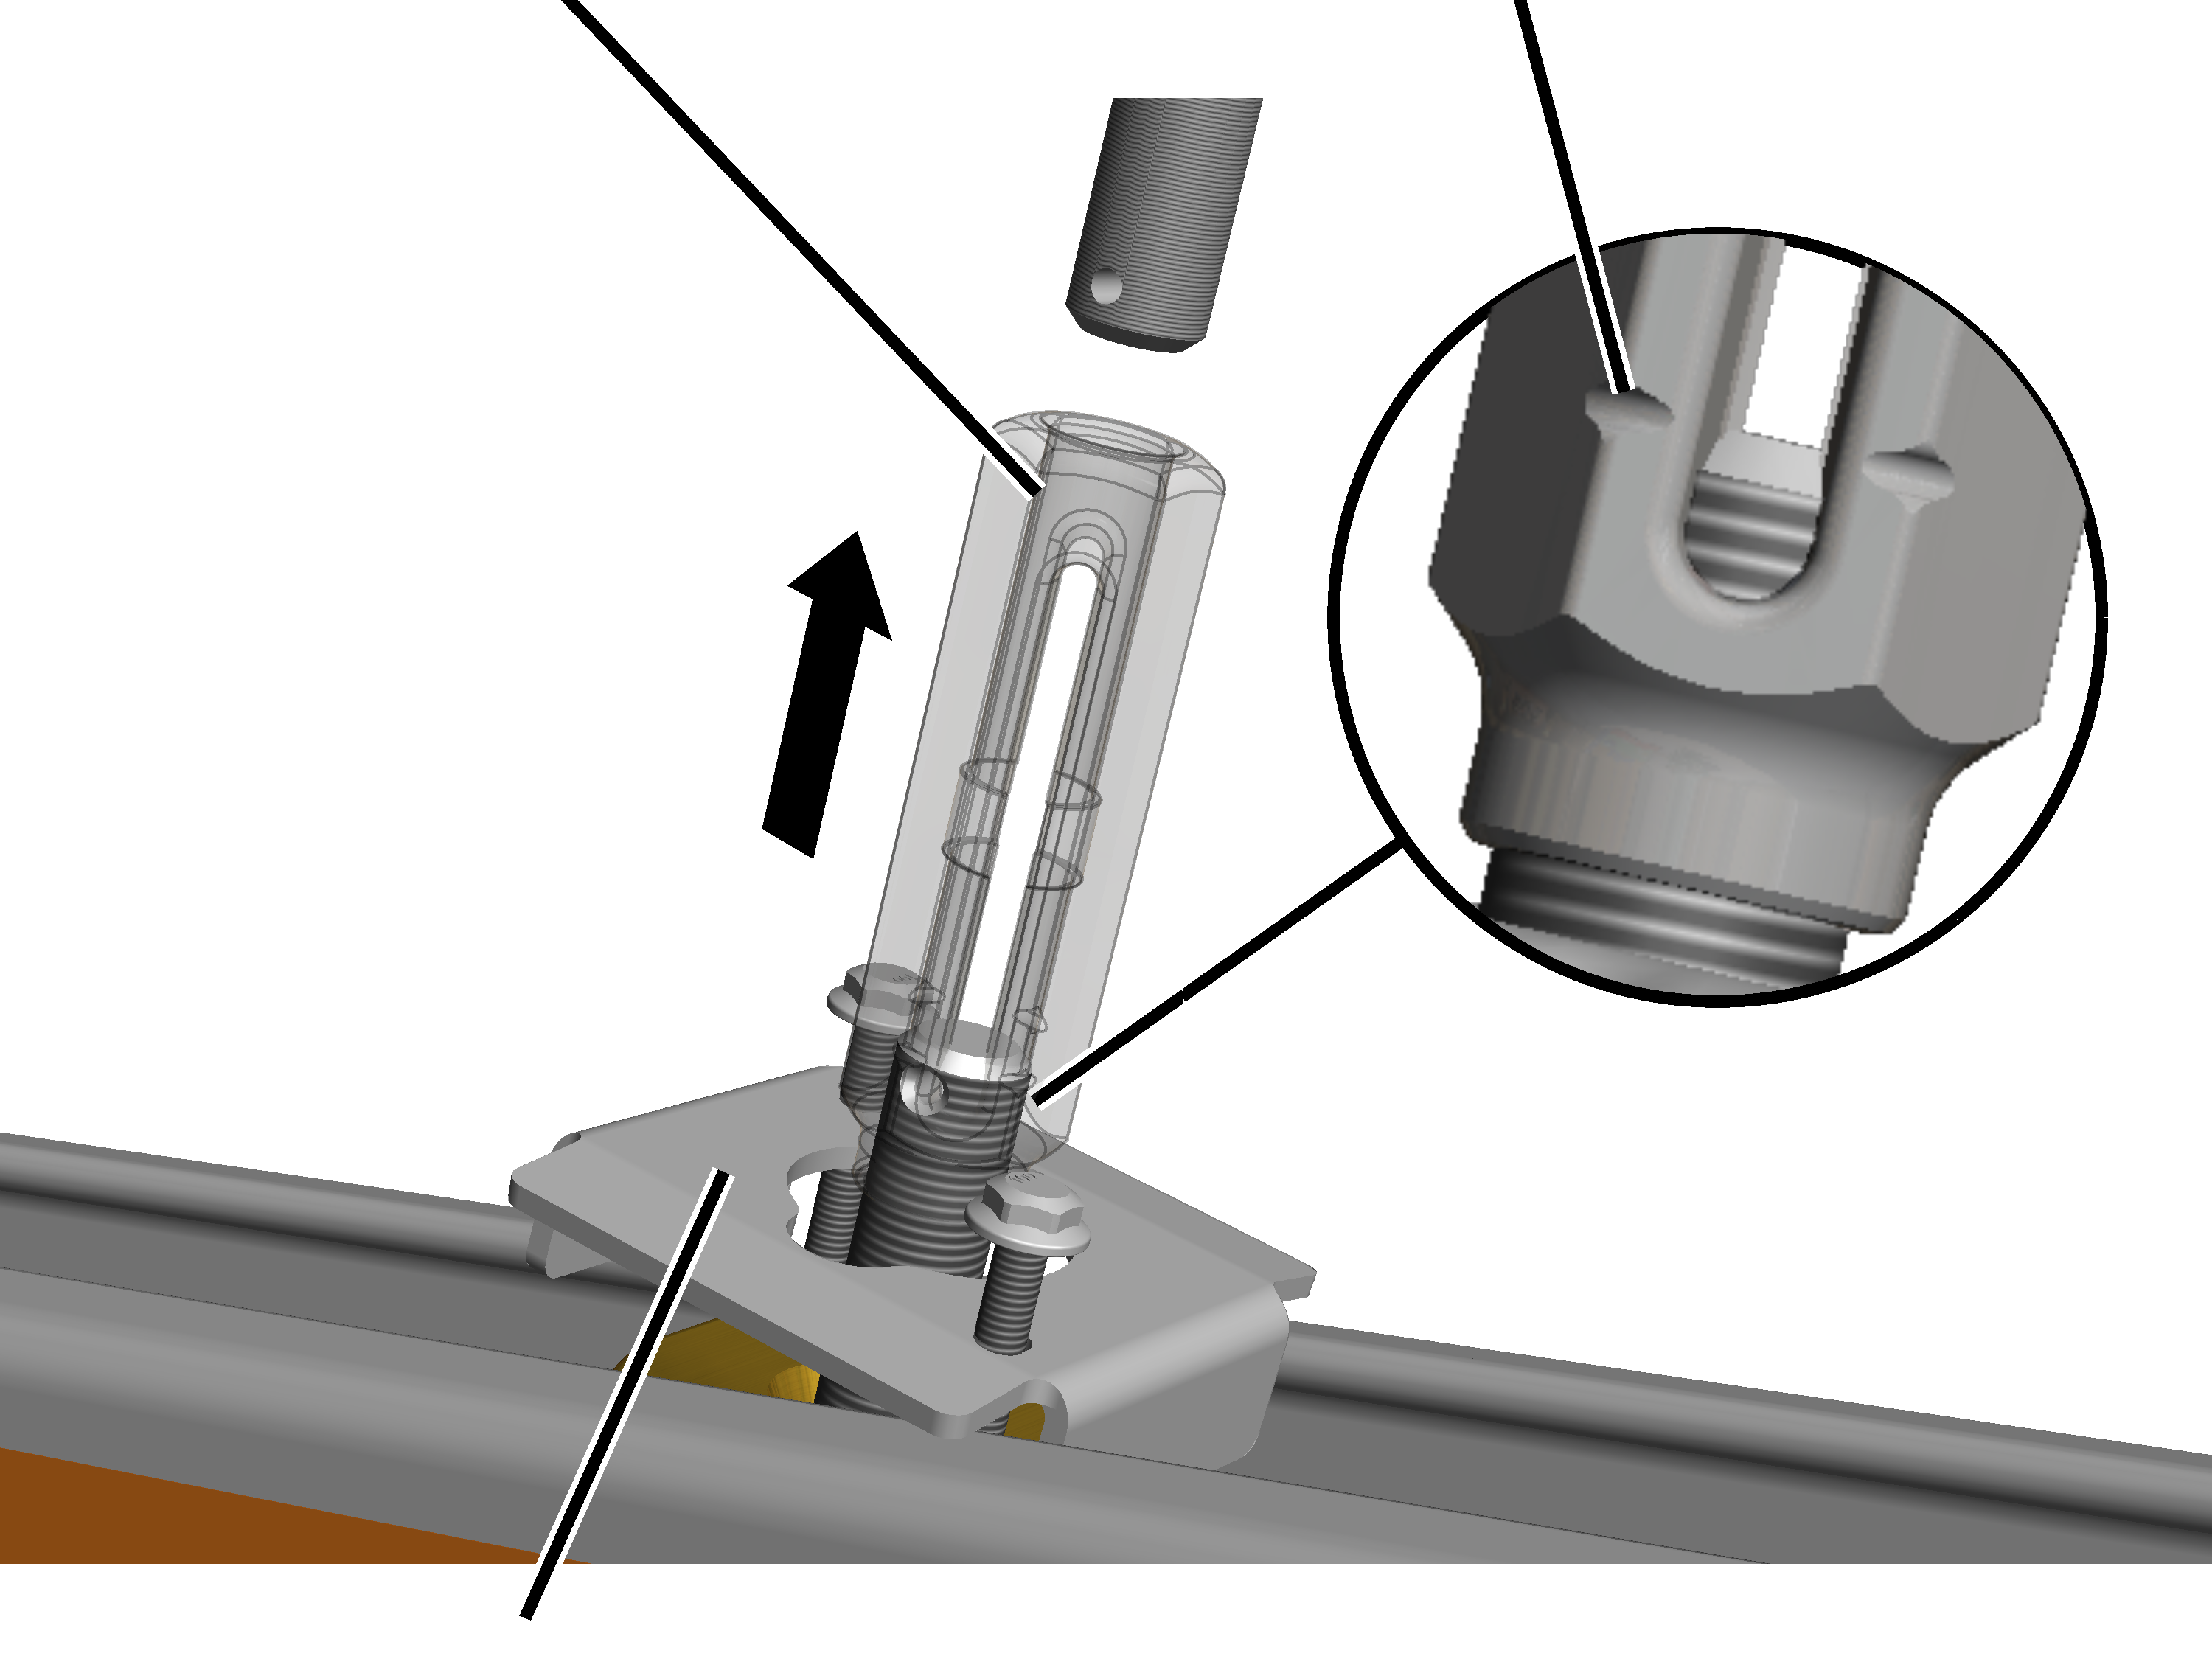
Retaining cap |
Profile
link |
|
|
|
Place the retaining cap on the profile línk.
Insert the M6x40 rib screws (2x) through the retaining cap and screw
them in two to three revolutions. Do not yet screw them tight.
Releasing
tension nuts