A well-lubricated chain wears much slower and can be used considerably longer. The chain must be lubricated before operation.
|
|
 Press the LIFT button and allow
the chain to run into the chain box. Lubricate the chain during its
movement.
Press the LIFT button and allow
the chain to run into the chain box. Lubricate the chain during its
movement.
Lubricant: “Chainlife S”. For details, see page 83.
Apply additional lubricant to
the unstressed chain in the chain box so that it flows into the joints of the
chain links.
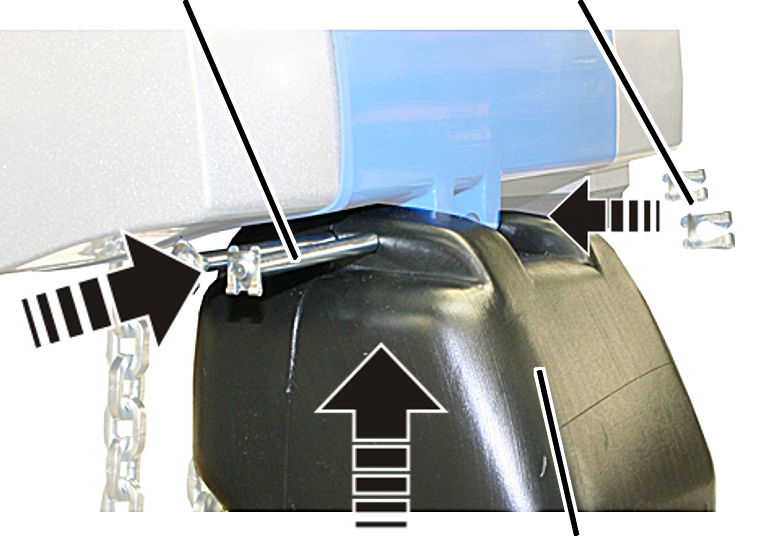
The illustrations show a chain box being installed on the GM6 chain hoist. Installation on a GM2 or GM4 chain hoist is very similar.
|
Bolt |
SL safety clip | |
|
| ||
|
|
Chain box | |
Place the chain in the chain
box.
Turn the chain box as shown in
the figure (slanted side facing outward).
Use the bolts to install the
chain box on the chain hoist.
─ For GM2: Use a bolt to fix the chain box to the chain hoist.
─ For GM4 and chain box with one hole: Use a bolt to fix the chain box to the chain hoist.
─ For GM4 and chain box with two holes: Use a bolt to fix the chain box to the chain hoist. Use the inner holes of the chain box. The outer holes remain free.
─ For GM6 and plastic chain box: Use two bolts to fix the chain box to the chain hoist.
Secure the bolts with the SL safety
clips (1x or 2x).
|
|
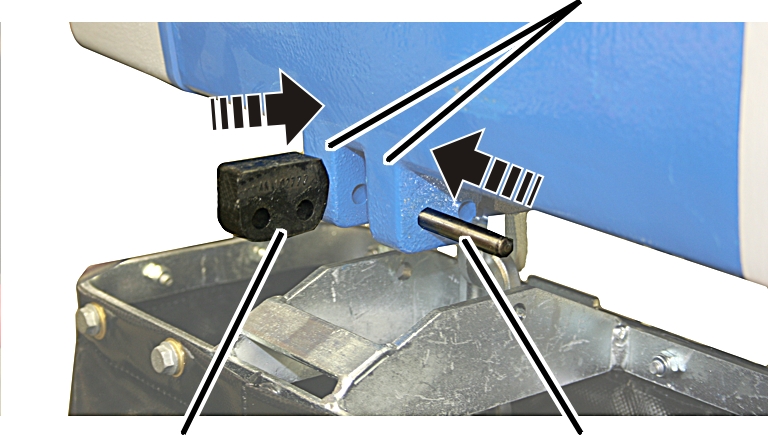
Suspension straps | |
|
| ||
|
Buffer |
Bolt | |
Turn the buffer as shown in the
figure (rounded side facing inward).
Push the buffer between the
suspension straps on the chain hoist.
Push the short bolt through the
outer holes of the suspension straps and the buffer.
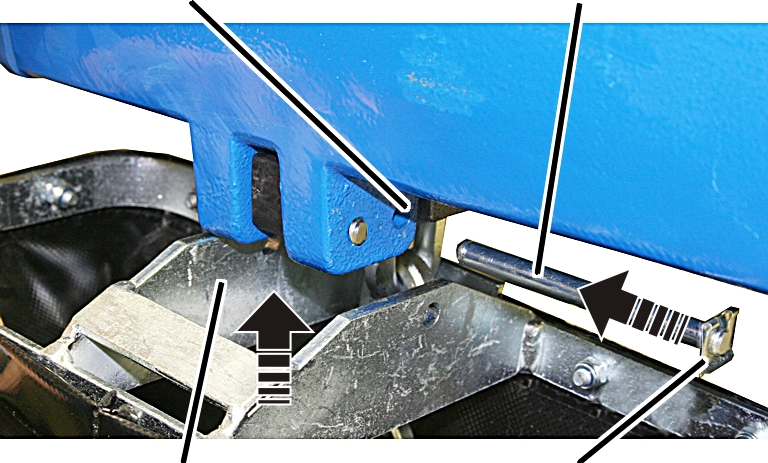
The illustrations show a chain box being installed on the GM8 chain hoist. Installation on a GM6 chain hoist is very similar.
|
Inner hole |
Bolt |
|
| |
|
Chain box |
SL safety clip |
Place the chain in the chain
box.
Turn the chain box as shown in
the figure (bar facing outward).
Use the bolts to install the
chain box on the chain hoist.
─ For GM6 and chain box with metal frame: Use a bolt to fix the chain box to the chain hoist. Use the inner holes of the suspension strap. The outer holes of the suspension strap remain free.
─ For GM8: Use a bolt to fix the chain box to the chain hoist. Use the inner holes of the suspension strap. The buffer is fixed to the outer holes of the suspension straps.
Secure the bolts with the SL safety
clips (2x).
|
| |
|
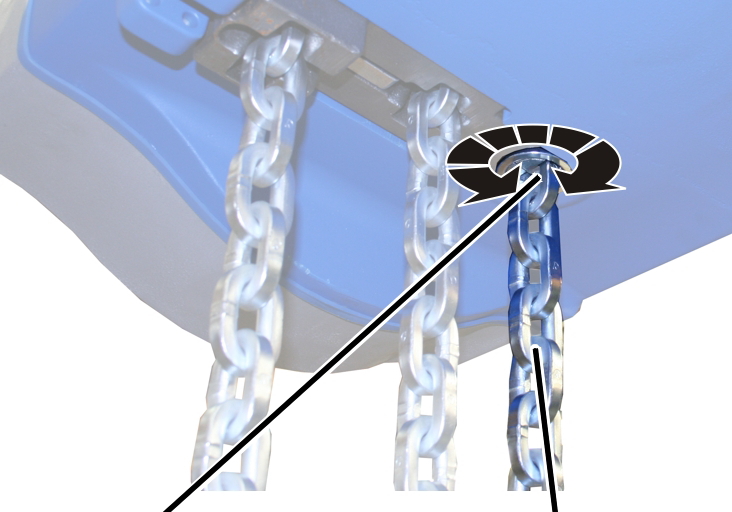
Chain anchor point |
Second fall |
Check the chain anchor point:
The second fall should extend straight to the bottom block and not be
twisted.
If necessary:
Turn the chain anchor point.
The electronic hoist limit
switch needs to be referenced again. See page 57.
Check the switching points (upper and lower) and
correct if necessary.
─ The saved switching points are retained after referencing and therefore do not need to be reset.
─ If the switching points are moved equally, all the switching points can be corrected at the same time by changing the reference point accordingly.