Danger from electric shock!
Electrical work performed incorrectly could result in electrical shocks.
Work on electrical systems and components may only be performed by a qualified electrician when the system is in a voltage-free state.
|
|
Danger from electric shock! Electrical work performed incorrectly could result in electrical shocks. Work on electrical systems and components may only be performed by a qualified electrician when the system is in a voltage-free state. |
 If fault current protection is
used as a safety measure, be sure to use fault current protection that is
sensitive to universal current.
If fault current protection is
used as a safety measure, be sure to use fault current protection that is
sensitive to universal current.
The chain hoist can cause leakage current during operation, which could cause a fault current protection switch to trigger.
If the fault current protection triggers due to leakage current during normal operation:
If possible, exchange the fault
current protection switch for one with 0.3 A. This will no longer guarantee
personnel safety.
Alternatively, a leakage current
compensating filter can be installed.
|
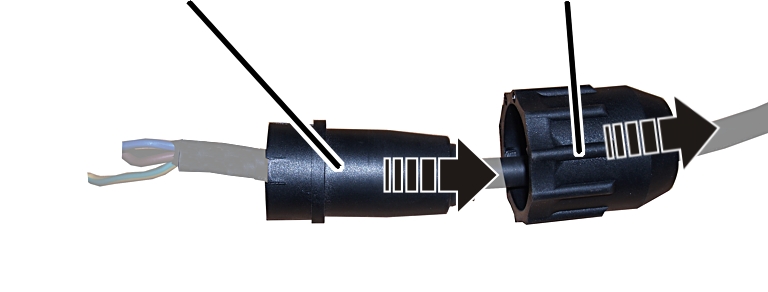
Connector housing |
Bayonet nut |
|
| |
Insert the bayonet nut on the
connection cable.
Insert the connector housing on
the connection cable.
|
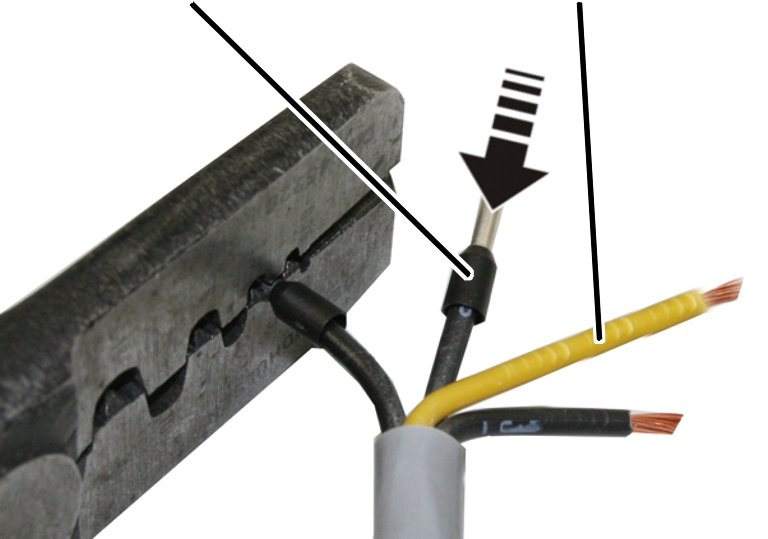
Wire end bushing |
Protective conductor |
|
| |
Leave the protective conductor
somewhat longer than the other wires and connect it in advance.
Press the wire end bushings onto
the wires.
|
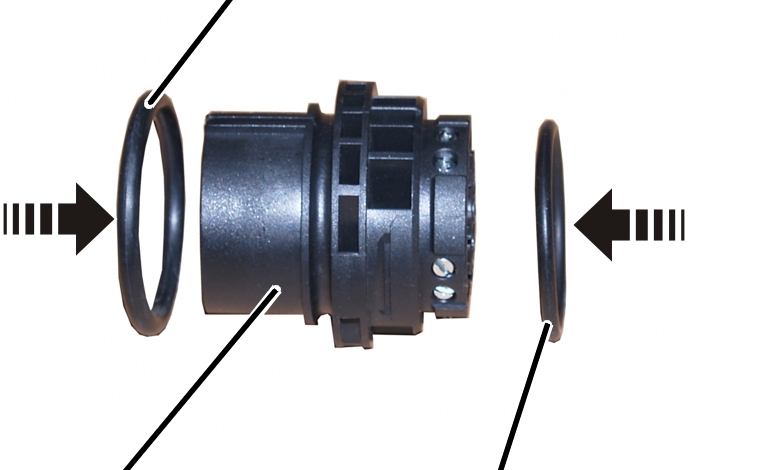
O-ring, thick |
| |
|
| ||
|
Bush insert |
O-ring, thin | |
Insert the O-rings on the bush
insert.
|
|
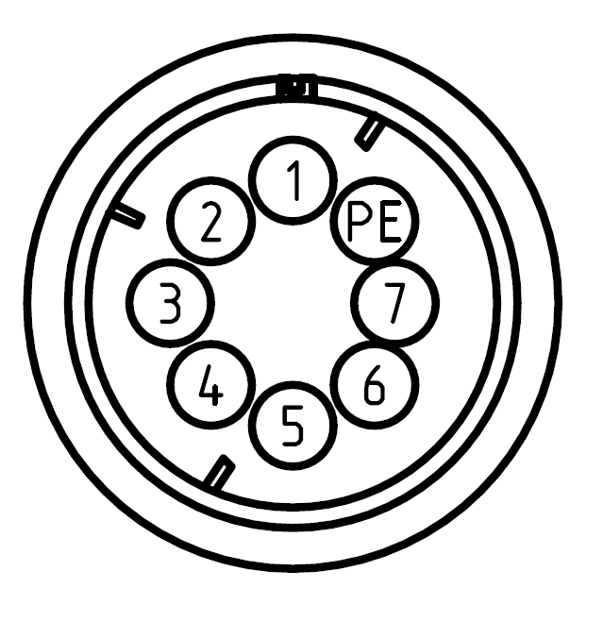
Check that the assignment is
correct (view of drawing from front) and connect the wires to the bush
insert.
|
Bush insert |
|
|
| |
|
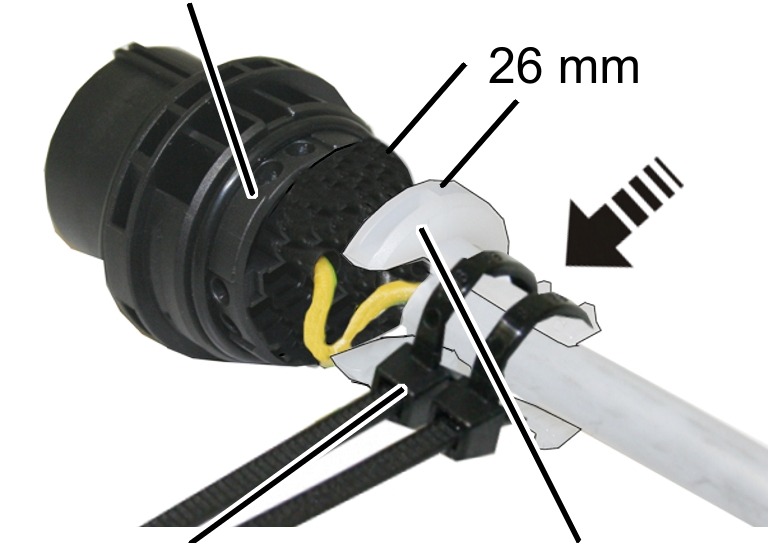
Cable ties |
Strain reliever |
Slide the strain reliever onto
the connection cable so that 26 mm clearance remains between the strain
reliever and the bush insert.
Fasten the strain reliever with
cable ties (2x).
|
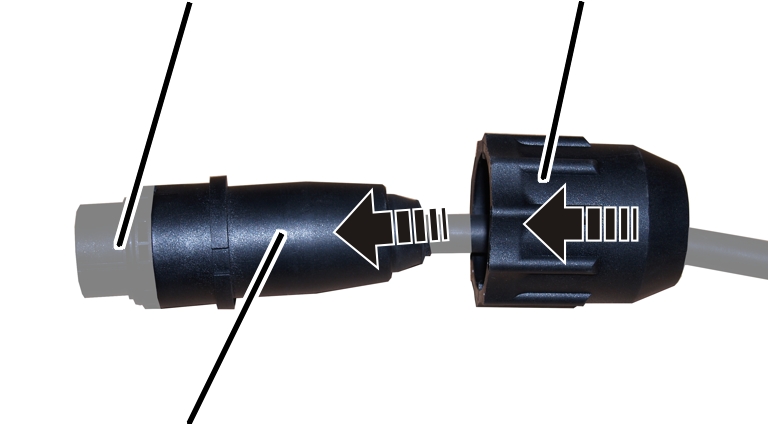
Bush insert |
Bayonet nut | |
|
| ||
|
Connector housing |
| |
Press the connector housing onto
the bush insert until it clicks.
Slide the bayonet nut over
it.
|
| |
|
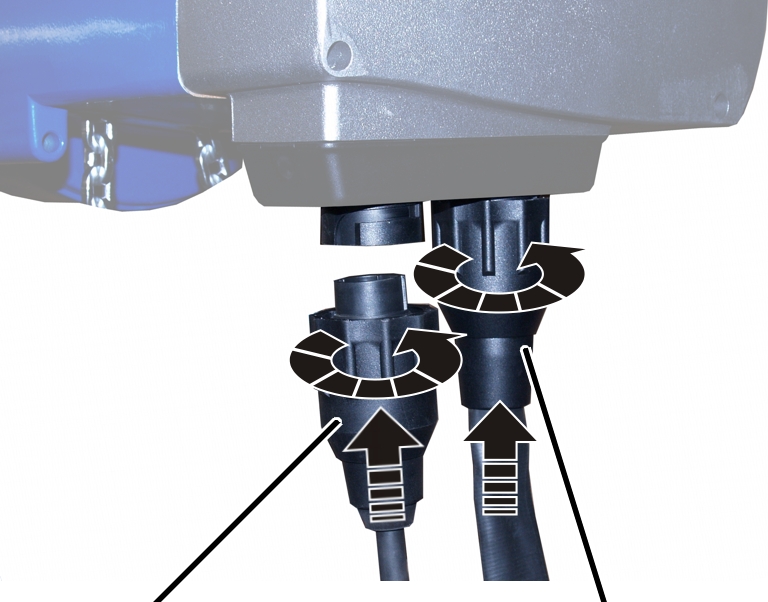
Bayonet coupling of connection cable |
Bayonet connector of control cable |
Slide on and tighten the bayonet
nuts.