Letter position markers
Letter position markers
For travelling cranes with end carriages which are more than 2.5 m wide, the end carriages are dismantled for transportation. Continue reading.
|
Letter position markers |
|
|
|
Letter position markers |
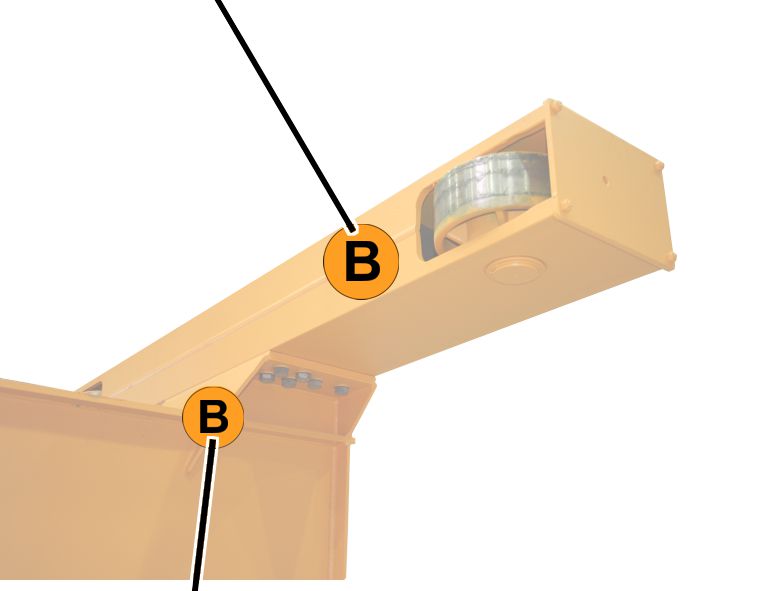
 Lay both end carriages on the
joint faces of the main girder in such a way that the letter position markers
match.
Lay both end carriages on the
joint faces of the main girder in such a way that the letter position markers
match.
|
|
Danger of fatal injury! The crane and the load can fall if the end carriages are not correctly screwed onto the main girders. Prepare and screw in the screws carefully! |
|
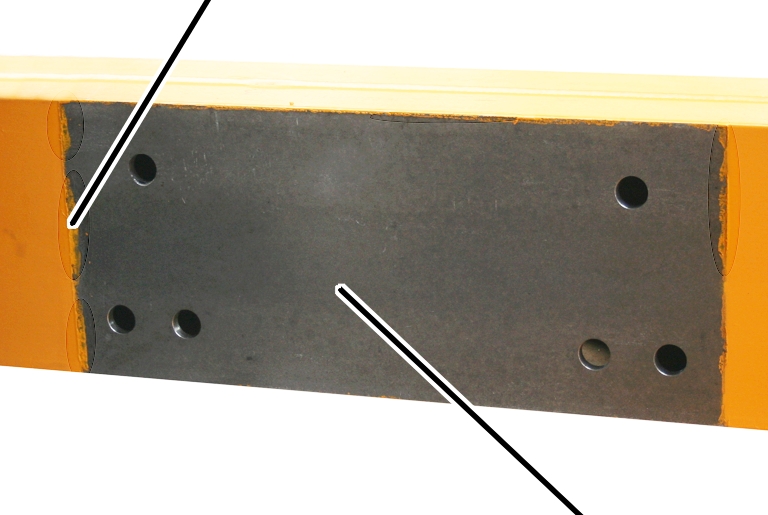
Residual paint |
|
|
| |
|
|
Joint face |
Thoroughly clean the joint faces
on the entire surface. There should not be any rust, dirt, paint or similar
impurities on them.
Lift the end carriages in front
of the connection surfaces. The hole patterns must lie exactly over one
another.
Check
the high-tensile bolts. The high-tensile bolts must meet these
requirements:
|
|
Material |
Size |
Lubrication |
|
High-tensile bolt (hexagonal) |
10.9 |
M20 |
|
|
Washer |
C 45 |
HV 21 |
MoS2 |
|
High-tensile nut (hexagonal) |
10 |
M20 |
MoS2 |
─ The high-tensile bolts and mounting plate with high-tensile nuts may only be installed with tightening torque a maximum of two times. If they are installed more than twice with tightening torque, the high-tensile bolts as well as the mounting plates with the high-tensile nuts must be scrapped.
Should it be necessary to loosen the high-tensile bolts during installation, the same high-tensile bolts can be reused a maximum of one more time, otherwise the lubrication will no longer be sufficient!
─ The high-tensile nuts and washers must be galvanised and lubricated with MoS2.
─ High-tensile bolts which have been installed on a crane for a lengthier period may not be used again.
The end carriages are initially only installed by manually screwing until hand-tight. They are finally firmly screwed (with a tightening torque) only after the crane is on the crane track and the trolley and all other components are installed. By doing so, the main girders can settle and the crane is not warped on the crane track. See Fastening the end carriages tightly.
|
|
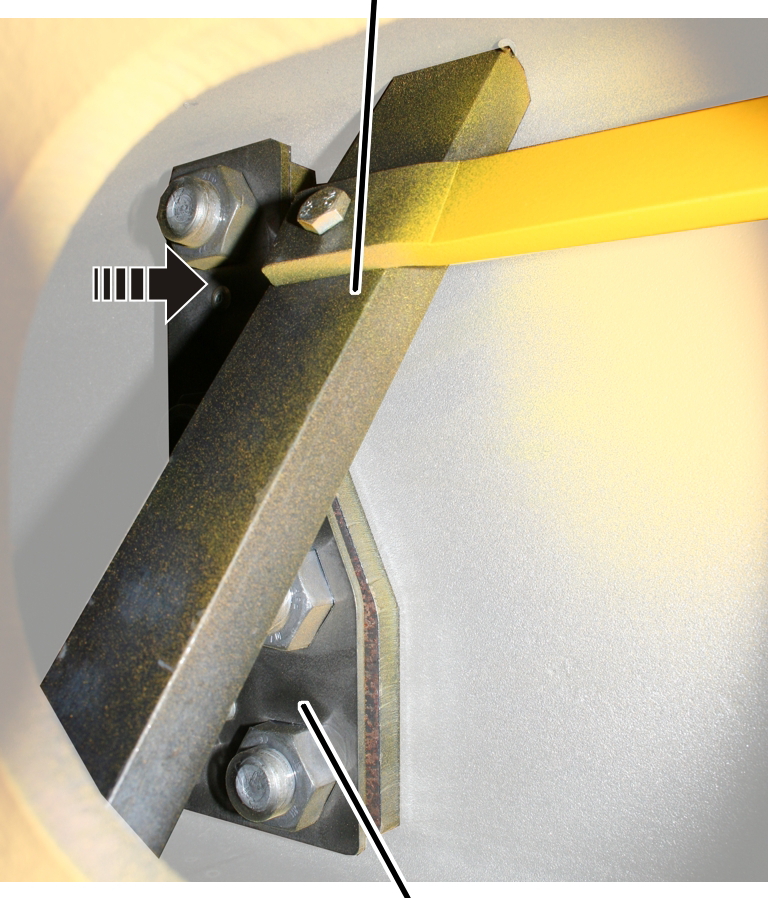
Clamp brace | |
|
| ||
|
|
Mounting plate | |
Place the mounting plate in the
end carriage and hold it so the hole pattern properly overlaps.
|
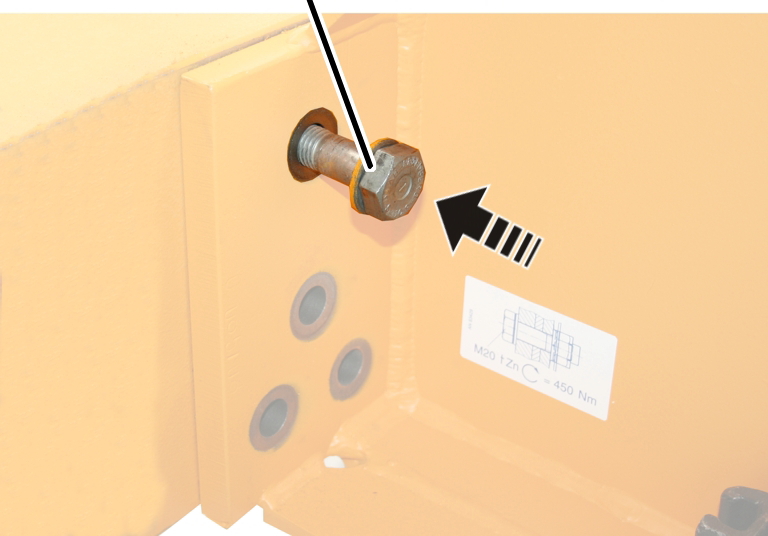
High-tensile bolt with washer |
|
|
| |
Insert the high-tensile bolts
and washers from the outside into the screw holes and screw on so they are
somewhat loose.
Screw on the next end carriage
following the same sequence of steps.
|
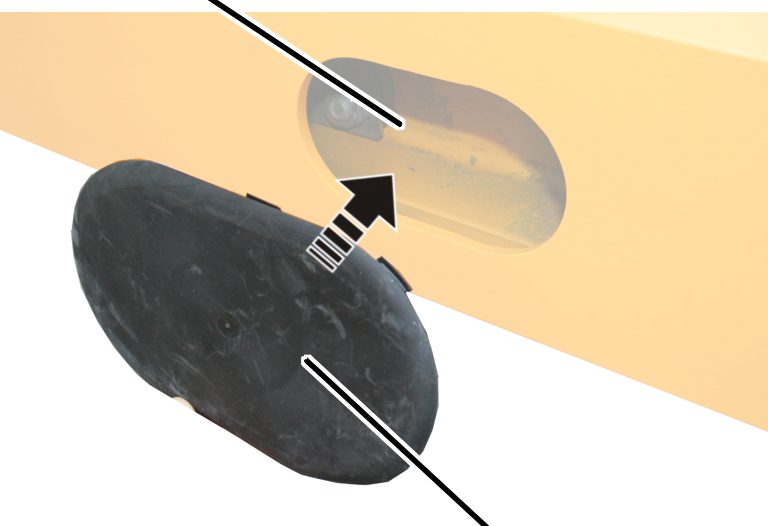
Access portal |
| |
|
| ||
|
|
Cap | |
Seal the access portal with a
cap.