Installing the wire rope hoist
on the main girder
If the wire rope hoist has not been installed yet, continue
here. Otherwise, skip this section.
Lifting the
trolley onto the overhead travelling crane
Only with trolley D, DB or
DA
This section only applies if a trolley of construction D, DB
or DA is to be placed on an overhead travelling crane.
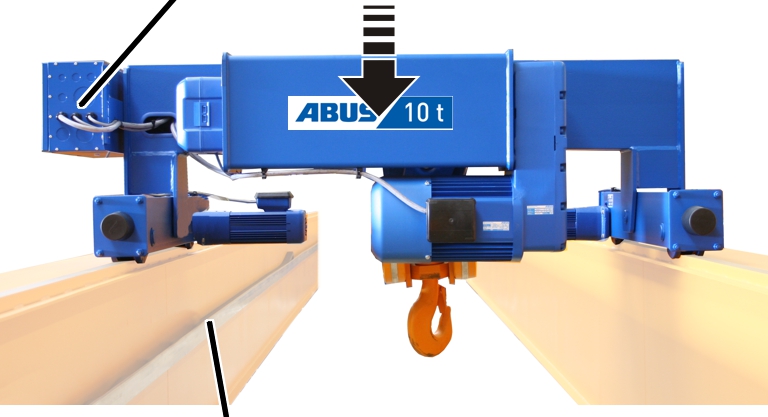
|
Hoist
panel |
|
|
|
|
Trolley
power supply |
|
|
|
|
 Rotate the trolley as in the
diagram.
Rotate the trolley as in the
diagram.
Place the trolley with the
wheels onto the trolley track.
Only for guide rollers: do not
fit the trolley with the guide rollers. Otherwise, they will be damaged.
Check whether all wheels come
into contact with the trolley track.
Only with trolley DQA
This section only applies if a trolley of construction DQA is
to be placed on an overhead travelling crane.
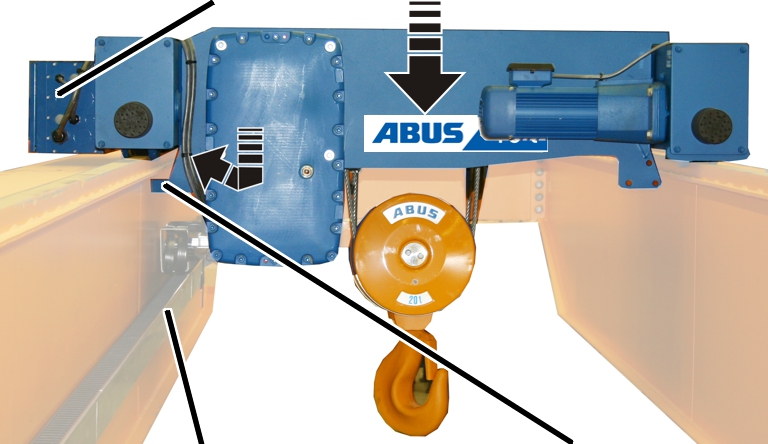
|
Hoist
panel |
|
|
|
|
Trolley
power supply |
|
Lift-off
prevention device |
|
|
|
Turn the trolley so that the
hoist panel is facing the trolley power supply (energy chain or festoon cable
system).
Tilt the trolley slightly and
with the lift-off prevention device move it underneath the upper flange of the
main girder.
Place the trolley with the
wheels onto the trolley track.
Only for guide rollers: do not
fit the trolley with the guide rollers. Otherwise, they will be damaged.
Check whether all wheels come
into contact with the trolley track.
Installing the
lift-off prevention device
The lift-off
prevention device is installed on the trolley. It consists of a load hook, which
runs under the upper flange of the main girder. The trolley is thereby not able
to fall from the main girder even in the event of accidents or similar
incidents.
Only with trolley D, DB or
DA
This section only applies if a trolley of construction D, DB
or DA is to be placed on an overhead travelling crane.
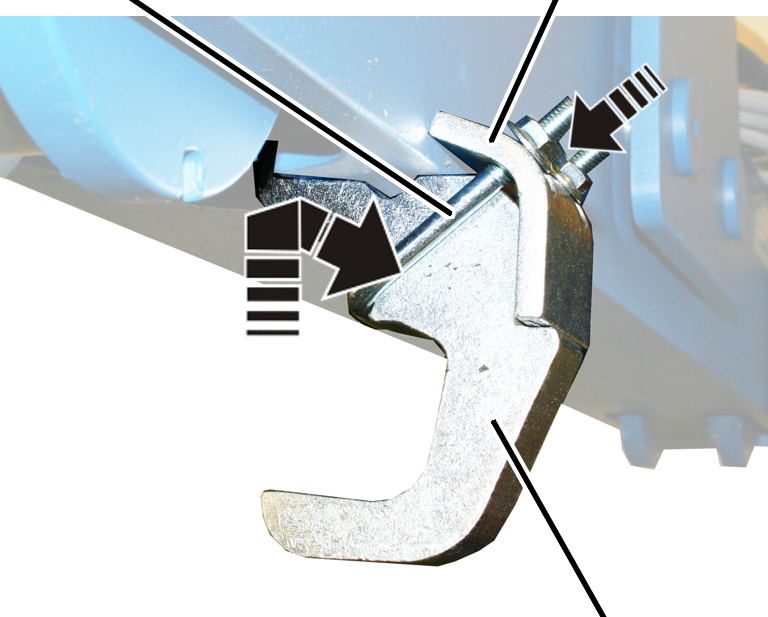
|
Threaded
bracket |
Clamp
strap |
|
|
|
|
Lift-off
prevention device |
Connect the clamp strap and
threaded bracket to the lift-off prevention device.
Fasten the lift-off prevention
device to the non-powered wheel from below in the opening.
Screw the clamp strap tightly
with M8 rib nuts (2x). 25 Nm
Only with trolley DQA
This section only applies if a trolley of construction DQA is
to be placed on an overhead travelling crane.
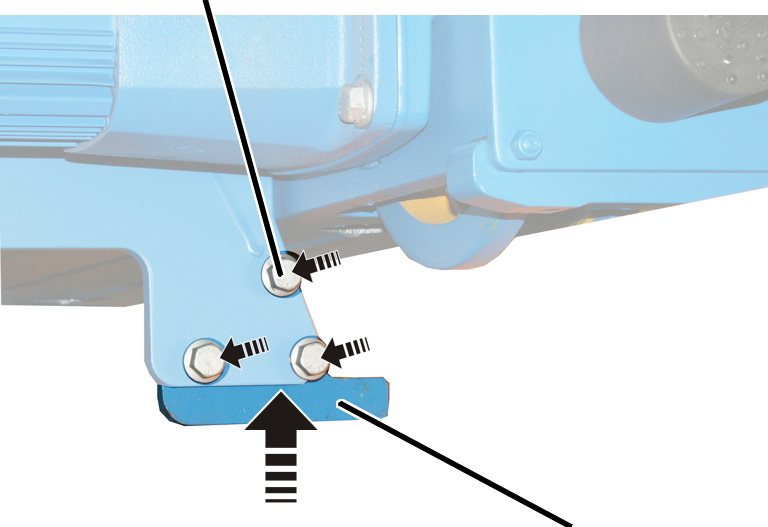
|
Rib
screw |
|
|
|
|
|
Lift-off
prevention device |
Fasten the lift-off prevention
device to the trolley frame.
Screw on the lift-off protection
device tightly with rib screws (3x).
|
Rib screw |
Tightening torque |
|
M12x30 |
115 Nm |
|
M16x35 |
210 Nm |