Observe the product manuals!
In addition to the points described here, all information in the section “Check before beginning work and switching on” in the other supplied product manuals also applies.
Check the following points before beginning work with the crane. If there is any damage or problems arise, do not work with the crane; inform coworkers and supervisors.
|
|
Observe the product manuals! In addition to the points described here, all information in the section “Check before beginning work and switching on” in the other supplied product manuals also applies. |
 In all supplied product manuals,
check whether additional points need to be checked before switching on.
In all supplied product manuals,
check whether additional points need to be checked before switching on.
─ Can any damage be detected on the crane or its accessories (e.g. rust, loose parts, leaking oil, missing screws,...)?
|
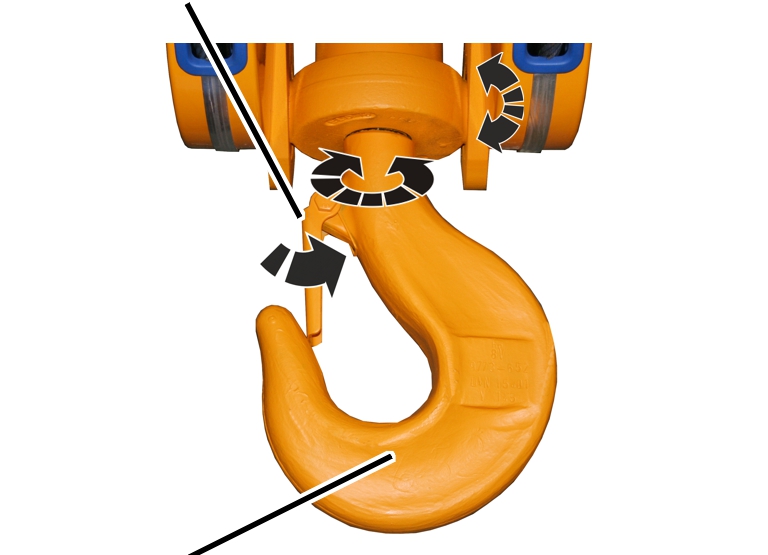
Hook safety latch |
|
|
| |
|
Load hook |
|
─ Is the load hook generally OK?
─ Is the load hook turnable?
─ Can the load hook be tilted?
─ Is the hook safety latch OK and moves with ease?
─ Does the hook safety latch close completely?
Examples of damage:
|
|
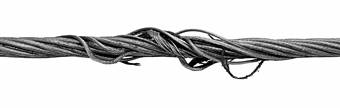
The joining of the wire rope has opened. The inner strands of the wire rope are visible.
|
|
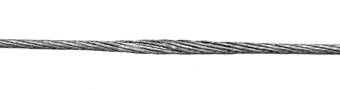
Loops have formed in the wire rope.
|
|
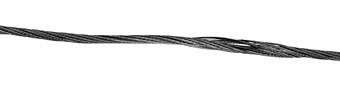
There is a kink in the wire rope. This results from violent external forces being applied to the wire rope.
|
|
The wire rope is flattened at one point. This results from the wire rope being pinched.
|
|
A bird cage has formed in the wire rope. This results from violent untwisting of the wire rope.
|
|
The wire rope has a corkscrew-type deformation.
Check the wire rope for
detectable broken wires. If broken wires are found in the wire rope, do not work
with the crane. Have a comprehensive wire rope test performed. See “General
Product Manual for ABUS Cranes”.
|
|
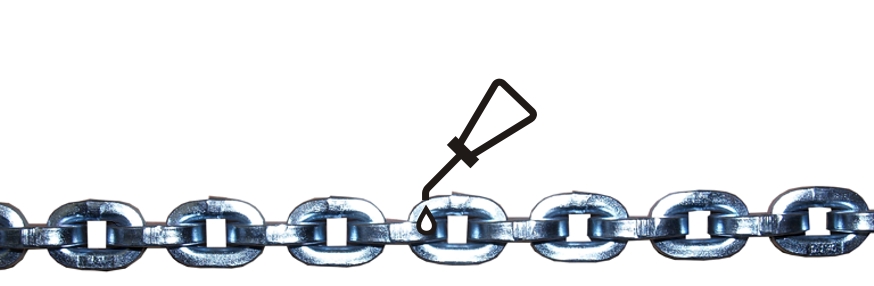
─ Is the chain lubricated with oil?
Inspect the entire chain for
damage. The damage shown here or any similar damage should not be detectable on
the chain.
|
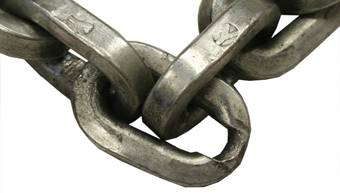
|
The chain link is heavily worn.
|
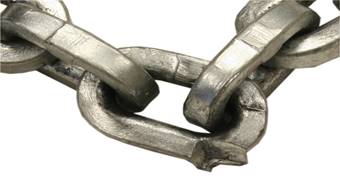
|
The chain link is mechanically damaged.
 In all supplied product manuals,
check whether additional points need to be checked for switching on.
In all supplied product manuals,
check whether additional points need to be checked for switching on.
|
|
|
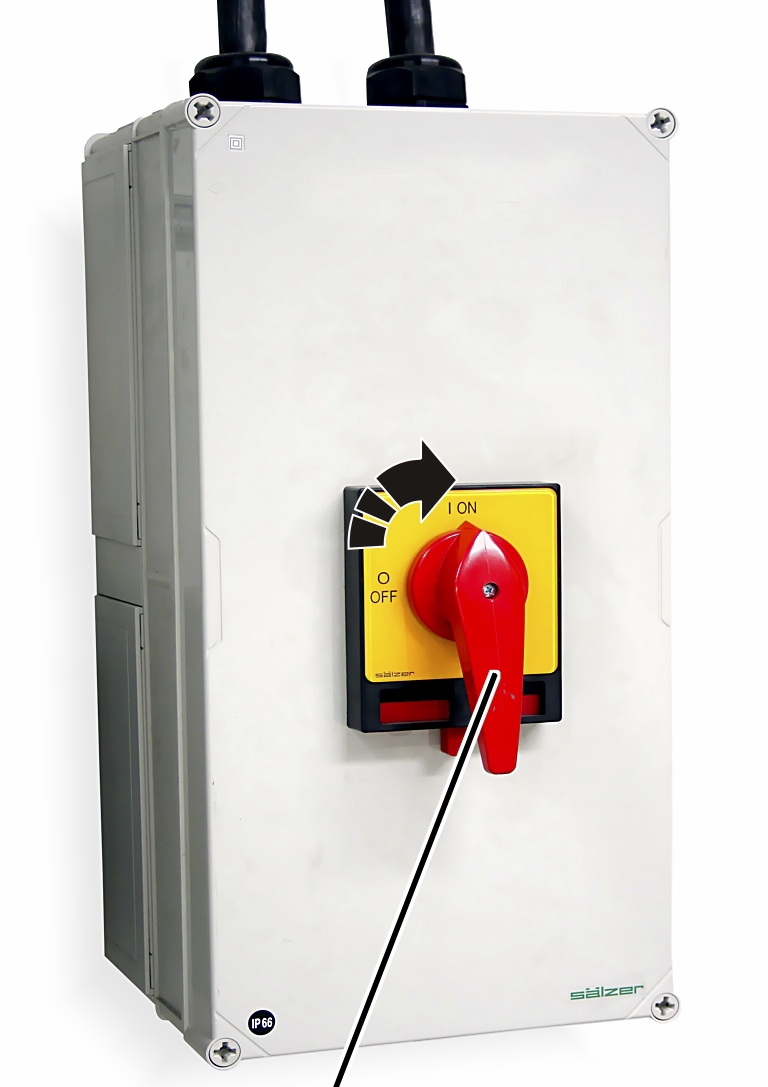
Mains switch of the crane installation |
Only if the crane installation
has a mains switch: Turn on the entire crane installation using the mains
switch.
● The crane is switched on.
● With ABUControl with LED matrix display: On the LED matrix display, first “WAITING” and then a rising percentage value of the start process is shown.
With ABUControl or ABULiner:
Wait about 30 seconds until the ABUControl or ABULiner crane control has
started.
● With ABUControl with LED matrix display: The message “F0001 Standby” is shown on the LED matrix display. The crane is now ready for operation.
|
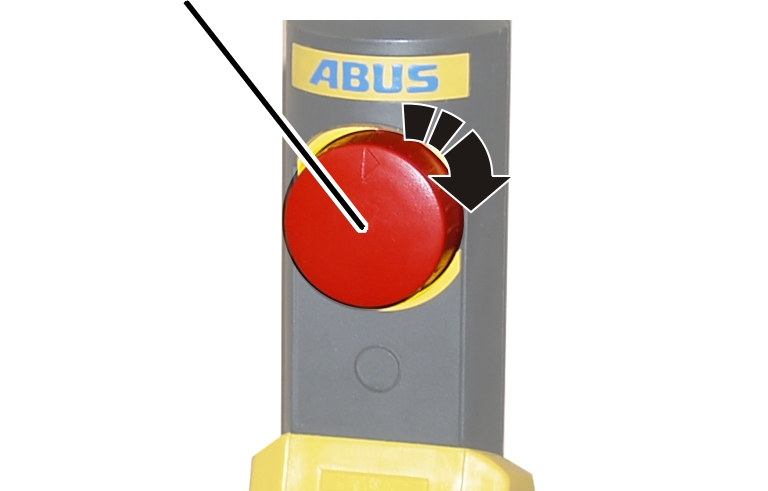
Emergency stop switch |
|
|
| |
Turn the emergency stop switch a
quarter-turn clockwise.
● The crane is ready for use.
Switch on the transmitter of the
radio remote control and log in to the receiver.
See the ABURemote product manual.
● The crane is ready for use.
Once the transmitter is released:
|
| |
|
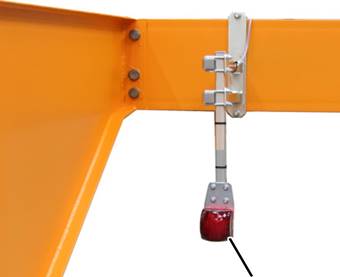
|
Red signal lamp |
● The red signal lamp lights up.
Persons nearby thus know that a transmitter is logged in to the crane and the crane can move at any time.
Test the following before beginning work:
Press the ‘Lift’ button
completely.
● The load hook moves up.
Press the emergency stop
switch.
● The load hook halts.
● The brake makes a clicking noise, and the load hook brakes immediately and comes to a stop.
● The functional checks of the emergency stop switch, hoist drive and brakes on the hoist drive are now completed.
Switch the crane back on using
the pendant control or radio remote control.
Test the following before beginning work:
Fully push the trolley travel
and crane travel buttons.
● The trolley and crane run in the corresponding direction.
Press the emergency stop
switch.
● The trolley and crane stop running.
● The brakes engage with an audible click, and trolley and crane brake immediately and come to stop.
● The functional test of the drive and the drive brakes is now completed.
Switch the crane back on using
the pendant control or radio remote control.
Test the following before beginning work:
Press the ‘Slewing’ button
completely.
● The crane pivots in the corresponding direction.
Press the emergency stop
switch.
● The crane stops pivoting and slowly comes to a stop.
● The slewing drive has no brake, therefore the crane slowly swings out.
● The functional check of the slewing drive is now completed.
Switch the crane back on using
the pendant control or radio remote control.
Test the following before beginning work:
Press the 'Lift' button halfway
and move the load hook completely up with slow lifting speed.
● At the highest hook position, the load hook halts.
● The function of the top hoist limiter has now been tested.
Note:
When the top hoist limiter is tested at the start of each work shift, the wire rope is completely wound up. This distributes the wire rope evenly on both cable drums. Trouble-free operation is thereby assured.
If the wire rope is not regularly and evenly wound on both cable drums, it can happen that the wire rope is unevenly distributed, and thus the wire rope is completely wound up on one cable drum and not yet wound on the other one.
Test the following before beginning work:
Move the load hook until it
reaches the set switching points.
● The chain hoist no longer travels in the respective direction.
The chain hoist has a friction clutch. It prevents damage to the chain hoist if the load hook in the highest hook position knocks against the housing from below.
|
|
Danger from falling suspended load! Moving to the highest hook position permanently damages the friction clutch. This could cause the load to fall, killing or injuring people. Never run the load hook so far up or down that the friction clutch engages. |
Therefore, also refrain from
testing the friction clutch before performing work.
Test the following before beginning work:
Testing the braking
function:
─ For overhead travelling cranes: Run the trolley at high speed until it reaches the end of the main girder.
─ For two trolleys: Run the trolleys successively at high speed until the respective other trolley is reached.
─ For single-rail trolley tracks: Run the trolley at high speed until it reaches the end of the trolley track.
● Shortly before the end, the crane/trolley brakes and continues running at low speed.
Check the shut-down
function:
─ For overhead travelling cranes: Run the crane until it reaches the end of the crane track.
─ For overhead travelling cranes: Run the trolley until it reaches the end of the main girder.
─ For two trolleys: Run the trolleys successively until the respective other trolley is reached.
─ For single-rail trolley tracks: Run the trolley until it reaches the end of the trolley track.
● At the end, the crane/trolley brakes to a standstill.
● The crane/trolley comes to a stop just before the end.
If the crane has additional warning and safety devices:
Test the warning devices.
Test the safety devices.