Danger from electric shock!
The housing contains some parts with live voltage which could lead to electric shock.
Before opening the receiver, completely switch off the receiver or the entire crane.
If the receiver is defective, it must be replaced. If the receiver needs to be replaced, the connection cable can be disconnected from the receiver. This ensures a new cable does not have to be laid from the panel to the receiver.
In the case of repairs or replacement, the receiver must be opened.
|
|
Danger from electric shock! The housing contains some parts with live voltage which could lead to electric shock. Before opening the receiver, completely switch off the receiver or the entire crane. |
The wireless technologies XR0 and XR2 are available for ABURemote.
─ Transmitter and receiver must both use the same wireless technology (both XR0 or both XR2). A transmitter with wireless technology XR0 cannot be used with a receiver with XR2 and a transmitter with wireless technology XR2 cannot be used with a receiver with XR0.
─ Several radio remote controls (combination of transmitter and receiver) with wireless technology XR0 and XR2 can be operated in parallel without any problems, e.g. within a building.
─ A radio remote control (combination of transmitter and receiver) with wireless technology XR0 can generally be exchanged for a radio remote control with wireless technology XR2.
 To find out which wireless
technology is used on the radio remote control:
To find out which wireless
technology is used on the radio remote control:
─ Observe
the type plate on the transmitter or the receiver:
Without further
specification: wireless technology XR0
With specification “XR2”: wireless
technology XR2
─ Or read the wireless technology in the menu item “Info”. See Displaying transmitter information.
Open the cover. See Opening
the housing.
Pull the cable bushing for
the connection cable out of the housing.
 Detach the connection
cable coupler plugs from the receiver.
Detach the connection
cable coupler plugs from the receiver.
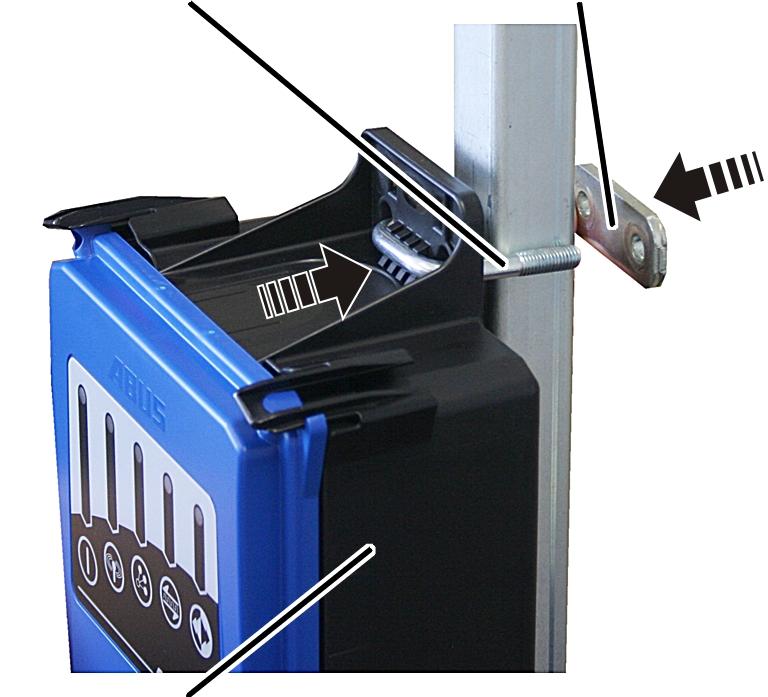
Undo the threaded bracket
on the receiver and pull off the receiver.
|
Threaded bracket |
Plate |
|
| |
|
Receiver |
|
Hold the receiver on the
square tube.
Insert one threaded
bracket each through the top and bottom of the housing.
Insert one plate onto each
threaded bracket from the rear side.
|
|
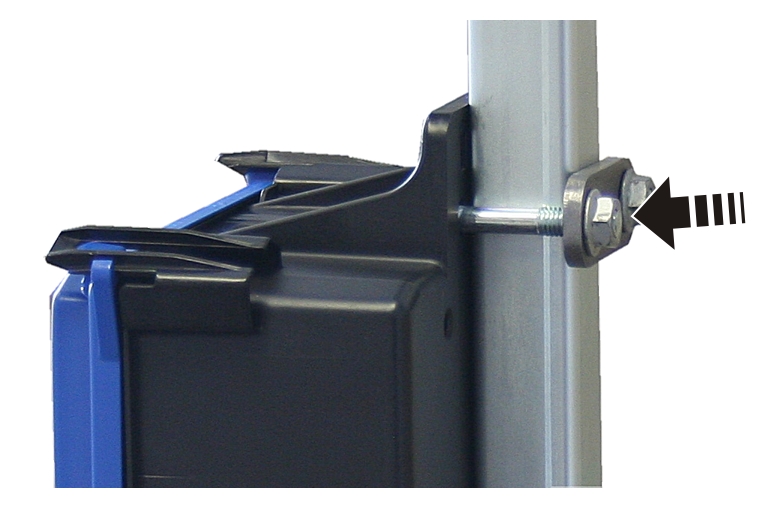
Tighten the threaded
bracket with the rib nuts M8 (2 x per threaded bracket). 15 Nm.
|
| |
|
|
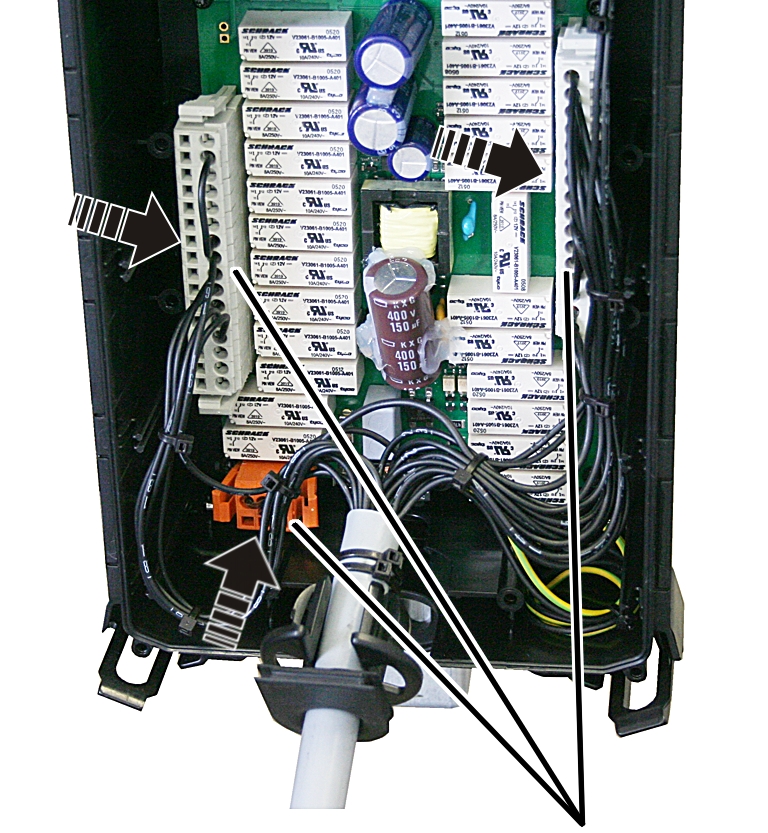
Coupler plugs |
 Insert the coupler plugs
for the connection cable on the pin multipoint connector on the circuit
board.
Insert the coupler plugs
for the connection cable on the pin multipoint connector on the circuit
board.
The coupler plugs and the pin multipoint connectors have coding pins. This ensures the coupler plugs cannot be interchanged.
|
Cable bushing (as strain relief) |
|
|
| |
|
Cable bushing (as seal) |
Housing |
Push the connection cable
with the two cable bushings into the housing.
Insert the rubber lips of the cable bushing (seal) so that they lay flat against the housing both inside and outside.
Insert the cable bushing (strain relief) into the housing as shown in the figure.
Close the cover. See Closing
the receiver.
To put a replacement receiver into operation, the address of the new receiver must be set on the transmitter(s) which are to control the crane with the new receiver.
Read off the address of
the replacement receiver on the receiver’s type plate.
Set the address on the
transmitter. See Setting the address
(linking transmitter to a receiver).
Switch the transmitter
off, remove the rechargeable batteries briefly and then reinsert them, switch
the transmitter back on again.